
Lists in R Programming: How to Create & Select Elements
 Editorial Team
⚡ Smart Summary
R List is an object that stores vectors, matrices, data frames and even other lists inside a single container. The list() function builds it, and double square brackets pull any element back out.
What is R List?
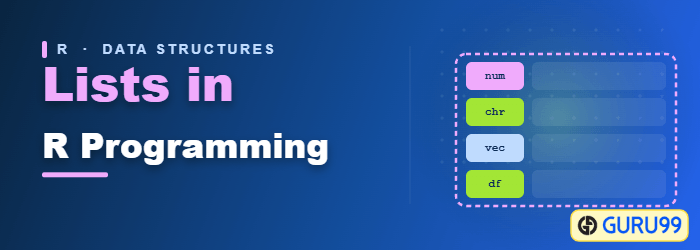
R List is an object in R programming which includes matrices, vectors, data frames, or lists within it. R List is also used to store a collection of objects and use them when we need them. We can imagine the R list as a bag to put many different items. When we need to use an item, we can open the bag and use it.
The contrast with a vector is what makes the bag useful. A vector forces every element into one type, so placing a word beside a number turns the number into text. A list applies no such rule, which is why it can carry a five-element vector, a two-row matrix and a 714-row data frame side by side without altering any of them.
Syntax of List in R
We can use the list() function to create lists in R programming:
list(element_1, ...)
arguments:
-element_1: store any type of R object
-...: pass as many objects as specifying. each object needs to be separated by a comma
Each argument may be passed bare or in the form tag = value. A bare argument becomes a positional element reachable only by its number, while a tagged argument also gains a name. The base R reference for list() documents both forms and notes that unlist() acts as an approximate inverse of as.list().
How to Create a List in R
Below is a step by step process on how to create a list in R:
In the example below, we will create three different objects, a Vector, a Matrix and a Data Frame using list function in R.
Step 1) Create a Vector
Use the below code to create a vector in R
# Vector with numeric from 1 up to 5
vect  <- 1:5
The colon operator builds the sequence 1, 2, 3, 4, 5 as an integer vector, and the assignment arrow stores it under the name vect.
Step 2) Create a Matrix
Now, create a matrix using the following code
# A 2x 5 matrix
mat  <- matrix(1:9, ncol = 5)
dim(mat)
Two details deserve attention here. A grid of two rows by five columns needs ten values, yet only nine are supplied, so R recycles the sequence and prints a warning that the data length is not a sub-multiple of the number of rows. That recycled value is why the second row of the printed matrix ends in 1 rather than 10. The call to dim() then reports the shape.
Output:
## [1] 2 5
Step 3) Create Data Frame
Create a data frame in R using below code
# select the 10th row of the built-in R data set EuStockMarkets
df <- EuStockMarkets[1:10,]
The comment mentions the tenth row, but the expression keeps rows 1 through 10 of the built-in EuStockMarkets series. Subsetting also drops the time-series class, so what comes back is a numeric matrix rather than a true data frame, which is exactly why the printed result below carries [1,] style row labels instead of row names. Wrap the call in as.data.frame() whenever a genuine data frame is needed.
Step 4) Create a List in R
Now, we can put the three object into R list using below code
# Construct list with these vec, mat, and df:
my_list <- list(vect, mat, df)
my_list
Output:
## [[1]]
## [1] 1 2 3 4 5

## [[2]]
##       [,1] [,2] [,3] [,4] [,5]
## [1,]    1    3    5    7    9
## [2,]    2    4    6    8    1

## [[3]]
##          DAX    SMI    CAC   FTSE
##  [1,] 1628.75 1678.1 1772.8 2443.6
##  [2,] 1613.63 1688.5 1750.5 2460.2
##  [3,] 1606.51 1678.6 1718.0 2448.2
##  [4,] 1621.04 1684.1 1708.1 2470.4
##  [5,] 1618.16 1686.6 1723.1 2484.7
##  [6,] 1610.61 1671.6 1714.3 2466.8
##  [7,] 1630.75 1682.9 1734.5 2487.9
##  [8,] 1640.17 1703.6 1757.4 2508.4
##  [9,] 1635.47 1697.5 1754.0 2510.5
##  [10,] 1645.89 1716.3 1754.3 2497.4
The three double-bracket headers in that output are the list positions. Nothing was flattened or coerced: element one is still an integer vector, element two is still a matrix, and element three still holds all ten rows of stock prices.
Select Elements from R List
After we built our list, we can access it quite easily. We need to use the [[index]] to select an element in a list. The value inside the double square bracket represents the position of the item in a list we want to extract. For instance, we pass 2 inside the parenthesis, R returns the second element listed.
Now in this R tutorial, let’s try to select the second items of lists in R named my_list, we use my_list[[2]]
# Print second element of the list
my_list[[2]]
Output:
##      [,1] [,2] [,3] [,4] [,5]
## [1,]    1    3    5    7    9
## [2,]    2    4    6    8    1
Single and double brackets are not interchangeable, and confusing them is the most common source of list errors. One bracket keeps the wrapper, two brackets remove it.
| Expression | What comes back | Class of the result | Use it when |
|---|---|---|---|
| my_list[[2]] | The stored element itself | Whatever was stored, here a matrix | You need to compute on one element |
| my_list[2] | A sublist holding that one element | list | You need to keep the list wrapper |
| my_list[c(1, 3)] | A sublist of the chosen elements | list | You need several elements at once |
| my_list[-2] | Every element except the second | list | You need to drop an element |
# Compare the two bracket styles
class(my_list[[2]])   # the matrix itself
class(my_list[2])     # a list of length one

# Several elements, and everything but one element
my_list[c(1, 3)]
my_list[-2]
Named Lists in R
Positional indexes are fragile: insert one element and every number after it shifts. Naming the elements removes that risk and makes the code read like the data it describes. Names can be supplied when the list is built, or attached afterwards with names().
# Tag each element at creation time
named_list <- list(numbers = vect, grid = mat, prices = df)

# Three ways to reach the same element
named_list$grid
named_list[["grid"]]
named_list["grid"]      # returns a one-element list

# Read or replace the names later
names(named_list)
names(named_list)[2] <- "grid_2x5"
The $ operator and the double bracket differ in one respect that catches beginners out. The $ operator performs partial matching, so named_list$pri still finds prices, while named_list[[“pri”]] returns NULL because double brackets match exactly unless exact = FALSE is passed. Partial matching is convenient at the console and unsafe in a script, so prefer the exact form in saved code.
# A compact map of the whole structure
str(named_list)
str() prints one line per element with its type and size, which is the fastest way to confirm that a list contains what you expect before indexing into it.
Modify, Add and Delete Elements in an R List
A list is not fixed once created. The same accessors that read an element also write to it, so updating, extending and shrinking a list all use ordinary assignment.
# Replace an element in place
named_list[["numbers"]] <- 1:10

# Add a new element simply by naming it
named_list[["created"]] <- Sys.Date()

# Append without a name: the element lands at the end
named_list <- append(named_list, list(TRUE))

# Delete an element by assigning NULL to it
named_list[["created"]] <- NULL
- Replace: assigning to an existing name overwrites that element and leaves its position unchanged.
- Add: assigning to a name that does not exist appends a new element at the end of the list.
- Append: append() takes a list as its second argument, so wrap a bare value in list() before passing it.
- Delete: assigning NULL with double brackets removes the element and shortens the list.
One consequence trips people up regularly: because NULL means deletion, you cannot store an actual NULL with double brackets. Use single-bracket assignment instead, as in named_list[“empty”] <- list(NULL), which keeps the slot and places NULL inside it.
Nested Lists and unlist() in R
Because a list can hold any R object, it can hold another list. Nesting is how configuration objects, JSON responses and model results are usually represented in R, so reaching into a nested list and flattening one are both everyday tasks.
# A list whose elements are themselves lists
project <- list(
  meta = list(owner = "analyst", year = 2026),
  data = list(vect, mat)
)

# Chain the accessors to reach an inner value
project$meta$year
project[["data"]][[2]]

# Flatten every level into one atomic vector
flat <- unlist(project)

# Strip a single level and keep the rest as a list
half <- unlist(project, recursive = FALSE)
Flattening has a cost worth understanding. unlist() must return one atomic vector, so it coerces every value to the most general type present, following the order logical, integer, double, character. A nested list that mixes numbers with text therefore comes back entirely as text. The names of the result are built by joining the outer and inner tags, which is why an element arrives as meta.owner rather than owner.
Pass use.names = FALSE when those compound names are unwanted, and set recursive = FALSE when only the outermost layer should be removed. If the values must keep their types, leave the structure intact and work through the list instead of flattening it.
Built-in Data Frame in R
Lists are often filled with data read from disk or from the web, so it helps to see how a data frame arrives before it is stored inside one. Before creating our own data frame, we can have a look at the R data set available online. The prison dataset is a 714×5 dimension. We can get a quick look at the bottom of the data frame with tail() function. By analogy, head() displays the top of the data frame. You can specify the number of rows shown with head (df, 5). We will learn more about the function read.csv() in the import data in R tutorial.
PATH <-'https://raw.githubusercontent.com/guru99-edu/R-Programming/master/prison.csv'
df <- read.csv(PATH)[1:5]
head(df, 5)
Output:
##   X state year govelec black
## 1 1     1   80       0 0.2560
## 2 2     1   81       0 0.2557
## 3 3     1   82       1 0.2554
## 4 4     1   83       0 0.2551
## 5 5     1   84       0 0.2548
The [1:5] that follows read.csv() selects the first five columns, not the first five rows, because a data frame is itself a list of columns. Single-bracket indexing on a list returns a smaller list, and here that smaller list is still a data frame.
We can check the structure of the data frame with str:
# Structure of the data
str(df)
Output:
## 'data.frame':    714 obs. of  5 variables:
##  $ X      : int  1 2 3 4 5 6 7 8 9 10 ...
##  $ state  : int  1 1 1 1 1 1 1 1 1 1 ...
##  $ year   : int  80 81 82 83 84 85 86 87 88 89 ...
##  $ govelec: int  0 0 1 0 0 0 1 0 0 0 ...
##  $ black  : num  0.256 0.256 0.255 0.255 0.255 ...
All variables are stored in the numerical format. The $ prefix on each line is the same operator used on named lists earlier, which confirms that a data frame is a list of equal-length columns wearing a rectangular label. Everything learned about naming, selecting and deleting list elements therefore transfers directly to R data types and to data frame columns.
