MariaDB Tutorial
⚡ Smart Summary
MariaDB Tutorial explains the open-source fork of MySQL maintained by its original developers. The lessons cover installation, command prompt usage, data types, table creation, CRUD operations, clauses, and joins to manage relational databases reliably.
What is MariaDB?
MariaDB is a fork of the MySQL database management system. It is created by its original developers. This DBMS tool offers data processing capabilities for both small and enterprise tasks.
MariaDB is an improved version of MySQL. It comes with numerous inbuilt powerful features and many usabilities, security and performance improvements that you cannot find in MySQL.
Here are the features of MariaDB:
- It operates under GPL, BSD or LGPL licenses.
- MariaDB supports a popular and standard querying language.
- It comes with many storage engines, including the high-performance ones that can be integrated with other relational database management systems.
- It provides the Galera cluster technology.
- MariaDB supports PHP, a popular language for web development.
- MariaDB can run on different operating systems, and it supports numerous programming languages.
- MariaDB comes with additional commands that are not available in MySQL. MySQL has features which have a negative impact on the performance of the DBMS. Such features have been replaced in MariaDB.
MariaDB vs. MySQL
Below are some key differences between MariaDB vs MySQL
| Parameter | MariaDB | MySQL |
|---|---|---|
| More Options for Storage Engines | MariaDB has 12 new storage engines that you won’t find in MySQL. | It has fewer options for storage compared to MariaDB. |
| Speed Improvements | MariaDB shows an improved speed when compared to MySQL. It comes with numerous features for optimizing speed. Such features include derived views/tables, subquery, execution control, disk access, and optimizer control. | MySQL exhibits a slower speed when compared to MariaDB. It relies on only a few features for speed optimization, for example, hash indexes. |
| Faster cache/indexes | With the Memory storage engine of MariaDB, an INSERT statement can be completed 24% than in the standard MySQL. | The memory storage engine of MySQL is slower compared to that MariaDB. |
| Larger and Faster Connection Pool | MariaDB comes with an advanced thread pool capable of running faster and supporting up to 200,000+ connections. | The thread pool provided by MySQL cannot support up to 200,000 connections per time. |
| Improved Replication | In MariaDB, replication can be done safer and faster. Updates can also be done 2x faster compared to the traditional MySQL. | MySQL’s community edition allows a static number of threads to be connected. MySQL’s enterprise plan comes with thread capabilities. |
| New Features/Extensions | MariaDB comes with new features and extensions including the JSON, WITH and KILL statements. | The new MariaDB features are not provided in MySQL. |
| Missing Features | MariaDB lacks some of the features provided by the MySQL enterprise edition. To address this, it offers alternative open-source plugins. Hence, MariaDB users are able to enjoy the same functionalities as MySQL Enterprise Edition users. | The Enterprise Edition of MySQL uses a proprietary code. Only users of MySQL Enterprise Edition have access to this. |
How to install MariaDB
Install as a Standalone Application
In order to use MariaDB, you have to install it on your computer.
The installation can be done by following the steps given below:
Step 1) Open Below URL
Download the installation file from the Link https://downloads.mariadb.org/
Step 2) Double click the file to start the installation
Once the download is complete, Open File
Step 3) Click the Next button
On the window that pops up, click the Next button:

Step 4) Accept the license agreement
Then click the Next button:

Step 5) Choose MariaDB Server
Choose the features that are to be installed and Click the Next

Step 6) Enter the password
In the next window, you will be required to change the password for the root user.
- Enter the password and confirm it by retyping the same password. If you want to permit access from remote machines, activate the necessary checkbox.
- Once done, click the Next button.

Step 7) Enter Name & Choose Port number
In the next window, type a name for the instance, choose the port number, and set the necessary size. Click the Next button:

Step 8) Click Next
In the next window, simply click the Next button.
Step 9) Click on Install
Launch the installation by clicking the Install button.

Step 10) A Progress bar Shown
A progress bar showing the progress of the installation will be shown:

Step 11) Click on Finish Button
Once the installation is complete, you will see the Finish button. Click the button to close the window:

Step 12) Congratulations!
You now have MariaDB installed on your computer.
Working with Command Prompt
Now that you have MariaDB installed on your computer, it is time for you to launch it and begin to use it. This can be done via the MariaDB command prompt.
Follow the steps given below:
Step 1) Click Start, choose All Programs then click MariaDB…
Step 2) Choose a MariaDB Command Prompt.

Step 3) The MariaDB command prompt will be started. It is now time to login. You should login as the root user and the password that you set during the installation of MariaDB. Type the following command on the command prompt:
MySQL -u root -p
Step 4) Enter the password and hit the return key. You should be logged in, as shown below:

You are now logged into MariaDB.
Data Types
MariaDB supports the following data types:
- String data types
- Numeric data types
- Date/time data types
- Large object data types
String Data Types
These include the following:
| String Data Type | Description |
|---|---|
| char(size) | The size denotes the number of characters to be stored. It stores a maximum of 255 characters. Fixed-length strings. |
| varchar(size) | The size denotes the number of characters to be stored. It stores a maximum of 255 characters. Variable-length strings. |
| text(size) | The size denotes the number of characters to be stored. It stores a maximum of 255 characters. Fixed-length strings. |
| binary(size) | The size denotes the number of characters to be stored. It stores a maximum of 255 characters. Fixed-size strings. |
Numeric Data Types
They include the following:
| Numeric Data Types | Description |
|---|---|
| bit | A very small integer value equivalent to tinyint(1). Signed values range between -128 and 127. Unsigned values range between 0 and 255. |
| int(m) | A standard integer value. Signed values range between -2147483648 and 2147483647. Unsigned values range between 0 and 4294967295. |
| float(m, d) | A floating point number with single precision. |
| double(m,d) | A floating point number with double precision. |
| float(p) | A floating point number. |
Date/Time Data Types
These include the following:
| Date/Time Data Type | Description |
|---|---|
| Date | Displayed in the form ‘yyyy-mm-dd.’ Values range between ‘1000-01-01’ and ‘9999-12-31’. |
| Datetime | Displayed in the form ‘yyyy-mm-dd hh:mm:ss’. Values range between ‘1000-01-01 00:00:00’ and ‘9999-12-31 23:59:59’. |
| timestamp(m) | Displayed in the form ‘yyyy-mm-dd hh:mm:ss’. Values range between ‘1970-01-01 00:00:01’ utc and ‘2038-01-19 03:14:07’ utc. |
| Time | Displayed in the form ‘hh:mm:ss’. Values range between ‘-838:59:59’ and ‘838:59:59’. |
Large Object Datatypes (LOB)
They include the following:
| Large object Datatype | Description |
|---|---|
| tinyblob | Its maximum size is 255 bytes. |
| blob(size) | Takes 65,535 bytes as the maximum size. |
| mediumblob | Its maximum size is 16,777,215 bytes. |
| longtext | It takes 4GB as the maximum size. |
Create a Database and Tables
To create a new database in MariaDB, you should have special privileges which are only granted to the root user and admins.
To create a new database, you should use the CREATE DATABASE command which takes the following syntax:
CREATE DATABASE DatabaseName;
In this case, you need to create a database and give it the name Demo.
Start the MariaDB command prompt and login as the root user by typing the following command:
mysql -u root -p
Type the root password and hit the return key. You will be logged in.
Now, run the following command:
CREATE DATABASE Demo;

You have then created a database named Demo. It will be good for you to confirm whether the database was created successfully or not. You only have to show the list of the available databases by running the following command:
SHOW DATABASES;

The above output shows that the Demo database is part of the list, hence the database was created successfully.
MariaDB Select Database
For you to be able to use or work on a particular database, you have to select it from the list of the available databases. After selecting a database, you can perform tasks such as creating tables within the database.
To select a database, you should use the USE command. It takes the syntax given below:
USE database_name;
You need to use the Demo database. You can select it by running the following command:
USE Demo;
![]()
The above image shows that the MariaDB command prompt has changed from none to the name of the database that has been selected.
You can now go ahead and create tables within the Demo database.
MariaDB – Create Table
For you to be able to create a table, you must have selected a database. The table can be created using the CREATE TABLE statement. Here is the syntax for the command:
CREATE TABLE tableName (columnName columnType);
You can set one of the columns to be the primary key. This column should not allow null values.
We will create two tables within the Demo database, Book, and Price tables. Each table will have two columns.
Let’s begin by creating the Book table with two columns, id and name. Run the following command:
CREATE TABLE Book(
id INT NOT NULL AUTO_INCREMENT,
name VARCHAR(100) NOT NULL,
PRIMARY KEY (id));

The PRIMARY KEY constraint has been used to set the id column as the primary key for the table. The AUTO_INCREMENT property will increment the values of the id column by 1 automatically for each new record inserted into the table. All the columns will not allow null values.
Now, create the second table, the Price table:
CREATE TABLE Price(
id INT NOT NULL AUTO_INCREMENT,
price float NOT NULL,
PRIMARY KEY (id));

The id column has been set as the primary key for the table.
Showing Tables
Now that you have created the two tables, it will be good for you to conform whether the tables were created successfully or not. You can show the list of tables contained in a database by running the following command:
SHOW TABLES;

The above screenshot shows that the two tables were created successfully within the Demo database.
Showing Table Structure
To see the structure of any particular table, you can use the DESCRIBE command, commonly abbreviated as DESC. It takes the following syntax:
DESC TableName;
For example, to see the structure of the table named Book, you can run the following command;
DESC Book;

The table has two columns. To see the structure of the Price table, you can run the following command:
DESC Price;

CRUD and Clauses
INSERT
To insert data into a MariaDB table, you should use the INSERT INTO statement. This command takes the syntax given below:
INSERT INTO tableName
(column_1, column_2, ... )
VALUES
(value1, value2, ... ),
(value1, value2, ... ),
...;
The above syntax shows that you have to specify the table columns into which you want to insert data as well as the data that you need to insert.
Let us insert a record into the Book table:
INSERT INTO book
(id, name)
VALUES(1, 'MariaDB Book');

You have inserted a single record into the table. Insert a record into the Price table:
INSERT INTO price
(id, price)
VALUES(1, 200);

The record has been created.
SELECT
The SELECT statement helps us to view or see the contents of a database table. To see the contents of the Book table, for example, you need to run the following command:
SELECT * from book;

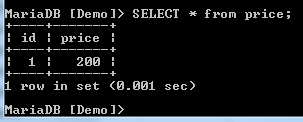
Now, view the contents of the Price table:
SELECT * from price;
Inserting Multiple Records
It is possible for us to insert multiple records into a MariaDB table at a go. To demonstrate this, run the following example:
INSERT INTO book
(id, name)
VALUES
(2,'MariaDB Book2'),
(3,'MariaDB Book3'),
(4,'MariaDB Book4'),
(5,'MariaDB Book5');

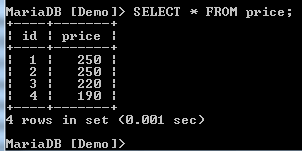
You can query the table to check whether the records were inserted successfully:
SELECT * FROM book;

The records were inserted successfully. Insert multiple records into the Price table by running this example:
INSERT INTO price
(id, price)
VALUES
(2, 250),
(3, 220),
(4, 190),
(5, 300);

Let’s confirm whether the records were created successfully:
SELECT * FROM price;

UPDATE
The UPDATE command helps us to change or modify the records that have already been inserted into a table. You can combine it with the WHERE clause to specify the record that is to be updated. Here is the syntax:
UPDATE tableName SET field=newValue, field2=newValue2,...
[WHERE ...]
The UPDATE command can also be combined with clauses such as SET, WHERE, LIMIT, and ORDER BY. You will see this shortly:
Consider the table named Price with the following records:

Let’s change the price of the book with an id of 1 from 200 to 250:
UPDATE price
SET price = 250
WHERE id = 1;

The command ran successfully. You can now query the table to see whether the change took place:

The above screenshot shows that the change has been implemented. Consider the table Book with the following records:

Let us change the name of the book named Book to MariaDB Book1. Notice that the book has an id of 1. Here is the command for this:
UPDATE book
SET name = “MariaDB Book1”
WHERE id = 1;

Check whether the change has been implemented:

The above screenshot shows that the change has been implemented successfully.
In the above examples, we have only changed one column at a time. However, it is possible for us to change multiple columns at a go. Let us demonstrate this using an example.
Let us use the Price table with the following data:

Let us change both the id and the price of the book with an id of 5. We will change its id to 6 and price to 6. Run the following command:
UPDATE price
SET id = 6,
price = 280
WHERE id = 5;

Now, query the table to check whether the change was made successfully:

The change was made successfully.
Delete
We use the DELETE command when we need to delete either one or many records from a table. Here is the syntax for the command:
DELETE FROM tableName
[WHERE condition(s)]
[ORDER BY exp [ ASC | DESC ]]
[LIMIT numberRows];
Consider the Price table with the following records:

We need to delete the last record from the table. It has an id of 6 and a price of 280. Let us delete the record:
DELETE FROM price
WHERE id = 6;

The command ran successfully. Let us query the table to confirm whether the deletion was successful:

The output shows that the record was deleted successfully.
Where
The WHERE clause helps us to specify the exact location where we need to make a change. It is used together with statements such as INSERT, SELECT, UPDATE, and DELETE. Consider the Price table with the following data:

Suppose we need to see the records in which the price is less than 250. We can run the following command:
SELECT *
FROM price
WHERE price < 250;

All the records in which the price is below 250 have been returned.
The WHERE clause can be combined with the AND statement. Suppose we need to see all records in the Price table where the price is below 250 and id is above 3. We can run the following command:
SELECT *
FROM price
WHERE id > 3
AND price < 250;

Only one record has been returned. The reason is that it has to meet all the conditions that have been specified, that is, id above 3 and price below 250. If any of these conditions is violated, then the record will not be returned.
The clause can also be combined with the OR command. Let us replace the AND in our previous command with OR and see the kind of output that we receive:
SELECT *
FROM price
WHERE id > 3
OR price < 250;

We now get 2 records rather than 1. This is because, for a record of qualifying, it only has to meet one of the specified conditions.
Like
This clause is used to specify the data pattern when accessing table data in which an exact match is necessary. It can be combined with the INSERT, UPDATE, SELECT and DELETE statements.
You should pass the pattern of data you are looking for to the clause, and it will return either true or false. Here are the wildcard characters that can be used together with the clause:
- %: for matching either 0 or more characters.
- _: for matching a single character.
Here is the syntax for the LIKE clause:
SELECT field_1, field_2,... FROM tableName1, tableName2,...
WHERE fieldName LIKE condition;
Let us demonstrate how to use the clause with the % wildcard character. Let us use the Book table with the following records:

We need to see all records in which the name begins with M. We can run the following command:
SELECT name
FROM book
WHERE name LIKE 'M%';

All records have been returned because their names begin with the letter M. To see all names that end with 4, you can run the following command:
SELECT name
FROM book
WHERE name LIKE '%4';

Only one name has been returned because it’s the only one meeting the condition.
We can also surround the search pattern by the wildcard:
SELECT name
FROM book
WHERE name LIKE '%DB%';

Other than the % wildcard, the LIKE clause can be used together with the _ wildcard. This is the underscore wildcard, and it will only look for a single character.
Let’s work with the Price table with the following records:
Let us check for the record in which the price is like 1_0. We run the following command:
SELECT *
FROM price
WHERE price LIKE '1_0';

It has returned the record in which the price is 190. We can also try another pattern:
SELECT *
FROM price
WHERE price LIKE '_2_';

It is possible for us to use the LIKE clause together with the NOT operator. This will return all the records that don’t meet the specified pattern. For example:
Let us use the Price table with the following records:

Let us find all the records where the price does not start with 2:
SELECT *
FROM price
WHERE price NOT LIKE '2%';

Only one record does not meet the specified pattern.
Order By
This clause helps us to sort out our records in either ascending or descending order. We use it with the SELECT statement, as shown below:
SELECT expression(s)
FROM tables
[WHERE condition(s)]
ORDER BY exp [ ASC | DESC ];
It is possible for us to use this clause without adding either the ASC or DESC part. For example:
We will use the Price table with the following records:

Run the following command against the table:
SELECT * FROM price
WHERE price LIKE '2%.'
ORDER BY price;

In the above command, we have ordered by the price. The records have been ordered with the prices in ascending order. That means that when we don’t specify the order, the sorting is done in ascending order by default.
Let us run the clause with the DESC option:
SELECT * FROM price
WHERE price LIKE '2%'
ORDER BY price DESC;

The records have been sorted with the price in descending order as we have specified.
Let us use the ORDER BY clause together with the ASC attribute:
SELECT * FROM price
WHERE price LIKE '2%.'
ORDER BY price ASC;

The records have been ordered but with the prices in ascending order. This is similar to when we use the ORDER BY clause without either ASC or DESC attributes.
DISTINCT
This clause helps us to do away with duplicates when selecting records from a table. This means that it helps us get unique records. Its syntax is given below:
SELECT DISTINCT expression(s)
FROM tableName
[WHERE condition(s)];
To demonstrate this, we will use the Price table with the following data:

When we select the price column from the table, we get the following result:
SELECT price FROM Price;

We have two records with a price of 250, creating a duplicate. We need to have only unique records. We can filter these by use of the DISTINCT clause as shown below:
SELECT DISTINCT price FROM Price;

We now don’t have any duplicates in the above output.
From
The FROM clause used for fetching data from a database table. It can also help when joining tables. Here is the syntax for the command:
SELECT columnNames FROM tableName;
To see the contents of the book table, run the following command:
SELECT * FROM price;

The clause can help you to fetch only a single column from a database table. For example:
SELECT price FROM Price;

Advanced Tasks
Stored Procedure
A procedure is a MariaDB program that you can pass parameters to. A procedure doesn’t return values. To create a procedure, we use the CREATE PROCEDURE command.
To demonstrate how to create and call a procedure, we will create a procedure named myProcedure() that helps us select the name column from the book table. Here is the procedure:
DELIMITER $
    CREATE PROCEDURE myProcedure()
        BEGIN
            SELECT name FROM book;
        END;
;

The procedure has been created. We have simply enclosed the SELECT statement within the BEGIN and END clauses of the procedure.
Now, we can call the procedure by its name as shown below:
CALL myProcedure();

The procedure returns the name column of the book table when called.
We can create a procedure that takes in a parameter. For example, we need to select the name of the book and filter using the book id. We can create the following procedure for this:
DELIMITER $
    CREATE PROCEDURE myProcedure2(book_id int)
        BEGIN
            SELECT name FROM book WHERE id = book_id;
        END;
;

Above, we have created a procedure named myProcedure2(). This procedure takes one integer parameter named book_id which is the id of the book whose name we need to see. To see the name of the book with an id of 3, we can call the procedure as follows:
CALL myProcedure2(3);

Function
Unlike procedures, we must pass parameters to functions and a function must return a value. To create a function in MariaDB, we use the CREATE FUNCTION statement. The statement takes the following syntax:
CREATE
[ DEFINER = { CURRENT-USER | username } ]
FUNCTION function-name [(parameter datatype [, parameter datatype]) ]
RETURNS datatype [LANGUAGE SQL
                        | DETERMINISTIC
                        | NOT DETERMINISTIC
                        | {CONTAINS SQL
                          | NO SQL
                          | READS SQL DATA
                          | MODIFIES SQL DATA}
                        | SQL SECURITY {DEFINER | INVOKER}
                        | COMMENT 'comment'

BEGIN

   declaration-section

   executable-section

END;
The above parameters are described below:
| Parameter | Description |
|---|---|
| DEFINER clause | This parameter is optional. If you don’t specify it, the definer will become the user who created the function. If there is a need to specify a different definer, include the DEFINER clause in which the user_name will be the definer of the function. |
| function_name | The name that is to be assigned to this function in the MariaDB. |
| parameter | The parameter(s) passed to the function. During the creation of the function, all parameters are treated as IN parameters (rather than OUT/INOUT parameters). |
| return_datatype | The data type of the return value of the function. |
| LANGUAGE SQL | It affects the portability but not the function. |
| DETERMINISTIC | The function will return one result only when given a number of parameters. |
| NOT DETERMINISTIC | It is possible for the function to return a different result when given a number of parameters. |
| CONTAINS SQL | Informs MariaDB that this function contains SQL. The database will not verify whether this is true. |
| NO SQL | This clause is not used, and it has no impact on your function. |
| READS SQL DATA | Tells MariaDB that this function will use SELECT statements to read data, but it won’t modify the data. |
| MODIFIES SQL DATA | Tells MariaDB that this function will use INSERT, DELETE, UPDATE, and other DDL statements to modify SQL data. |
| declaration-section | This is where local variables should be declared. |
| executable-section | The function code should be added here. |
Here is an example MariaDB function:
DELIMITER //

CREATE FUNCTION sumFunc (x INT )
RETURNS INT DETERMINISTIC

BEGIN

   DECLARE sum INT;
   SET sum = 0;
   label1: WHILE sum <= 3000 DO
   SET sum = sum + x;
   END WHILE label1;
   RETURN sum;
END; //
DELIMITER ;

We can then call the above function as follows:
select sumFunc(1000);
The command will return the following:

Once you are done with a function, it will be good for you to delete it. This is easy as you only have to call the DROP FUNCTION statement that takes the following syntax:
DROP FUNCTION function_name;
For example, to drop the function named myFunc, we can run the following command:
DROP FUNCTION myFunc;
JOIN
When you need to retrieve data from more than one tables at a go, use MariaDB JOINS. This means that a JOIN works on two or more tables. The following three types of JOINS are supported in MariaDB:
- INNER/SIMPLE JOIN
- LEFT OUTER JOIN/LEFT JOIN
- RIGHT OUTER JOIN/RIGHT JOIN
Let us discuss them one-by-one:
INNER JOIN
The inner join returns all rows from the tables in which the join condition is true. Its syntax is as follows:
SELECT columns
FROM table-1
INNER JOIN table-2
ON table-1.column = table-2.column;
For example:
We will use our two tables, books, and book.
The book table has the following data:

The Price table has the following data:

The goal is to join the name column from the Book table and the price column from Price table into a single table. This is possible with an inner join, as demonstrated below:
SELECT book.name, price.price
FROM book
INNER JOIN price
ON book.id = price.id;
The command returns the following:

LEFT OUTER JOIN
This join returns all the rows from the left-hand table and only rows in which the join condition is true from the other table. Its syntax is as follows:
SELECT columns
FROM table-1
LEFT [OUTER] JOIN table-2
ON table-1.column = table-2.column;
The OUTER keyword has been placed within square brackets because it is optional.
For example:
SELECT book.name, price.price
FROM book
LEFT JOIN price
ON book.id = price.id;
The command returns the following:

The last record in the above table has no matching value on the left. That is why it has been replaced with NULL.
RIGHT OUTER JOIN
This join returns all the rows from the right-hand table and only rows in which the join condition is true from the other table. Its syntax is as follows:
SELECT columns
FROM table-1
RIGHT [OUTER] JOIN table-2
ON table-1.column = table-2.column;
The OUTER keyword has been placed within square brackets because it is optional.
For example:
SELECT book.name, price.price
FROM book
RIGHT JOIN price
ON book.id = price.id;
The command returns the following:

The reason is that all rows in the right-hand table were matched to those in the other table. If some of the rows did not match, we would have NULLs in the first column.