iOS Automation Testing with Xcode UI Automation Framework
iOS Automation Testing using Xcode
To guarantee the quality of your iOS application, you should follow the Test-Driven development processes shown in below figure.

Test-Driven Development (TDD) is a Testing model which is applied to iOS application testing. In this model, a tester has to follow 4 phases below:
- Design: Figure out what you want to test, design your test cases
- Test: Run all tests and see if test cases fail
- Implement: Revise your code, fix bugs which cause the test to fail
- Test again: if Fail, if you roll back to the design. If all test cases Pass, the code meets the entire tested requirement.
Setting up Xcode Project for UI Testing
To create iOS Test Program, you need a Mac Book.Your Mac has already installed:
- OS X. Operating system for Mac PC
- Xcode IDE, a development tool for iOS
- Automated Testing framework (UI Automation, OCUnit..)
- iOS SDK 4 (or higher)
How to Create iOS Automation using UI Automation Framework
Step 1) Launch Instruments
Open XCode ->Open Developer Tool ->Instrument

Step 2) Add Automation Instrument
In Instruments window, select Automation Instrument

To create a test script, you either record a Test Scenario or you program it manually.
Step 3) Press Red button
An instrument is launching, and Stop recording immediately. If you want to start the record, press Red button

Step 4) Create a new script
In the Scripts window, click Add > Create to create a new script

Step 5) Choose the target
You’re in the Trace window, use the Choose Target pull down to navigate to the debugging version of your App.

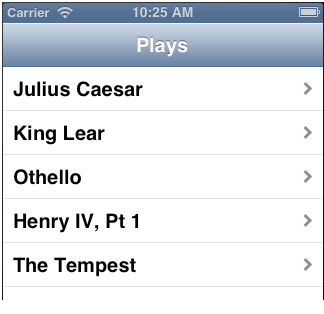
In this case, I will use Apple’s sample SimpleDrillDown simple app as an application under test. It has GUI below.
Step 6) Start record your script
Record your script by hitting the record button at the top or bottom of the tool.
![]()
Now you can do some UI action on your application under test, and your script is recorded.
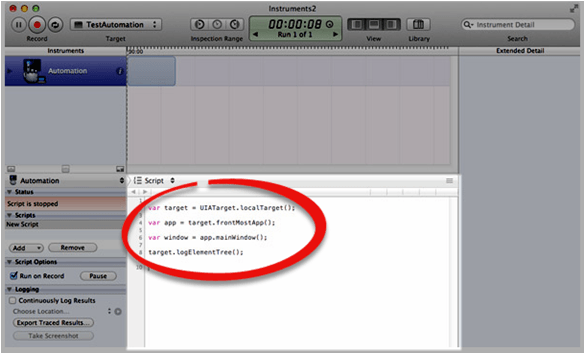
Step 7) See your script
To see your script, hit the Trace Log/Editor Log drop down and switch to script log view.

You will see your recorded script.
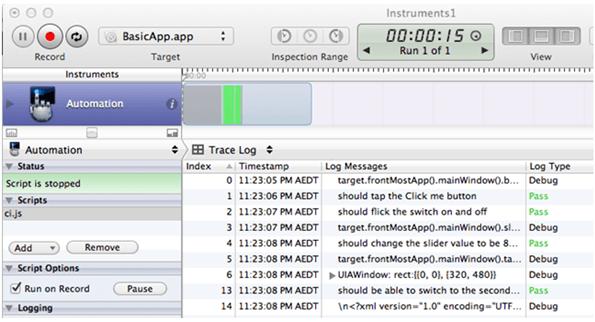
Step 8) Play your script
Press play button, the script runs, and you can stop it after logs appear.
How to Create iOS Automation using OCUnit framework
Step 1) Start Xcode IDE, Add Unit Test Bundle target
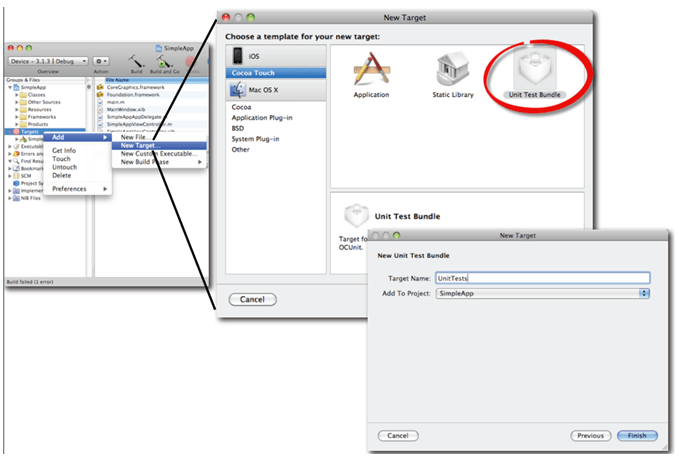
Step 2) Write the name of the new Unit test Bundle as the figure above, then click Finish
Step 3) Make Unit Test active target

Step 4) Add a group for test classes
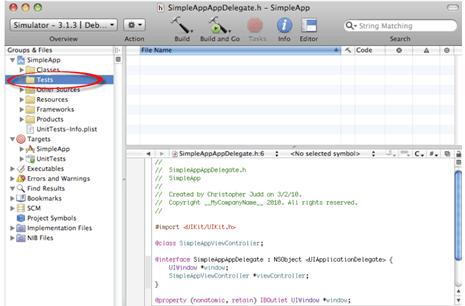
Step 5) Add a Unit test class

Step 6) Now start your implement
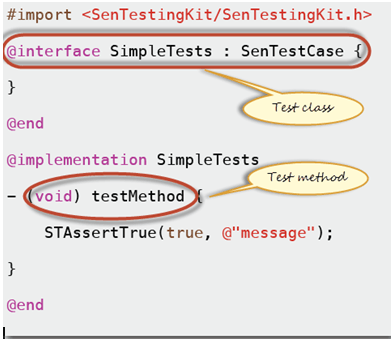
OCUnit uses Objective-C language to create test program. The Developer must know about this language.
UI Automation Sample Code
This article includes some Source Code examples. They help you to understand the tutorial more clearly and quickly.
UI AutomationSample Test script for UI Automation demo.