
Create Releases & Cycles in HP ALM (Quality Center)
 Thomas Hamilton
⚡ Smart Summary
Create Releases and Cycles in HP ALM using the Management tab, which organises every requirement, test, and defect against a dated delivery. This article covers the release hierarchy, creating releases and cycles, defining release scope, adding milestones, and reading the status and quality tabs.
What is the Management Tab in HP ALM?
- The Management tab helps users to organise and track releases and cycles.
- A release has a definite start date and end date, and corresponds to a group of changes that will be deployed to end users in that time interval.
- A cycle, which falls within a release, has a set of development and testing efforts in order to achieve a common goal.
- ALM users can track the progress of the project in real time by analysing the releases tree, to check whether it matches the release goals.
- It also enables users to get a quick snapshot of the quality of that release, showing the outstanding defects and the defect opening rate.

Why do we need Management of Releases and Cycles in ALM?
In reality, when product development happens, there are various releases for a particular product.
- Each release is broken down into a number of cycles. Let us say we have two releases, each having two cycles of development and testing, for the Guru99 banking application.
- Each release also has a predefined scope and milestone associated with it.
- For each cycle there is a specific set of requirements.
- Each requirement has a number of test cases associated with it.
- Upon executing tests, defects are logged and mapped to the corresponding tests, after which we can trace requirements and defects.

The diagram shows why sequencing matters. Because every work item is traced upwards to a cycle and a release, creating the release structure first is what makes reporting possible later.
Release, Cycle, Scope, and Milestone Compared
Four objects live in the Management tab, and confusing them is the most common reason a release tree becomes unusable.
| Object | What It Represents | Sits Inside | Mandatory Fields |
|---|---|---|---|
| Release | A dated delivery to end users | A folder in the releases tree | Name, start date, end date |
| Cycle | One round of development and testing | A release | Name, start date, end date |
| Release Scope | An item the release intends to deliver | A release | Name only |
| Milestone | A tracking checkpoint | A release | Name, start and end tracking dates |
The Management Tab
This module helps us to create and manage releases and cycles, which is the first step before creating any work item such as requirements, tests, or defects. It also helps with project planning and tracking. The following functions are the important ones in this tab.
- Creating Releases
- Creating Cycles
- Creating Release Scope
- Creating Milestones
Note: before starting this exercise, see the HP ALM introduction for how to log in to ALM, and how to download and install HP ALM if you do not yet have access.
How to Create a Release
Creating releases is the first step in ALM, and all other work items such as requirements, test cases, and defects are traced against releases and cycles.
As explained in the workflow, we will have two releases in the year for the Guru99 banking application, with the timelines below. The dates are illustrative and match the screenshots that follow.
| Release Name | Start Date | End Date |
|---|---|---|
| 2017 R1 | 01/01/2017 | 21/06/2017 |
| 2017 R2 | 01/07/2017 | 31/12/2017 |
Step 1) The first step is to navigate to the Management tab and click on the “Releases” tab. The landing page appears as shown below:

Step 2) Before creating a release, we can create a container or folder by clicking the “New Folder” icon in the Releases module, as shown below. Give the folder the name 2017.

Step 3) The next step is to create new releases. To create a new release, click the “New Release” button and the New Release dialog opens. Enter the following details.
- Release Name
- Start Date of the Release
- End Date of the Release
- Brief description of the release (optional)

Step 4) After entering the above details, click “OK”. The release will be created as shown below.
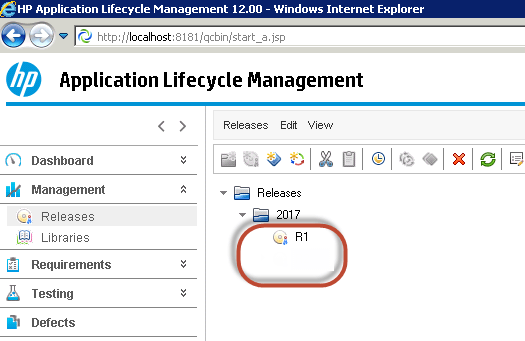
Likewise, you can create the other release, R2.
Step 5) Upon selecting a particular release, you can see the tabs that are relevant to releases.

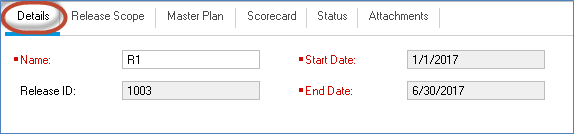
Step 6) Now let us understand the important tabs available under the “Releases” module. Select the Details tab to retrieve the information provided during creation of the release.
Step 7) Select the Release Scope tab, which provides details about the scope of that release. We have not created scope for this release yet, so the scope list is empty. Creating milestones and scope is covered later on this page.

Step 8) Master Plan provides a pictorial representation of the timeline. If cycles are created, the master plan will include cycle timelines for that release as well.

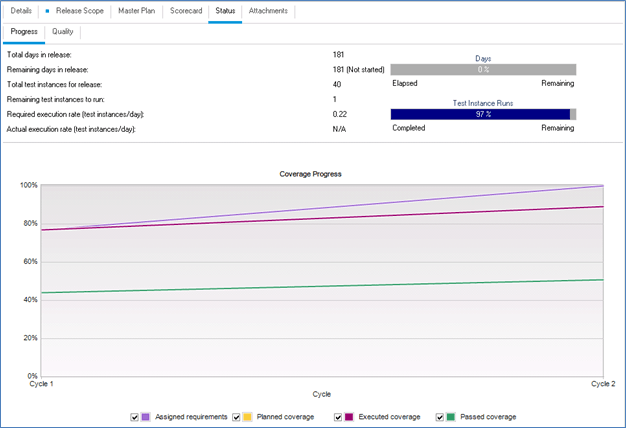
Step 9) The Status tab shows the overall progress of that release.
When the release is created fresh, without any work item such as requirements, tests, or defects added to it, the status is displayed as shown below.

The status is displayed as shown below once the user maps work items such as requirements, tests, and defects against the release.
💡 Tip: An empty Status or Quality tab does not indicate a fault. Both panels stay blank until requirements, tests, or defects are mapped to the release, because there is nothing yet to summarise.
How to create a Cycle
In reality, each release is further broken down into cycles. Let us understand how to create cycles in ALM. In our case there are two cycles in each release.
| Release | Cycle Name | Cycle Start Date | Cycle End Date |
|---|---|---|---|
| Release R1 | Cycle 1 | 01/01/2017 | 31/03/2017 |
| Cycle 2 | 01/04/2017 | 30/06/2017 | |
| Release R2 | Cycle 1 | 01/07/2017 | 30/09/2017 |
| Cycle 2 | 01/10/2017 | 31/12/2017 |
Step 1) Select the release under which you would like to create cycles and click the “New Cycle” button. The New Cycle dialog opens, with the release timelines prepopulated because this cycle is created under the selected release. Enter the following details in the ‘New Cycle’ window:
- Name of the Cycle
- Start Date of the Cycle
- End Date of the Cycle
- Description (optional)

⚠️ Warning: Cycle dates must fall inside the parent release dates. ALM rejects a cycle that starts before the release begins or ends after it closes, so extend the release first if the plan changes.
Step 2) Once all the cycles are created, you can access them under the created release as shown below.

Step 3) Select a particular cycle to access the details of that cycle.

Step 4) Now let us understand the other important tabs present under “Cycles”. You can attach files under the ‘Attachments’ tab. The Progress tab gives the status of that cycle under the selected release.
The progress is displayed as shown below when the cycle has been created without any work items, that is requirements, tests, or defects, mapped against it.

The progress is displayed as shown below after the user has mapped work items to the cycle.

Step 5) The Quality tab provides information such as the defect opening rate and the number of outstanding defects, which is the first indication of the quality of the current cycle.
When the user has just created the cycle, the ‘Quality’ tab is displayed as shown below, because no work items are mapped against it.
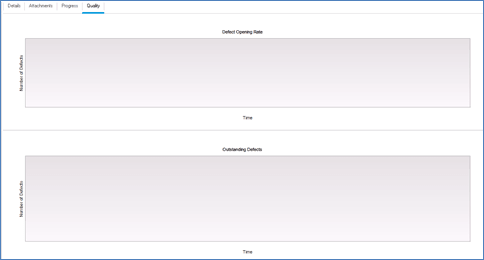
The ‘Quality’ tab is displayed as shown below once the user has mapped work items against that release.

How to Create Release Scope
Each release has a scope and milestones associated with it, which can be added under the “Release Scope” tab in the Releases module.
Step 1) Upon clicking the “+” icon in the Release Scope tab of the Releases module, the New Scope dialog opens.

Enter the following details.
- The name of the scope, which is the only mandatory field
- Priority of the scope item
- Owner of the scope
- Description of the scope

Step 2) Upon clicking the “OK” button, all the added scope items are shown in the “Release Scope” tab as shown below.

How to Create a Milestone
Step 1) A new milestone can be created only under a release, using the “New Milestone” icon as shown below.
Step 2) While creating a milestone the following fields are mandatory.
- Name of the Milestone
- Start Tracking Date
- End Tracking Date
- Description

Step 3) The created milestone is shown below.
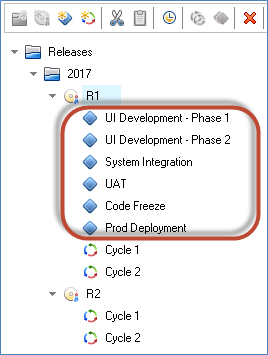
Step 4) Now you can map a milestone scope against the created project scope. To do this, select the milestone, navigate to Milestone Scope, select the corresponding scope, and map it.

Best Practices for Planning Releases and Cycles
The Management tab is quick to fill in and slow to correct, so a few conventions keep the tree readable as projects accumulate.
- Agree a naming convention first. A pattern such as YYYY R1 and YYYY R1 C1 sorts correctly and stays readable years later.
- Use folders per year. Without folders the releases tree becomes a flat list that is difficult to scan.
- Keep cycles short. Cycles of two to four weeks give meaningful progress readings, whereas a six month cycle hides problems until the end.
- Create scope items before test design. Scope is what turns a release from a date range into a statement of intent.
- Do not delete a closed release. Historic releases carry the traceability for defects raised against them.
- Map every requirement to a cycle. Unmapped work items never appear in the Status or Quality tabs.
Once the release structure exists, continue with requirements specifications, then the test plan module and test lab. Administrators should also review how to customise a project and the defect management life cycle. The complete series is available in the HP ALM tutorial, and interview preparation in the Quality Center interview questions.
