
How to Draw Shapes in Photoshop using Shape Tool
 Editorial Team
⚡ Smart Summary
Drawing shapes in Photoshop uses the Shape tool, which relies on vector technology like the pen tool. This resource explains the Path, Shape, and Pixels modes, editing fill and stroke, using the Custom Shape tool, and subtracting areas with the pathfinder feature.

Steps to Draw Shapes in Photoshop
Like the pen tool, the shape layer also uses Photoshop vector technology. You will get the shape layer tool right here in the toolbar.

Now click on that and you can see various shapes like:
- Rectangle Tool
- Rounded Rectangle Tool
- Ellipse Tool
- Polygon Tool
- Line Tool
- Custom Shape Tool
By selecting these items you can draw them as a regular path or as a shape layer.
See the options bar; in the second position you can see a menu. It will show you 3 options to draw your shape: “Path”, “Shape”, and “Pixels”.

Now, Pixels fills the drawn path with pixels; this option does not use vector technology. Path will draw only the path of the shape and will not fill any color in the path. But here I select the Shape option, and you can see some various options here. I can select “fill color, stroke color, stroke type” and much more options here.

Now draw the shape and see in the layer panel that a new layer is created there.

You can see a small path icon on the layer. It indicates that this layer is a shape layer.

Now grab the “Path Selection tool” and you can click on that. You can see there are some control handles of the vector shape. If you want to edit the color of the shape, then just go and double click on the shape layer and you will get the color picker.

These are vector shapes, which means they are resolution independent, and I can drag and use them in any document and scale them up and down without any loss of quality, because they use vector technology instead of pixel technology.
Let us see a useful aspect of shape tools, the “Photoshop Custom Shape tool”, which gives you lots of ready-made shapes that you can easily use when you want.

All these shapes are included in this popup menu by a number of different categories, but right now I am choosing “All” so that I can get all the shapes out there in the list.
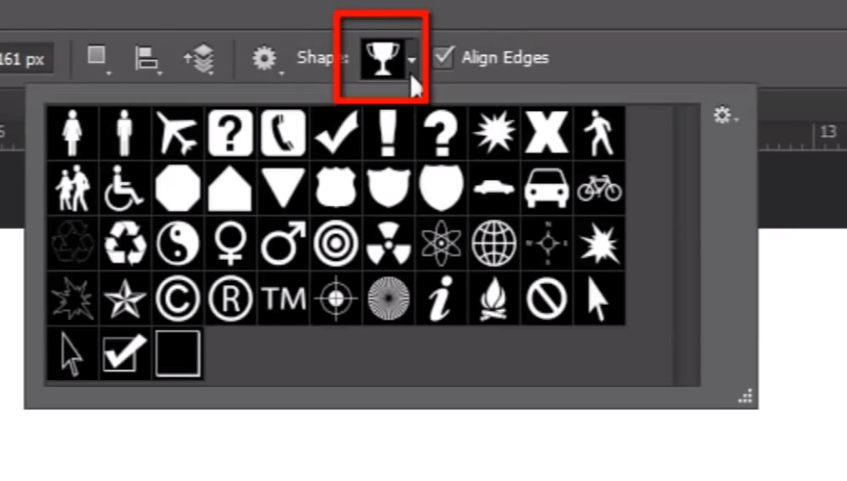
Now choose the shape that you want to use. To draw the shape, you can simply click on the work area if you want to draw it with any specific size, or you can also simply drag and draw the shape to create the shape layer.

Let us edit the shape’s color and stroke properties in the options bar at the top.

Now if I want to subtract some part inside this shape, then I will go and select the “Ellipse tool” and set the pathfinder feature to “Subtract Front Shape”.

If I draw a circle inside here, that is going to subtract that area from the main shape. I can also change the position of the shape.

So this was a brief overview about the shape layers in Photoshop. You can create various kinds of designs with the help of the shape layer without losing any quality, because it uses vector Photoshop technology.

Now let us go ahead to our next topic, “smart object“.
