XSLT Report in Selenium Webdriver
⚡ Smart Summary
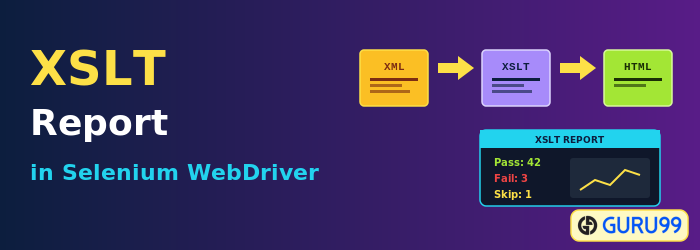
XSLT Report in Selenium WebDriver enhances the default TestNG output by transforming XML results into a clear, user-friendly HTML report. This resource explains prerequisites, ANT configuration, report generation, and verifying pass, fail, and skip results through interactive pie charts.
XSLT Report
The XSLT Report in the Selenium framework is a very important feature that is used to further enhance the default reporting system provided by Testng. It enhances the TestNG reporting feature in a very user-friendly way. It also has a more user-friendly UI and a detailed description for the test suite results.
What is XSLT in Selenium?
XSLT in Selenium is a language for transforming XML documents into other XML documents. We can customize output files by adding/removing attributes and elements in XML files using XSLT. This helps in interpreting results quickly and it is supported by all browsers. It uses XPath to navigate through elements and attributes in XML documents. XSLT stands for Extensible Stylesheet Language Transformations.
Below are the most popularly used XSL elements in programming:
- <xsl:stylesheet> It defines that this document is an XSLT style sheet document.
- <xsl:if> is used to put a conditional test against the content of the XML file.
- <xsl:template> is used to build templates.
- <xsl:apply-templates> is used to apply templates to elements.
- <xsl:choose> is used in conjunction with <xsl:otherwise> and <xsl:when> to express multiple conditions.
- <xsl:for-each> is used to select every XML element of a specified node.
- <xsl:value-of> is used to extract the value of a selected node.
- <xsl:sort> is used to sort the output.
Pre-requisite to generate XSLT report
Before generating the report, make sure the following prerequisites are in place.
1) The ANT build tool should be installed (it is necessary to install ANT for the XSLT reporting feature). ANT is used to compile the source code and create the build. It is also very much extensible. Refer to this link for the steps to download and install ANT.
2) The XSLT package downloaded.
3) A Selenium script that should be executed by TestNG.
We will discuss the XSLT report in Selenium Webdriver during this example.
Generate XSLT Report in Selenium
With the prerequisites ready, the next stage is to run a script and produce the report.
In this scenario, we will use the Guru99 demo site to illustrate how to generate an XSLT report.
Scenario: You will automate and generate an XSLT report for the following scenario:
- Launch the web browser
- Launch Firefox and open the site https://demo.guru99.com/V4/

- Login to the application.

- Log out from the application.


Now we will generate the XSLT report in selenium as given in the below steps.
Step 1) For the above-mentioned scenario, create and execute the Selenium script for the Guru99 demo site.
import org.openqa.selenium.Alert;
import org.openqa.selenium.By;
import org.openqa.selenium.WebDriver;
import org.openqa.selenium.firefox.FirefoxDriver;
import org.testng.Assert;
import org.testng.annotations.Test;

public class Testing {
    WebDriver driver = new FirefoxDriver();

    @Test(priority=1)
    public void Login()
    {
        //Launching the Site.
        driver.get("https://demo.guru99.com/V4/");

        //Login to Guru99
        driver.findElement(By.name("uid")).sendKeys("mngr34926");
        driver.findElement(By.name("password")).sendKeys("amUpenu");
        driver.findElement(By.name("btnLogin")).click();
        //Verifying the manager home page
        Assert.assertEquals(driver.getTitle(),"Guru99 Bank Manager HomePage" );
    }

    @Test(priority=2)
    public void verifytitle()
    {
        //Verifying the title of the home page
        Assert.assertEquals(driver.getTitle(),"Guru99 Bank Manager HomePage" );
    }

    @Test(priority=3)
    public void Logout()
    {
        driver.findElement(By.linkText("Log out")).click();
        Alert alert = driver.switchTo().alert();
        alert.accept();
        //Verifying the title of the logout page
        Assert.assertEquals(driver.getTitle(),"Guru99 Bank Home Page" );
    }
}
Step 2) Download the XSLT report package from this link:

Unzip the above folder and you will get the below items:
- build.xml
- testng-results.xsl

Step 3) Unzip the folder and copy all files and paste them at the project home directory as shown in the below screen.

Step 4) In this step, run the build.xml file from eclipse as shown below:

Right click on the build.xml then click on Run As Ant Build.

Then a new window opens. Now select the option ‘generateReport’.

Click on the Run button. It should generate the report.
Verifying XSLT Report
After generating the report, you should confirm that it was created correctly and review the results.
Once the build is successful and you have moved to the project home directory, you will find the testng-xslt folder.

Inside this folder you will find the index.html file as shown below:

Now open this HTML file in any browser like Firefox or Chrome which supports JavaScript. You will find the report as shown in the below screen. The pie chart report represents the test status more clearly. The filter feature allows the user to filter the result as per the set criteria.

You will find the pie chart showing the percentage of passed, failed and skipped tests.
To display the result in regular format, click on the Default suite from the left-hand side of the pane. It should show the details of each test as shown in the below screen:

Now we forcefully make a test pass, fail and skip.
To view a report of each type for the test result, we need to make some changes in the below methods.
- verifytitle(): In the Assert, we pass the wrong expected page title. When the code is executed, it does not match the expected title, hence making the test fail.
- Logout(): In this method, we forcefully skip the test by using SkipException, so that when the code is executed, this method will be skipped.
By doing so, we are trying to show the XSLT report with the help of a pie chart. It will show the test result for a pass, fail and skip test.
@Test(priority=2)
public void verifytitle()
{
    //Verifying the title of the home page
    Assert.assertEquals(driver.getTitle(),"Guru99 Bank Manager" );
}

@Test(priority=3)
public void Logout()
{
    throw new SkipException("Skip this");
}

Now we have one test for each type of result status, i.e., pass, fail and skip.
After execution of the script and build.xml, verify the XSLT report as shown in the below screen:

The test report is a more user-friendly report and easy to understand. You can also filter the result by selecting the check box in the below screen.

Note: In the screenshot, the ‘config’ option displays the test for which the configuration is done. In a big project, there are lots of configuration code, so it is usually used in big projects.