
What is TensorFlow? How It Works, Architecture & Features
 Editorial Team
⚡ Smart Summary
TensorFlow is the open-source platform Google built for machine learning, representing every computation as a dataflow graph of tensors. This overview covers the architecture, the components, how a calculation executes, and how to feed data through an input pipeline.
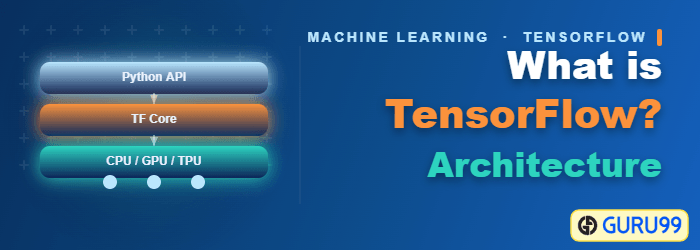
What is TensorFlow?
TensorFlow is an open-source end-to-end platform for creating Machine Learning applications. It is a symbolic math library that uses dataflow and differentiable programming to perform various tasks focused on training and inference of deep neural networks. It allows developers to create machine learning applications using various tools, libraries, and community resources.
Currently, the most famous deep learning library in the world is Google’s TensorFlow. Google applies machine learning across its products to improve search, translation, image captioning and recommendations.
TensorFlow Example
To give a concrete example, Google users can experience a faster and more refined search experience with AI. If the user types a keyword in the search bar, Google provides a recommendation about what could be the next word.

Google wants to use machine learning to take advantage of their massive datasets to give users the best experience. Three different groups use machine learning:
- Researchers
- Data Scientists
- Programmers
They can all use the same toolset to collaborate with each other and improve their efficiency.
Google does not just hold large datasets, it also runs enormous compute infrastructure, so TensorFlow was built to scale from the outset. TensorFlow is a library developed by the Google Brain Team to accelerate machine learning and deep neural network research.
It was built to run on multiple CPUs or GPUs and even mobile operating systems, and it has several wrappers in several languages like Python, C++ or Java.
History of TensorFlow
A couple of years ago, deep learning started to outperform all other machine learning algorithms when giving a massive amount of data. Google saw it could use these deep neural networks to improve its services:
- Gmail
- Photo
- Google search engine
They built a framework called TensorFlow so that researchers and developers could work on the same model, then deploy it at a scale many people could use.
TensorFlow was released publicly in November 2015, and version 1.0 followed in February 2017. The far bigger change came with TensorFlow 2.0 in September 2019, which made eager execution the default and adopted Keras as the standard high-level API. From version 2.16 onward, Keras 3 is the default, and the same model code can also run on JAX or PyTorch backends.
TensorFlow is released under the Apache 2.0 licence, so you may use, modify and redistribute it, including commercially, without paying Google.
How TensorFlow Works
TensorFlow enables you to build dataflow graphs and structures to define how data moves through a graph by taking inputs as a multi-dimensional array called Tensor. It allows you to construct a flowchart of operations that can be performed on these inputs, which goes at one end and comes at the other end as output.
TensorFlow Architecture
TensorFlow architecture works in three parts:
- Preprocessing the data
- Build the model
- Train and estimate the model
It is called TensorFlow because it takes input as a multi-dimensional array, also known as tensors. You can construct a sort of flowchart of operations (called a Graph) that you want to perform on that input. The input goes in at one end, and then it flows through this system of multiple operations and comes out the other end as output.
Where Can TensorFlow Run?
TensorFlow hardware and software requirements fall into two phases:
Development phase: this is when you train the model, usually on a desktop or laptop.
Run or inference phase: once training is complete, the model can run on many platforms:
- Desktop running Windows, macOS or Linux
- Cloud as a web service
- Mobile devices like iOS and Android
You can train it on multiple machines then you can run it on a different machine, once you have the trained model.
The model can be trained and used on GPUs as well as CPUs. GPUs were initially designed for video games. Around 2009, Stanford researchers showed that GPUs are extremely efficient at the matrix and linear algebra operations that neural networks depend on. Deep learning relies on a lot of matrix multiplication. TensorFlow is very fast at computing the matrix multiplication because it is written in C++. Although it is implemented in C++, TensorFlow can be accessed and controlled by other languages mainly, Python.
One more significant feature is TensorBoard, which visualises the graph, the training metrics, and the distribution of weights while the model runs.
TensorFlow Components
Tensor
TensorFlow’s name is directly derived from its core framework: Tensor. In TensorFlow, all the computations involve tensors. A tensor is a vector or matrix of n-dimensions that represents all types of data. All values in a tensor hold identical data type with a known (or partially known) shape. The shape of the data is the dimensionality of the matrix or array.
A tensor can be originated from the input data or the result of a computation. In TensorFlow, all the operations are conducted inside a graph. The graph is a set of computation that takes place successively. Each operation is called an op node and are connected to each other.
The graph outlines the ops and connections between the nodes. However, it does not display the values. The edge of the nodes is the tensor, i.e., a way to populate the operation with data.
Graphs
TensorFlow makes use of a graph framework. The graph gathers and describes all the series computations done during the training. The graph has lots of advantages:
- It runs on multiple CPUs or GPUs, and even on mobile operating systems
- The portability of the graph allows to preserve the computations for immediate or later use. The graph can be saved to be executed in the future.
- All the computations in the graph are done by connecting tensors together
- A graph has nodes and edges. Each node carries a mathematical operation and produces an output, while the edges describe the input and output relationships between nodes. The tensors themselves travel along the edges.
Why is TensorFlow Popular?
TensorFlow is widely adopted because it is accessible at every level of expertise. Its APIs cover everything from a three-line Keras model to a hand-built CNN or RNN. Because computation is expressed as a graph, TensorBoard can visualise the network and make debugging far easier. It also deploys at scale, running on CPU, GPU and TPU, and on mobile through TensorFlow Lite.
TensorFlow remains one of the two most-used deep learning frameworks on GitHub, alongside PyTorch.
TensorFlow Algorithms
TensorFlow ships with high-level estimators for several classical algorithms. In TensorFlow 1.x these lived under tf.estimator:
- Linear regression: tf.estimator.LinearRegressor
- Classification: tf.estimator.LinearClassifier
- Deep learning classification: tf.estimator.DNNClassifier
- Wide and deep learning: tf.estimator.DNNLinearCombinedClassifier
- Boosted tree regression: tf.estimator.BoostedTreesRegressor
- Boosted tree classification: tf.estimator.BoostedTreesClassifier
TensorFlow vs PyTorch: Which Should You Choose?
TensorFlow and PyTorch are the two dominant deep learning frameworks, and the practical differences have narrowed considerably since TensorFlow 2.0 adopted eager execution.
| Criteria | TensorFlow | PyTorch |
|---|---|---|
| Developed by | Google Brain | Meta AI |
| Execution | Eager, with optional graph compilation | Eager, with optional compilation |
| High-level API | Keras, built in | Separate libraries such as Lightning |
| Mobile and edge | Mature, through TensorFlow Lite | Improving, through ExecuTorch |
| Browser deployment | TensorFlow.js | Requires conversion to ONNX |
| Typical stronghold | Production and deployment | Research and experimentation |
The pragmatic answer: pick TensorFlow when the model has to ship to mobile, the browser, or a managed serving stack, and pick PyTorch when you are iterating on model architecture. Keras 3, the default from TensorFlow 2.16 onward, softens the decision further, because the same Keras code can run on a TensorFlow, JAX, or PyTorch backend.
How Calculations Work in TensorFlow
⚠️ Version note: the walkthroughs below use the TensorFlow 1.x graph-and-session style, which is the clearest way to see how the dataflow graph actually works. tf.placeholder(), tf.Session() and make_initializable_iterator() were removed in TensorFlow 2.0 and will raise AttributeError on a current installation. The section TensorFlow 1.x vs TensorFlow 2.x further down gives the modern equivalent of every example.
import numpy as np
import tensorflow as tf
In the first two line of code, we have imported tensorflow as tf. With Python, it is a common practice to use a short name for a library. The advantage is to avoid to type the full name of the library when we need to use it. For instance, we can import tensorflow as tf, and call tf when we want to use a tensorflow function
Let’s practice the elementary workflow of TensorFlow with simple TensorFlow examples. Let’s create a computational graph that multiplies two numbers together.
During the example, we will multiply X_1 and X_2 together. TensorFlow will create a node to connect the operation. In our example, it is called multiply. When the graph is determined, TensorFlow computational engines will multiply together X_1 and X_2.

Finally, we will run a TensorFlow session that will run the computational graph with the values of X_1 and X_2 and print the result of the multiplication.
Let’s define the X_1 and X_2 input nodes. When we create a node in TensorFlow, we have to choose what kind of node to create. The X1 and X2 nodes will be a placeholder node. The placeholder assigns a new value each time we make a calculation. We will create them as a TF dot placeholder node.
Step 1: Define the variable
X_1 = tf.placeholder(tf.float32, name = "X_1")
X_2 = tf.placeholder(tf.float32, name = "X_2")
A placeholder needs a data type. These are numbers, so tf.float32 is the right choice. The name argument is optional but useful, because it is the label that appears in the TensorBoard visualisation of the graph. X_2 is defined the same way.
Step 2: Define the computation
multiply = tf.multiply(X_1, X_2, name = "multiply")
Now we can define the node that does the multiplication operation. In TensorFlow we can do that by creating a tf.multiply node.
We will pass in the X_1 and X_2 nodes to the multiplication node. It tells tensorflow to link those nodes in the computational graph, so we are asking it to pull the values from x and y and multiply the result. Let’s also give the multiplication node the name multiply. It is the entire definition for our simple computational graph.
Step 3: Execute the operation
To execute operations in the graph, we have to create a session. In TensorFlow, it is done by tf.Session(). Now that we have a session we can ask the session to run operations on our computational graph by calling session. To run the computation, we need to use run.
When the multiplication operation runs, it needs the values of the X_1 and X_2 nodes, so you feed them in at run time. We can do that by supplying a parameter called feed_dict. We pass the value 1,2,3 for X_1 and 4,5,6 for X_2.
We print the results with print(result). We should see 4, 10 and 18 for 1×4, 2×5 and 3×6
X_1 = tf.placeholder(tf.float32, name = "X_1")
X_2 = tf.placeholder(tf.float32, name = "X_2")

multiply = tf.multiply(X_1, X_2, name = "multiply")

with tf.Session() as session:
    result = session.run(multiply, feed_dict={X_1:[1,2,3], X_2:[4,5,6]})
    print(result)
[ 4. 10. 18.]
Options to Load Data into TensorFlow
The first step before training a machine learning algorithm is to load the data. There are two common ways to load data:
1. Load data into memory: It is the simplest method. You load all your data into memory as a single array. You write plain Python for this; none of it is TensorFlow-specific.
2. TensorFlow data pipeline: TensorFlow provides a built-in API that loads the data, applies transformations, and feeds the model. This method works very well especially when you have a large dataset. For instance, image records are known to be enormous and do not fit into memory. The data pipeline manages the memory by itself
What solution to use?
Load data in memory
If your dataset is not too big, i.e., less than 10 gigabytes, you can use the first method. The data can fit into the memory. You can use a famous library called Pandas to import CSV files. You will learn more about pandas in the next tutorial.
Load data with TensorFlow pipeline
The second method works best if you have a large dataset. For instance, if you have a dataset of 50 gigabytes, and your computer has only 16 gigabytes of memory then the machine will crash.
In this situation, you need to build a TensorFlow pipeline. The pipeline will load the data in batch, or small chunk. Each batch will be pushed to the pipeline and be ready for the training. Building a pipeline is an excellent solution because it allows you to use parallel computing. It means TensorFlow will train the model across multiple CPUs. That speeds up computation and makes it practical to train larger networks.
In short: load small datasets into memory with pandas, and use a TensorFlow pipeline when the data is large or when you want parallel loading across multiple CPUs.
How to Create TensorFlow Pipeline
Here are the steps to create a TensorFlow pipeline:
In the example before, we manually added three values for X_1 and X_2. Now, we will see how to load data to TensorFlow:
Step 1) Create the data
First of all, let’s use numpy library to generate two random values.
import numpy as np
x_input = np.random.sample((1,2))
print(x_input)
[[0.8835775 0.23766977]]
Step 2) Create the placeholder
Like in the previous example, we create a placeholder with the name X. We need to specify the shape of the tensor explicitly. In case, we will load an array with only two values. We can write the shape as shape=[1,2]
# using a placeholder
x = tf.placeholder(tf.float32, shape=[1,2], name = 'X')
Step 3) Define the dataset method
Next, we need to define the Dataset where we can populate the value of the placeholder x. We need to use the method tf.data.Dataset.from_tensor_slices
dataset = tf.data.Dataset.from_tensor_slices(x)
Step 4) Create the pipeline
In step four, we need to initialize the pipeline where the data will flow. We need to create an iterator with make_initializable_iterator. We name it iterator. Then we need to call this iterator to feed the next batch of data, get_next. We name this step get_next. Note that in our example, there is only one batch of data with only two values.
iterator = dataset.make_initializable_iterator()
get_next = iterator.get_next()
Step 5) Execute the operation
The last step is similar to the previous example. We initiate a session, and we run the operation iterator. We feed the feed_dict with the value generated by numpy. These two value will populate the placeholder x. Then we run get_next to print the result.
with tf.Session() as sess:
    # feed the placeholder with data
    sess.run(iterator.initializer, feed_dict={ x: x_input })
    print(sess.run(get_next))
[0.8835775 0.23766978]
TensorFlow 1.x vs TensorFlow 2.x: What Changed
TensorFlow 2.0 was a breaking rewrite of the user-facing API. Understanding the difference matters, because a large amount of tutorial code online, including the examples above, targets the 1.x style.
| Concept | TensorFlow 1.x | TensorFlow 2.x |
|---|---|---|
| Execution model | Define the graph, then run it | Eager by default, operations run immediately |
| Feeding data | tf.placeholder plus feed_dict | Pass Python values or tensors directly |
| Running operations | tf.Session().run() | Call the function, no session needed |
| High-level API | tf.estimator | Keras, tf.keras |
| Graph optimisation | Always graph-based | Opt in with the @tf.function decorator |
| Iterating a dataset | make_initializable_iterator() | Plain Python for loop over the dataset |
The multiplication example, rewritten. Three steps and a session become one line, because the operation executes the moment it is called:
import tensorflow as tf

X_1 = tf.constant([1, 2, 3], dtype=tf.float32)
X_2 = tf.constant([4, 5, 6], dtype=tf.float32)

result = tf.multiply(X_1, X_2, name="multiply")
print(result.numpy())        # [ 4. 10. 18.]
The input pipeline, rewritten. No placeholder and no iterator object are required:
import numpy as np
import tensorflow as tf

x_input = np.random.sample((1, 2))
dataset = tf.data.Dataset.from_tensor_slices(x_input)

for batch in dataset:
    print(batch.numpy())
If you need the speed of a compiled graph, wrap the function in @tf.function and TensorFlow traces it into one automatically. Legacy 1.x scripts can also be run unchanged through the tf.compat.v1 namespace, though that path is maintenance only and should not be used for new work.
TensorFlow: Key Takeaways and Code Reference
- TensorFlow meaning: TensorFlow is the most famous deep learning library these recent years. A practitioner using TensorFlow can build any deep learning structure, like CNN, RNN or simple artificial neural network.
- TensorFlow is mostly used by academics, startups, and large companies. Google uses TensorFlow in almost all Google daily products including Gmail, Photo and Google Search Engine.
- The Google Brain team developed TensorFlow to close the gap between researchers and product developers. In 2015, they made TensorFlow public; it is rapidly growing in popularity. Nowadays, TensorFlow is the deep learning library with the most repositories on GitHub.
- Practitioners use TensorFlow because it deploys easily at scale, in the cloud, in the browser, or on mobile devices running iOS and Android.
TensorFlow works in a session. Each session is defined by a graph with different computations. A simple example can be to multiply to number. In TensorFlow, three steps are required:
- Define the variable
X_1 = tf.placeholder(tf.float32, name = "X_1")
X_2 = tf.placeholder(tf.float32, name = "X_2")
- Define the computation
multiply = tf.multiply(X_1, X_2, name = "multiply")
- Execute the operation
with tf.Session() as session:
    result = session.run(multiply, feed_dict={X_1: [1, 2, 3], X_2: [4, 5, 6]})
    print(result)
One common practice in TensorFlow is to create a pipeline to load the data. If you follow these five steps, you’ll be able to load data to TensorFLow:
- Create the data
import numpy as np
x_input = np.random.sample((1,2))
print(x_input)
- Create the placeholder
x = tf.placeholder(tf.float32, shape=[1,2], name = 'X')
- Define the dataset method
dataset = tf.data.Dataset.from_tensor_slices(x)
- Create the pipeline
iterator = dataset.make_initializable_iterator()
get_next = iterator.get_next()
- Execute the program
with tf.Session() as sess:
    sess.run(iterator.initializer, feed_dict={x: x_input})
    print(sess.run(get_next))
