Session Properties in Informatica: Complete Tutorial
Session property is a set of instructions that instructs Informatica how and when to move the data from source to targets.
A session property is a task, just like other tasks that we create in workflow manager. Any session you create must have a mapping associated with it.
A session can have a single mapping at a time and once assigned, it cannot be changed. To execute a session task, it must be added to a workflow.
A session can be a reusable object or non-reusable. When you create a session in task developer, then it can be reused, but when you create a session in workflow designer, then it is non-reusable.
A reusable session can be added to multiple workflows.
Properties Of Session
Using the properties of the session you can configure various characteristics of the session like pre and post SQL scripts, log file name and path, memory properties, etc.
You can also override mapping properties in the session properties. In this section, we will discuss the following important properties of the session.
- Treat source rows as
- Commit Interval
- Session log file Property
- Test Load Property
- Log options
- Error Handling
- Source/Target Properties
- Connections
Step 1) Open the session “s_m_emp_emp_target” in task developer, which we created in the earlier tutorial.

Step 2) Double click on the session icon inside Task Developer to open edit task window.
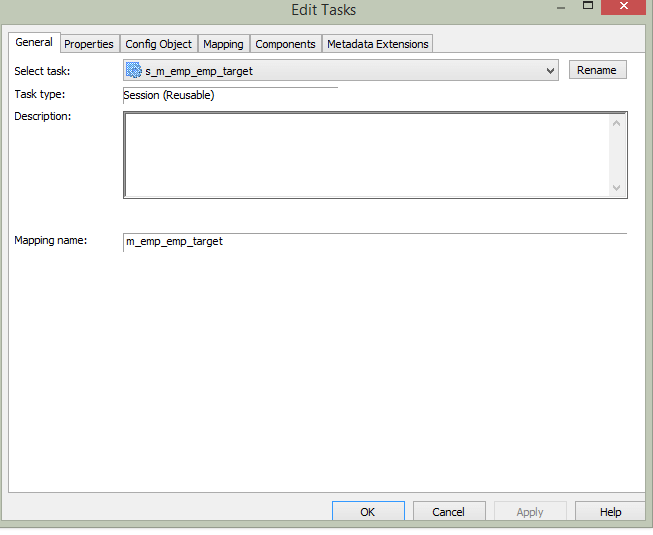
Step 3) Inside the “Edit Task” window clicks on the properties tab.

Step 4) In properties tab, it will show the properties of the session

Treat Source Rows As Property
This property allows you to define how the source data affects the target table. For example, you can define that the source record should be inserted or deleted from the target.
This property has four options –
- Insert
- Update
- Delete
- Data-driven

- When this property is set to insert, the source data will be marked to be inserted. It means the data will only be inserted.
- When the property is set to update, the target data will be updated by the source data. For updating of data primary key needs to be defined in the target table.
- When property is set to delete the source data which is already present in the target will be deleted from the target table. For this property to execute and apply the changes, the primary key should be defined in the target table.
- With the property set to data driven, the Informatica checks what source records are marked. If in a mapping the source records are marked as insert then records will be inserted into the target. If records are marked as an update in the mapping, then the records will be updated in the target. So what operation will be performed at the target depends on how records are handled inside the mapping.
How To Make Treat Source Rows – Delete
Step 1)
- In the property tab of the session task, select “Delete” option in “Treat Source Rows as”
- Select OK Button

Step 2) To define primary key in target table, open Informatica designer
- Open target designer
- Double click on the “emp_target” table

This will open an “Edit Table” for our target table.
Step 3) In the edit window of target table
- For the EmpNo column, select key type as “primary key” from the scroll down menu and
- Select OK button.

Step 4) Save the changes in Informatica and execute the workflow for this mapping.
When you execute this mapping, the source records which are already present in the target will get deleted.
Commit Interval – Property
This property defines the interval after which the Informatica makes commit operation to the target table.
For example, if you are inserting 20,000 records in a target table, and you define commit interval as 5,000, then after every 5,000 insertions of records in the target, a commit operation will be performed.

Session Log File Name & Session Log File directory

Configure this property to modify
- Default session log file name and
- Path of the log file
The $PMSessionLogDir\ is an Informatica variable and in windows it points to the following default location “C:\Informatica\9.6.1\server\infa_shared\SessLogs”.
Enable Test Load
Using this property, you can test your session and mappings. When you use this feature and execute the sessions, records are fetched from the sources but they don’t get loaded into the target. So this feature helps in Testing the correctness of mappings, parameter files, functioning of various transformations inside the mapping.
If you enable this feature, then there is another property – No of Rows to Test, this property should be configured for the no of records which you want to be fetched from the source for the test load.

Memory Properties
Memory properties give us the flexibility to fine tune the memory allocated to the Informatica for performance optimizations. When there are high bottleneck and performance is poor then you can try to improve the performance using the memory properties.
To configure memory properties click on the “config object” tab of the edit task window. It will open another window where you can configure the changes.

In this section, you can configure the memory properties. For example, default buffer block size, sequential buffer length, etc. Changes to this properties will determine how much memory should be allocated to Informatica services for their operation.

Log options

In this property section, you can configure the log properties of the session. You can set the no for how many no of logs you want to save for a session, session log file max size.
Error Handling

In this section, you can configure the error properties for the session.
Using Stop on errors you can configure after how many errors the session has to be stopped.
Using override tracing you can override the mapping tracing levels.
You can also configure the behaviour of the session for various errors encountered for example stored procedure error, pre-post SQL error, etc.
Mapping and Source/Target Properties
In the mapping tab of the edit task window of the session, you can configure the properties related to the mapping and its sources/targets and transformations. With this section of properties, you can override the properties of the source and targets. For the sources and targets we can override the table names, we can apply table name prefixes. Inside the mappings we can configure the properties of various transformations, sources and targets, in addition to that in this section we can also review and override those properties. It’s like a single place to review all those properties.

Connection Properties in Mapping
Using this property, you can define database connections for the source and targets.

Source Properties
In this section, you can configure the properties related to the source of the mapping. You can configure pre and post SQL scripts for the source.
Using SQL query property, you can override the SQL for the source. You can also override the source table name in this section.

Target Properties
In this section, you can configure the details of the target. You can define whether target load has to be a bulk load or a normal mode.
In bulk load, the performance gain is achieved as during the load there are no redo log buffers managed by the database.
On the other hand, normal load is slower as compared to bulk load, but in case of failure database recovery is possible.
You can also define the property to truncate the target table before populating it. It means before loading any records in the target, the target table will be truncated, and then the load will be performed. This property is useful when we create mappings for stage load.
We can also define target table pre SQL and post SQL. Pre SQL is the piece of SQL code which will be executed before performing insert in the target table, and post SQL code will be executed after the load of target table is completed.

Success or Failure Of Session Task
When you have multiple sessions inside a workflow, then there can be a scenario where one or more session fails. In such condition, there comes a question of what would be the status of the workflow because you are having a workflow in which few tasks have failed, and few task got succeeded. To handle such conditions, Informatica provides the option to set this failure specific property inside the workflow. To configure such behaviour –
Step 1) Open the workflow “wkf_run_command”, which we created earlier

Step 2) Double click on the command task, this will open edit task window
- Select the general tab
- Select the check box against property “fail parent if this task fails”
- Select Ok Button

Step 3) Double click on the session task, this will open edit task window
- Select the general tab
- Select the check box against property “fail parent if this task fails”
- Select Ok Button

Step 4) Save the changes using a ctrl+s shortcut.
When you execute this workflow after making the above changes if any of the tasks fails the workflow status will be made as failed. so you can identify that during the execution of your workflow some of its task has failed.