
Jenkins GitHub Integration: How to Install Git Plugin?
 Thomas Hamilton
⚡ Smart Summary
Jenkins GitHub Integration connects an automation server to a source repository so every commit can be built and verified automatically. Installing the Git plugin, creating a Freestyle job, authenticating with a token, and registering a webhook complete the connection.
You have already learned what Jenkins is and how to install it on a Windows system. Assuming those basic steps are complete, we shall now move on to plugin management.
Jenkins has outstanding plugin support. Over a thousand third-party application plugins are available. To check whether Jenkins supports the third-party application you have in mind, search the plugins directory at https://plugins.jenkins.io/.

Installation of Plugins in Jenkins
Jenkins comes with a fairly basic setup, so you need to install the required plugins to enable support for each third-party application.
GitHub is a web-based repository of code that plays a major role in DevOps. It provides a common platform for multiple developers working on the same code or project to upload and retrieve updated code, thereby facilitating continuous integration.
Jenkins needs the Git plugin installed before it can pull code from a GitHub repository. The two plugin names are often confused, so the table below separates them:
| Plugin | What it provides | Required for this walkthrough? |
|---|---|---|
| Git plugin | The Git option under Source Code Management, repository cloning, and branch selection | Yes — this is the essential one |
| GitHub plugin | Webhook handling, the GitHub hook trigger option, and build status reported back to commits | Only for automatic triggering |
You need not install these plugins if you already accepted the suggested plugins during the Jenkins installation setup, since the Git plugin is part of that set. If not, here is how to install them and pull code from a GitHub repository.
How to Install Git Plugin in Jenkins
Following is a step by step process on how to install the Git plugin in Jenkins:
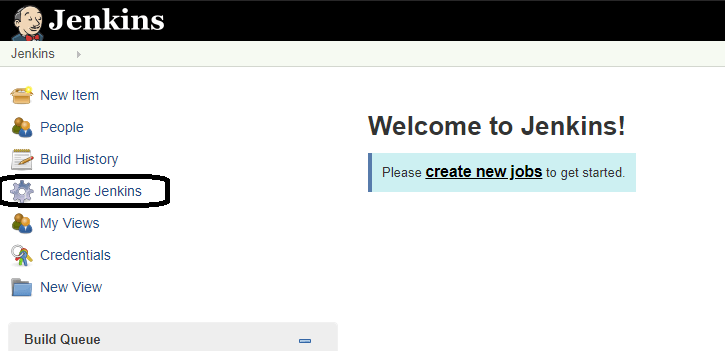
Step 1: Open your dashboard.
Click on the Manage Jenkins button on your Jenkins dashboard:
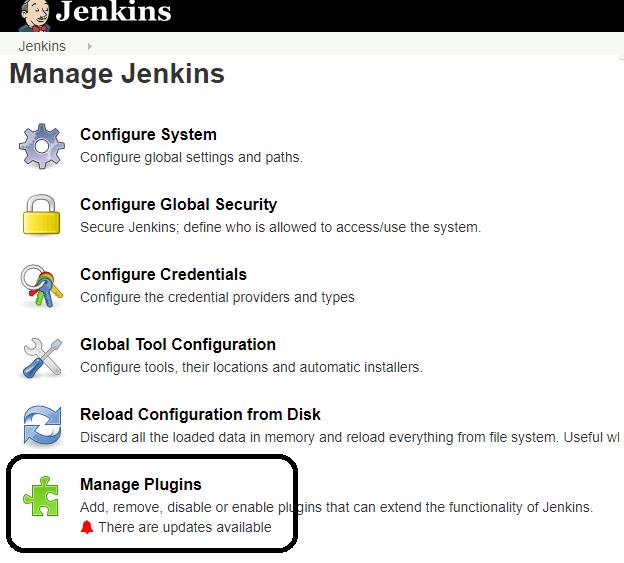
Step 2: Find the plugins option.
Click on Plugins. On current Jenkins releases this entry is labelled simply Plugins; older releases labelled the same screen Manage Plugins.
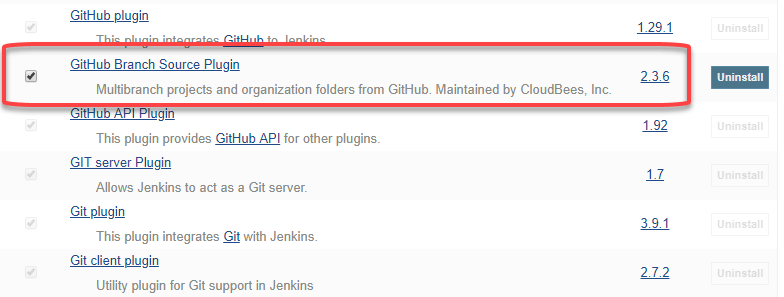
Step 3: On the Plugins page, open the Available plugins tab and then:
- Select the Git plugin
- Click Install without restart. The plugin takes a few moments to download, depending on your internet connection, and is installed automatically.
- You may instead choose Download now and install after restart, in which case the plugin is applied when Jenkins next starts.
- If the plugin is already present, it appears on the Installed tab and no update is offered.

Step 4: Once the plugins have been installed, go to Manage Jenkins > Plugins > Installed. Your new plugins are listed among the rest.
With the plugin in place, Jenkins can now be pointed at an actual repository.
How to Integrate Jenkins With GitHub
We shall now walk through the process of integrating Jenkins and GitHub on a Windows system:
Step 1) Create a new job in Jenkins. Open the Jenkins dashboard at your Jenkins URL, for example http://localhost:8080/, and click New Item:

Step 2) Enter the item name, select the job type, and click OK. We shall create a Freestyle project as an example.
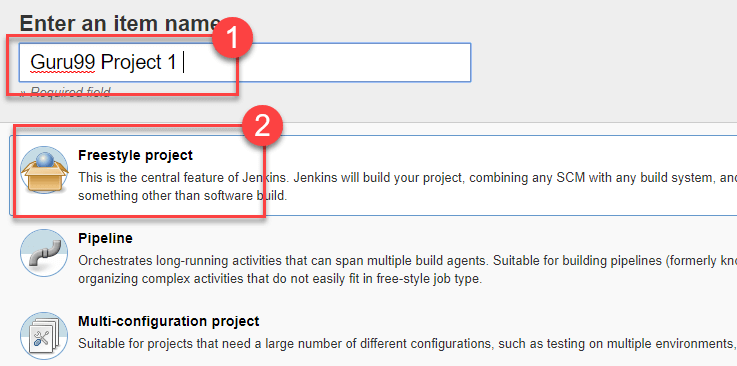
Step 3) Once you click OK, the page redirects to the project configuration form. Enter the project information here:
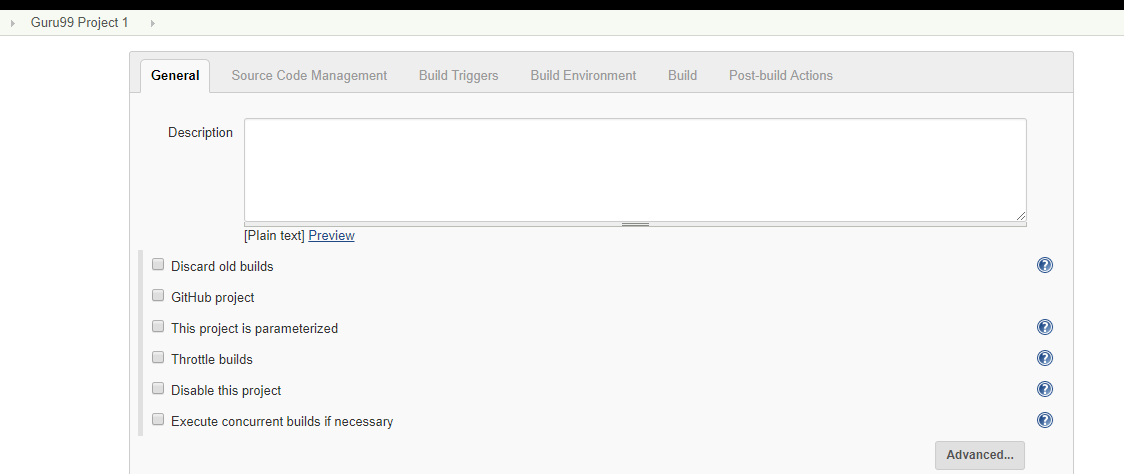
Step 4) You will see a Git option under Source Code Management if the Git plugin has been installed in Jenkins:
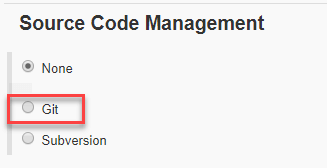
Note: If the Git option does not appear, reinstall the plugin, restart Jenkins, and log in to the dashboard again. The Git option will then be visible as shown above.
Step 5) Enter the Git repository URL to pull the code from GitHub.
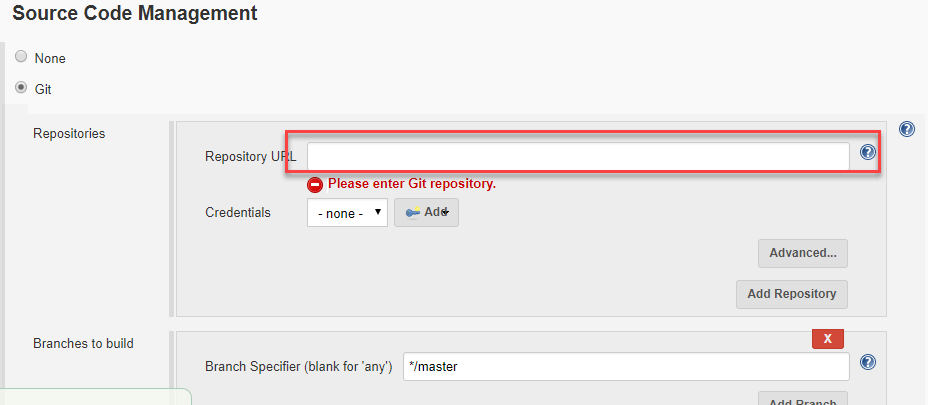
Step 6) You might get an error message the first time you enter the repository URL. For example:
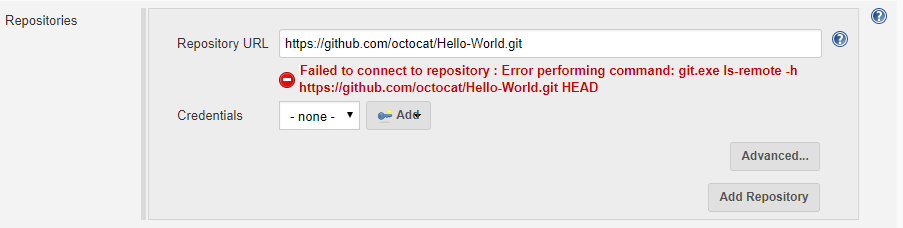
This happens when Git is not installed on the machine running Jenkins. Jenkins does not bundle its own Git binary; the plugin calls the Git executable on the host. To install Git locally, go to https://git-scm.com/downloads.
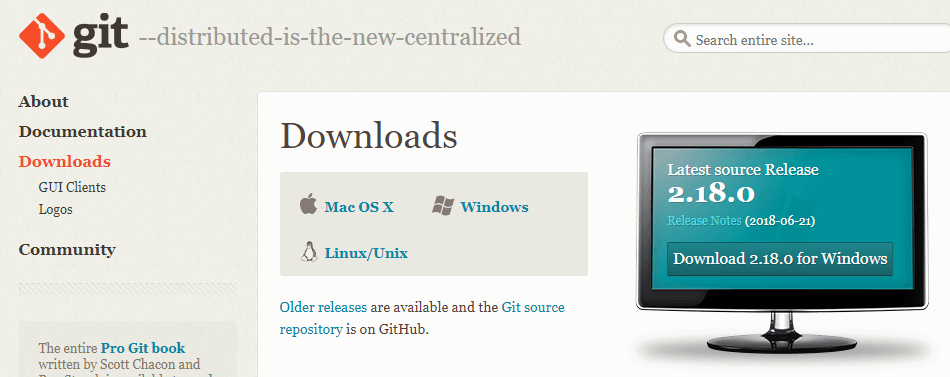
Download the appropriate Git installer for your Operating System — in this case Windows — and install it on the machine running Jenkins. Complete the onscreen instructions to finish the installation.

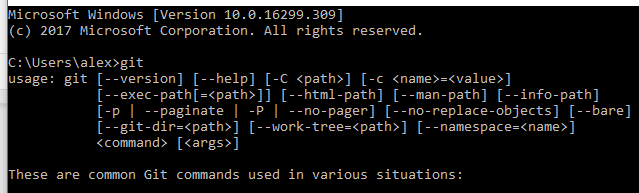
Step 7) Jenkins can execute Git repositories once Git is installed on the machine. To confirm the installation, open a command prompt, type git, and press Enter. A list of Git options appears:
:: Confirm the Git executable resolves and report its version
git --version

:: Expected output
git version 2.51.0.windows.1

:: Show the full path Jenkins should record in Global Tool Configuration
where git
This confirms that Git is installed on your system.
Note: If Git is already installed, add the git.exe path under Manage Jenkins > Tools (labelled Global Tool Configuration on older releases).
Step 8) With everything in place, add the Git URL into Jenkins again. No error message appears, which confirms the Jenkins Git integration:
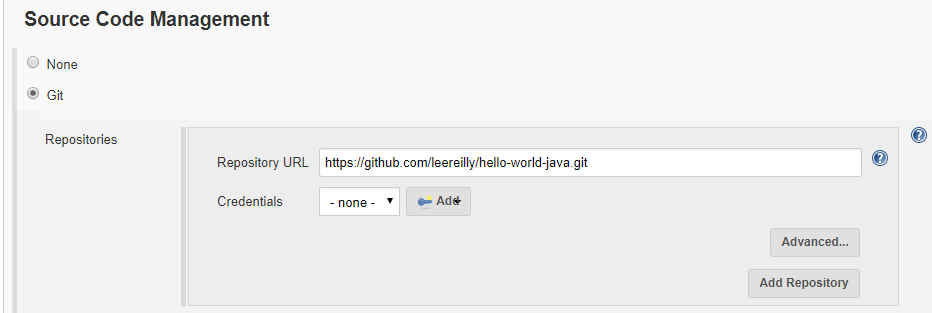
Git is now properly configured on your system. A public repository will clone at this point, but a private one still needs credentials, which is the next step.
How to Authenticate Jenkins With a GitHub Personal Access Token
GitHub stopped accepting account passwords for Git operations in August 2021. Supplying a username and password in Jenkins therefore fails against any private repository with an authentication error, even when the same credentials sign in to the GitHub website. A personal access token replaces the password, and Jenkins stores it in its own credentials store rather than in the job configuration.
Create the token in GitHub first:
- In GitHub, open Settings > Developer settings > Personal access tokens.
- Choose a fine-grained token where possible, because it can be scoped to a single repository, or a classic token if your organisation still requires one.
- Grant read access to repository contents. Add commit status write access only when you want Jenkins to report build results back onto commits.
- Set an expiry date and copy the token immediately — GitHub displays it exactly once.
Then register the token inside Jenkins:
- Go to Manage Jenkins > Credentials > System > Global credentials and click Add Credentials.
- Select Username with password as the kind. Enter your GitHub username, and paste the token into the password field.
- Give the entry a clear ID such as
github-patso it is recognisable in job configuration screens. - Return to the job, open Source Code Management > Git, and select the new credential from the Credentials dropdown.
The red validation error under the repository URL disappears once Jenkins can authenticate. Two practical notes are worth remembering. First, tokens expire; a job that has run reliably for months and suddenly fails on checkout is almost always an expired token rather than a broken repository. Second, an SSH key is a valid alternative — add the private key as an SSH Username with private key credential and use the git@github.com:owner/repo.git URL form instead of the HTTPS form.
How to Trigger Jenkins Builds Automatically With a GitHub Webhook
The job created above still has to be started by hand, which defeats the purpose of continuous integration. A webhook closes that gap: GitHub sends an HTTP request to Jenkins on every push, and Jenkins starts the build immediately.
Jenkins must be reachable from GitHub for this to work. On a laptop running localhost:8080 it is not, so either host Jenkins on a public URL or expose it temporarily through a tunnelling service during testing.
- Install the GitHub plugin. Return to Manage Jenkins > Plugins > Available plugins and install GitHub. This adds the trigger option that the Git plugin alone does not provide.
- Enable the trigger on the job. Open the job configuration, scroll to Build Triggers, and tick GitHub hook trigger for GITScm polling.
- Add the webhook in GitHub. In the repository, open Settings > Webhooks > Add webhook.
- Set the payload URL to your Jenkins address followed by
/github-webhook/. The trailing slash matters. - Set the content type to
application/jsonand choose Just the push event. - Save and test. GitHub sends a ping immediately. A green tick under Recent Deliveries means Jenkins accepted it.
# Payload URL format for the GitHub webhook
https://jenkins.example.com/github-webhook/

# Content type
application/json

# Verify from the Jenkins host that the endpoint answers
curl -I https://jenkins.example.com/github-webhook/
Push a commit to confirm the loop is closed. The job should appear in the build queue within a few seconds without any manual action. If nothing happens, open the webhook in GitHub and read the Recent Deliveries response code: a 403 usually points at Jenkins security settings blocking anonymous access to the endpoint, while a timeout means GitHub cannot reach the Jenkins URL at all.
Once builds trigger automatically, the remaining friction is usually a handful of recurring errors.
Common Jenkins GitHub Integration Errors and Fixes
Nearly every failed integration falls into one of the categories below, and each has a distinct symptom that points straight at the cause.
- No Git option under Source Code Management: the Git plugin is not installed or not loaded. Reinstall it from Manage Jenkins > Plugins, restart Jenkins, and reload the job configuration page.
- “Failed to connect to repository” on a public URL: Git is missing from the Jenkins host. Install Git, then confirm with
git --versionand record the path under Manage Jenkins > Tools. - Authentication failed on a private repository: an account password is being used. Replace it with a personal access token as described above, or switch to an SSH key.
- Builds never start after a push: either the GitHub hook trigger checkbox is unticked, or GitHub cannot reach the Jenkins URL. Check the webhook delivery log in the repository settings.
- Wrong branch is built: the Branch Specifier still holds the default
*/masterwhile the repository usesmain. Update the specifier to match. - Checkout worked yesterday and fails today: the personal access token has reached its expiry date. Generate a replacement and update the stored credential.
Also Check: Best Jenkins Alternatives (Open Source & Paid) and the CI/CD pipeline walkthrough, which builds on the connection established here.
