How to Download and Install Eclipse for Java
 Editorial Team
⚡ Smart Summary
Install Eclipse for Java by downloading the Eclipse IDE from the official website, running the installer, and selecting the Java Developers package. This resource walks through every step, from download to creating a Java project, package, and class, and running your first program.

How to Download and Install Eclipse on Windows
Following is a step-by-step guide to download and install the Eclipse IDE:
Step 1) Installing Eclipse. Open your browser and type https://www.eclipse.org/.

Step 2) Click on the “Download” button.

Step 3) Click on the “Download 64 bit” button.

Step 4) Click on the “Download” button.

Step 5) Install Eclipse.
- Click on “downloads” in Windows File Explorer.
- Click on the “eclipse-inst-win64.exe” file.

Step 6) Click on the Run button.

Step 7) Click on “Eclipse IDE for Java Developers”.

Step 8) Click on the “INSTALL” button.

Step 9) Click on the “LAUNCH” button.

Step 10) Click on the “Launch” button.

Step 11) Click on the “Create a new Java project” link.

Step 12) Create a new Java project.
- Write the project name.
- Click on the “Finish” button.

Step 13) Create a Java package.
- Go to “src”.
- Click on “New”.
- Click on “Package”.

Step 14) Writing the package name.
- Write the name of the package.
- Click on the Finish button.

Step 15) Creating a Java class.
- Click on the package you have created.
- Click on “New”.
- Click on “Class”.

Step 16) Defining the Java class.
- Write the class name.
- Click on the “public static void main (String[] args)” checkbox.
- Click on the “Finish” button.

The HelloWorld.java file will be created as shown below:

Step 17) Click on the “Run” button.

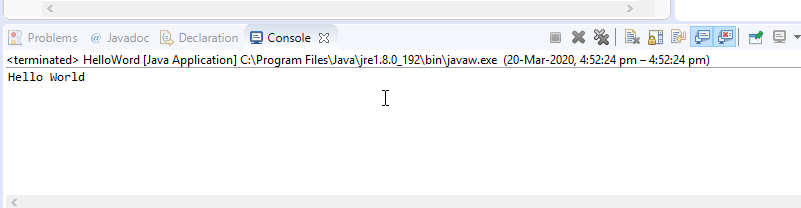
The output will be displayed as shown below.