
AutoIT in Selenium Tutorial: How to use it?
 Krishna Rungta
⚡ Smart Summary
AutoIt in Selenium is a freeware scripting language that automates Windows GUI dialogs and native popups that Selenium WebDriver cannot directly control, making it the go-to helper for file uploads, downloads, and authentication prompts.
What is AutoIt in Selenium?
AutoIt is a freeware scripting language designed for automating Windows GUI and general scripting. It uses a combination of mouse movement, keystrokes, and window control manipulation to automate a task that is not possible by Selenium WebDriver.
How to Download and Install AutoIt
Step 1) Go to this link.
Step 2) Hover on ‘AutoIt’ and ‘AutoIt Editor’ dropdown.

Step 3) Click on ‘AutoIt’ Downloads option.

Step 4) Download “AutoIt” by clicking on ‘Download AutoIt’ button.
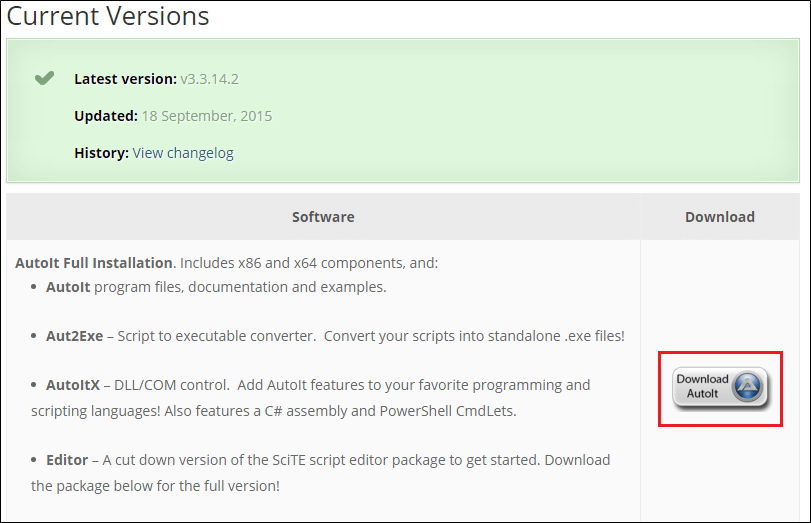
Step 5) Now download “AutoIt editor” by clicking on ‘Downloads’ button.

Step 6) Click on the link as shown below.

After download you will get two setup files as shown in the below screen, first is AutoIt version 3 setup and second is Scitautoit3.

Step 7) For installing AutoIt, click on both AutoIt setups one by one.
Step 8) After successful installation, open up AutoIt Editor.
Go to ‘C:\Program Files (x86)\AutoIt3\SciTE’

And click on ‘SciTE.exe’ file, the AutoIt editor opens as shown in the below screen.

Step 9) Now open element Identifier.
Go to ‘C:\Program Files (x86)\AutoIt3’

And click on ‘Au3Info.exe’ file, the element identifier opens as shown in the below screen.

Note: Once you are done with this element identifier, you need to close it manually; it will not close automatically.
How to Use AutoIt in Selenium
Under this, we will see how to use AutoIt editor and how to find an element on the file uploader window through AutoIt Element Identifier (Element identifier is a tool like Selenium IDE; identifier finds the element of window GUI or non-HTML popups and provides the attribute of the element like title, class, instance) and how to write a script on AutoIt editor using 3 methods.
For Example: We will use the “Write to us” page of Guru99 to upload a resume (Doc file).
After clicking on the ‘Choose File’ button from the “Write to us” page, we need to call the AutoIt script. The control is immediately transferred to AutoIt after clicking ‘Choose File’ by the below statement, which takes care of the uploading part.
Runtime.getRuntime().exec("E:\\AutoIT\\FileUpload.exe");
Finally, when we run the Selenium script, it will fill the form-> upload resume-> submit form.

Step 1) Now open element Identifier. Go to ‘C:\Program Files (x86)\AutoIt3’ and click on ‘Au3Info.exe’ file, the element identifier window opens as shown in the below screen.
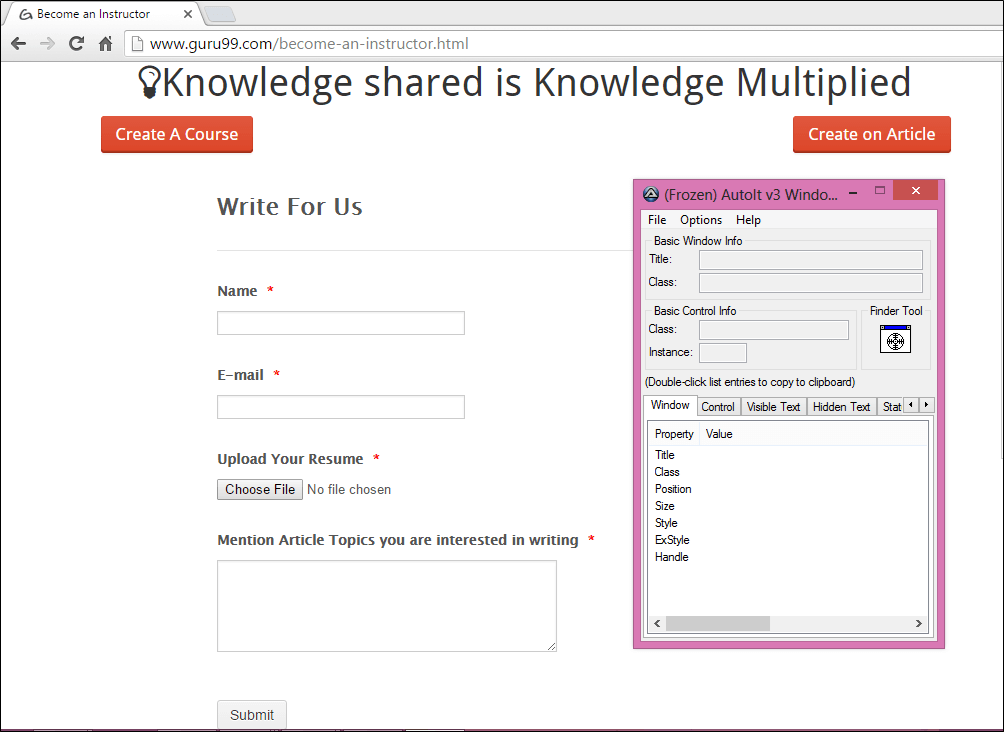
Step 2) Now open file uploader window by clicking on ‘Choose File’ which is a Windows activity.
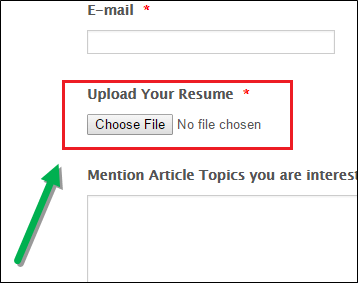
Step 3) Drag the finder tool on the “File Name” box element of the file uploader window to find the basic attributes info as shown in the below screen with the arrow.

We can get the value of attributes, i.e., title=’Open’, class=’Edit’ and instance=’1′ as shown below. These values are used in writing the AutoIt script example as explained in below step 4.

Step 4) Now open AutoIt script editor, go to ‘C:\Program Files (x86)\AutoIt3\SciTE’ and click on ‘SciTE.exe’ as shown in step 7 from the 1st topic.
Start writing a script for selecting a file to upload.
There are lots of methods available which we can use in a script according to the requirement, but right now we will focus on the below methods as these methods are required for writing the file upload script:
- ControlFocus(” title “,” text “,controlID ) //Sets input focus to a given control on a window.
- ControlSetText(” title “,” text “,controlID ,” File path which need to upload ” ) // Sets text of a control.
- ControlClick(” title “,” text “,controlID ) //Sends a mouse click command to a given control.
You can see a number of methods are displayed as shown in the below screen. The good feature of AutoIt is that it is somewhat like Eclipse that suggests some of the methods.

Here in the AutoIt editor, we have selected “control focus” method. Element identifier is already opened and minimized as the element is already identified in above step 3. We can open it by maximizing it.
Now, we will take the values from element identifier for ‘ControlFocus’ and ‘ControlSetText’ methods as these methods work on the same element, i.e., ‘File name’ text box, but for ‘ControlClick’ method we need to capture values of a different element, i.e., ‘Open’ button.
Parameter values for ControlFocus method:
This method sets focus to the ‘File name’ text box of the file uploader window.
- 1st parameter title is ” Open “.
- We ignore the 2nd parameter, the text is not required.
- 3rd parameter controlID is the combination of class=’Edit’ and Instance=’1′, i.e., ‘Edit1.’
ControlFocus("Open","","Edit1") // This method sets input focus to 'File name' text box.

Parameter values for ControlSetText method:
This method is used to define the path of a file which we need to upload in the ‘File name’ text box. In another way, we can say that this method is used to set the text to the input element.
- 1st parameter title is ” Open “.
- We ignore the 2nd parameter, the text is not required.
- 3rd parameter controlID is the combination of class=’Edit’ and Instance=’1′, i.e., ” Edit1 “.
- 4th parameter new text, we pass the path of the file which we need to upload.
ControlSetText("Open","","Edit1","E:\Resume\resume.doc") // This method inputs file path of a control.

After following the above step, do not close the windows (editor and element identifier); keep them open. You again need to open the file uploader window to find attributes of the ‘Open’ Button as shown in below step 5.
Step 5) Now drag the finder tool on the “Open” button element of the file uploader window to find the basic attribute information.
Previous values (i.e., attributes of ‘File name’ text box) overwrite with new values of the ‘Open’ button. You can see the class attribute is now changed to “button” which was previously “edit” in the AutoIt element identifier window.

We can get the value of attributes, i.e., title=’Open’, class=’Button’ and instance=’1′ as shown below. These values are used in writing AutoIt script as explained below.

Parameter values for ControlClick method:
This method clicks on the ‘Open’ button of the file uploader window.
- 1st parameter title is ” Open “.
- We ignore the 2nd parameter; the text is not required.
- 3rd parameter controlID is the combination of class and Instance, i.e., ” Button1 “.
ControlClick("Open","","Button1") //This method clicks on 'Open' button of file uploader.

Step 6) You can see in the below screen that the AutoIt script is completed to handle file uploader. Now you can close the element identifier and save the script as ” FileUpload ” at the given location ( E:\AutoIT ).

Now you cannot execute this script directly; you need to compile this script.
For compiling this script, you have two options “compile script x64” and “compile script x86“. If you have a Windows 32-bit machine then go with “compile script x86” and for a Windows 64-bit machine, go with “compile script x64.”

Step 7) ‘FileUpload exe’ file is generated after compilation; you can see it in the below screen. Now we can use this file in the Selenium WebDriver script.

Now we will use this AutoIt script in Selenium WebDriver. Check below for output.
File Upload in Selenium Using AutoIt
In a Selenium script, we find the elements of the form and fill the data in each element as required and upload the ‘resume.doc’ file by executing the AutoIt exe file generated from the AutoIt script, and then allow to submit the form in the Selenium AutoIt script.
- Open Eclipse and start writing code.
- When Selenium clicks on the Choose File button, the file uploader box opens.
- Then we need to call the AutoIt script; the control is immediately transferred to AutoIt in order to upload a file and then control is sent back to Selenium as shown below.

Step 1) Develop Selenium script in Eclipse.
- Runtime class allows the script to interface with the environment in which the script is running.
- getRuntime() gets the current runtime associated with this process.
- exec() method executes the AutoIt script ( FileUpload.exe ).
Runtime.getRuntime().exec("E:\\AutoIT\\FileUpload.exe");
The above line will call the AutoIt script in Selenium and upload the file.

Step 2) Execute the Selenium script in Eclipse.
importjava.io.IOException;
import org.openqa.selenium.By;
import org.openqa.selenium.WebDriver;
import org.openqa.selenium.firefox.FirefoxDriver;
public class FileUpload {
public static void main(String[] args) throws IOException {
    WebDriver driver=new FirefoxDriver();
    driver.get("https://demo.guru99.com/test/autoit.html");
    driver.findElement(By.id("postjob")).click();

    driver.findElement(By.id("input_3")).sendKeys("Gaurav");
    driver.findElement(By.id("id_4")).sendKeys("test.test@gmail.com");
    driver.findElement(By.id("input_4")).click();
    // below line execute the AutoIT script .
     Runtime.getRuntime().exec("E:\\AutoIT\\FileUpload.exe");
    driver.findElement(By.id("input_6")).sendKeys("AutoIT in Selenium");
    driver.findElement(By.id("input_2")).click();
    driver.close();
     }
}
Step 3) Verify the output; resume.doc file uploaded successfully and a thank you message will be displayed.

Why Use AutoIt?
Selenium is an open source tool that is designed to automate web-based applications on different browsers, but to handle window GUI and non-HTML popups in an application, AutoIt in Selenium is required as these window-based activities are not handled by Selenium.

Moving ahead in this AutoIt tutorial, we will learn how to upload a file in Selenium WebDriver using AutoIt. Here we need three tools in order to do this.
- Selenium WebDriver
- AutoIt editor and element identifier
- The window that you want to automate
