How to Install TestNG in Eclipse
⚡ Smart Summary
Install TestNG in Eclipse using the built-in Install New Software wizard and the official update site at testng.org/eclipse. The nine screenshots below walk you through every dialog, from search to final restart and verification inside the Show View list.

TestNG is a popular open-source testing framework for Java that pairs naturally with Selenium WebDriver. Installing it inside Eclipse takes only a few minutes through the Install New Software wizard and the official site at testng.org/eclipse. The screenshots below were captured against Eclipse 2024-06 with TestNG 7.10, but the same flow works in every recent Eclipse release.
Installing TestNG in Eclipse
Following is a step by step guide on how to install TestNG in Eclipse:
Step 1) Open Eclipse and launch the Install New Software wizard.
Launch Eclipse.
- On the menu bar, click Help.
- Choose the Install New Software… option.

Step 2) Add the TestNG update site and search for the plugin.
In the Work with field, paste https://testng.org/eclipse and press Enter. When the list loads, type TestNG in the filter box, tick the matching entry, and click the install (Next) button.
Step 3) Confirm the install details.
Review the items selected on the Install Details screen and click Next (or Confirm) to proceed.

Step 4) Accept the license agreement.
- Select the radio button I accept the terms of the license agreement.
- Click Finish.
Download time depends on your internet connection.

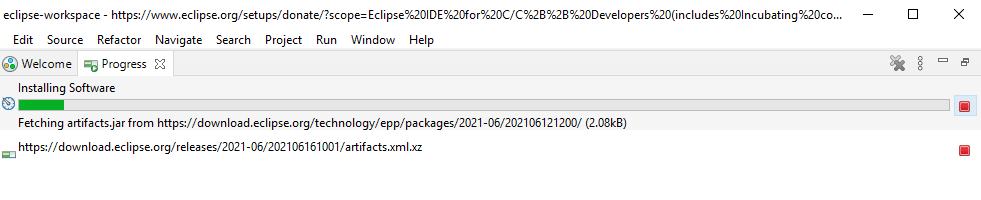
Step 5) Wait for Eclipse to download and install the plugin.
A progress bar appears at the bottom of the Eclipse window while the installer downloads the TestNG bundle.
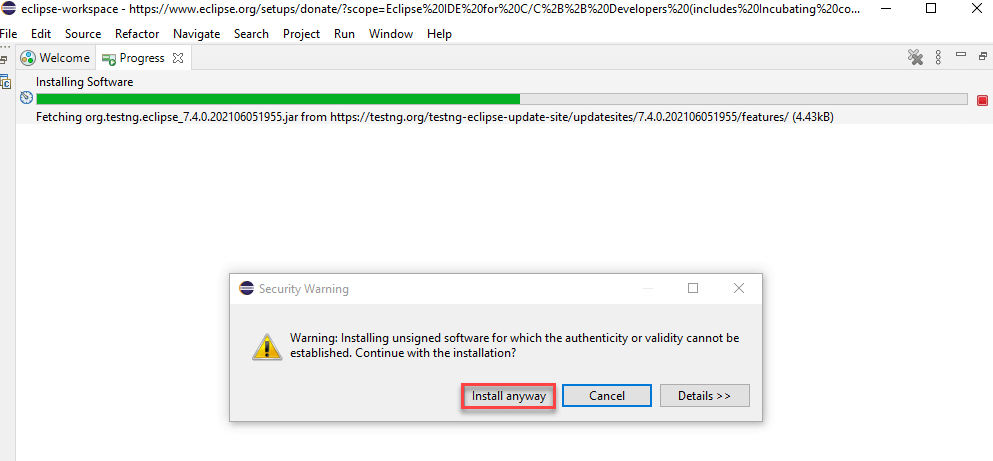
Step 6) Ignore the unsigned-content security warning.
If Eclipse displays a security dialog about unsigned content from the TestNG update site, click Install Anyway to continue.
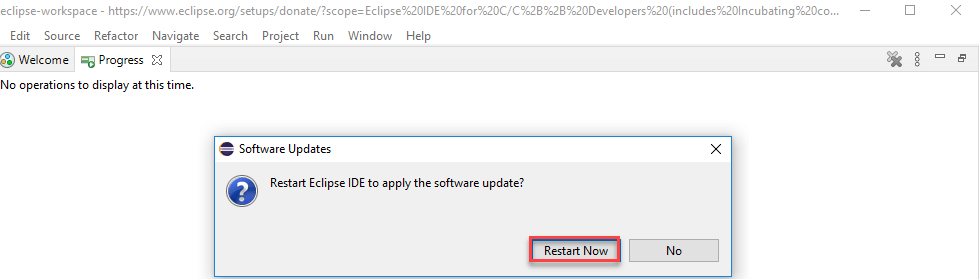
Step 7) Finish the installation and restart Eclipse.
When the install finishes, Eclipse prompts you to restart. Click Restart Now so the TestNG plugin loads into the workbench.
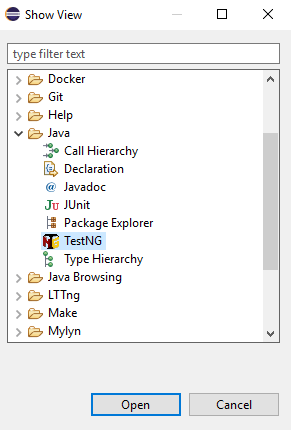
Step 8) Verify the installation through the Show View dialog.
After the restart, confirm TestNG is registered. Click Window > Show View > Other.
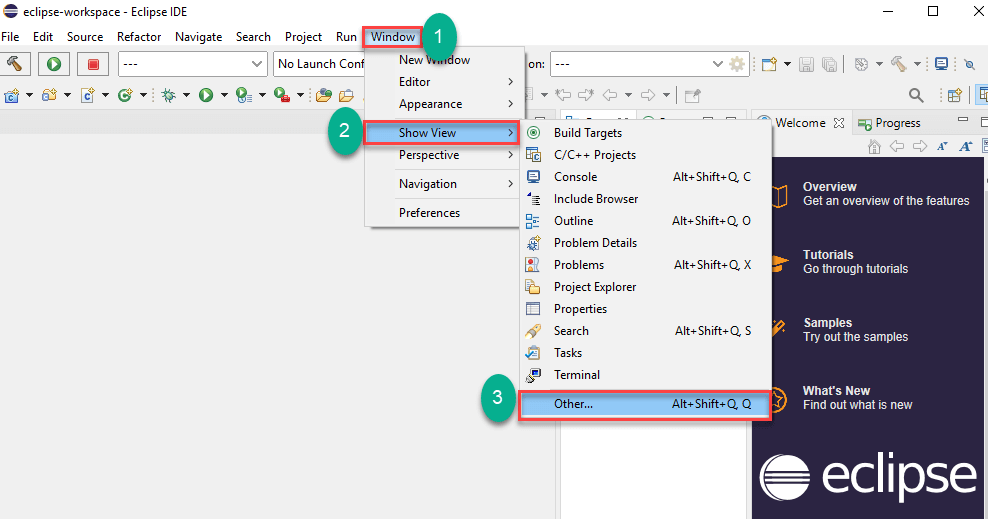
Expand the Java directory and confirm that TestNG appears in the list. Select it to open the TestNG results view.
That covers how to add TestNG to Eclipse and verify it loaded correctly.
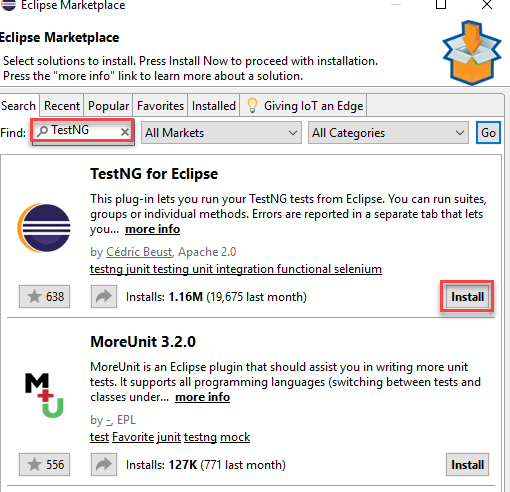
Alternative: install TestNG from the Eclipse Marketplace
If you prefer a one-click flow, the Eclipse Marketplace also lists TestNG. Open Help > Eclipse Marketplace…, type TestNG for Eclipse into the Find box, and click Install next to the matching tile. Eclipse handles the same license-acceptance, security-warning, and restart dialogs that the manual update-site flow uses. The Marketplace path is convenient on machines where the proxy blocks adding arbitrary update sites, since the Marketplace catalog is signed by the Eclipse Foundation. After restart, verify the plugin through Window > Show View > Other > Java > TestNG, exactly as in Step 8.
Troubleshooting common TestNG install errors
A handful of errors trip up new installs. The list below maps each symptom to a fix:
- “No repository found at testng.org/eclipse”: verify the URL has https, no trailing slash, and that a corporate proxy is not stripping it. Configure proxy under Window > Preferences > General > Network Connections.
- Plugin not visible after restart: open Help > About Eclipse > Installation Details and confirm TestNG appears under Installed Software. If not, rerun the wizard.
- Java version mismatch: TestNG 7.x requires Java 11 or higher. Point Eclipse at a JDK 17 install via Window > Preferences > Java > Installed JREs.
- TestNG view missing: open Window > Reset Perspective so the new view registers in the current layout.
- Eclipse hangs at “Calculating requirements and dependencies”: disable other update sites temporarily under Available Software Sites and retry.