How to Execute Payroll in SAP
In this tutorial, we will learn Execute Payroll in SAP
How to Execute Payroll in SAP
Before you proceed ahead executing payroll, make sure that control record is set to released status in your SAP system
Step 1) In the SAP command prompt, Enter transaction PC00_MXX_CALC, where XX = Molga of the country for which you want to execute payroll.
Step 2) In the next SAP screen,
- Enter Payroll Area
- Select Current Period
- You can also select other period and run payroll for a period other than the current period.
Step 3) Select the correct Schema
Step 4) Under Log, Flag the Display log checkbox.
Step 5) Under Remuneration statement parameters
- For a SMALL number of employees, tick the “Display Variant Rem. Statement” field and select the appropriate variant
- For a LARGE number of employees, tick “No Remuneration Statement” since there is a high chance of a ABAP dump Error
Step 6) Click Execute Check the Display Log for the results of the Payroll Run. It gives summary of total number of employees run, employees in error and employees successful.
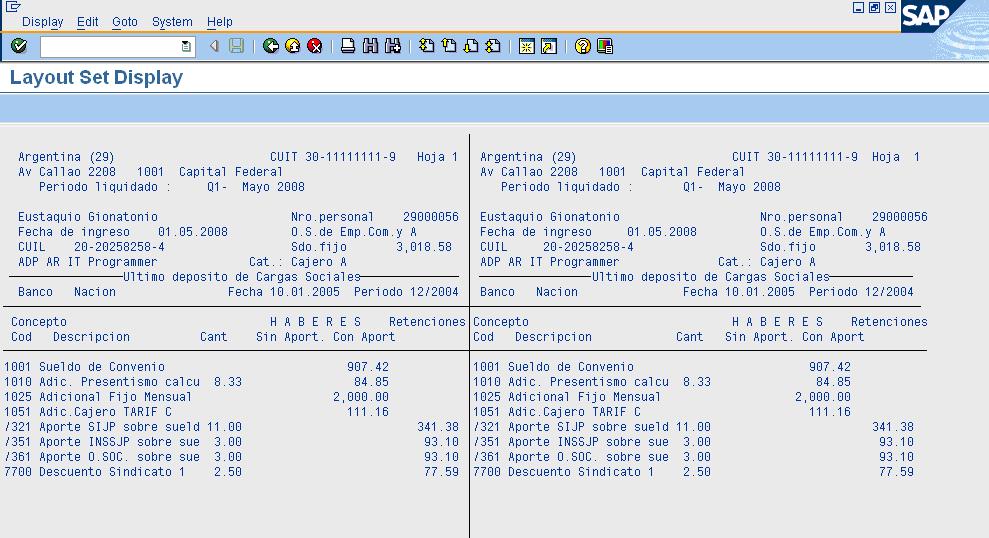
If you selected Remuneration statement in the previous selection screen, you can view this by clicking on the Form button.
Step 7) Remuneration Statement
You can also run payroll in Simulation (Test Mode) using transaction PC00_MXX_CALC_SIMU (XX = Molga). Test Mode simulates the actual payroll run but does not update the payroll tables. It is helpful in determining and correcting errors before you perform actual (live) payroll run
How to Execute Payroll in Background
When running payroll for large employee range it is advisable to process it in the background.
Step 1) In SAP Command Prompt, Enter Transaction PC00_MXX_CALC, where XX = Molga of the country for which you want to run the payroll.
Step 2) Enter the Payroll Area and Payroll Schema
Step 3) In SAP Menu Bar, Click
- Program
- Execute in Background
Step 4) In the SAP -Output Device Dialog Box
- Enter Device as LOCL (local)
- Click the check mark
Step 5) An Information message stating Format is set to X_65_132 is shown. Click Check Mark to proceed ahead.
Step 6) Click Immediate and then click the save button so the job is scheduled instantaneously. Alternatively you can also specify a date and time to run the job.
Step 7) Go To Transaction SM37 to check your Job.


