
Calabash Android Testing Tool Tutorial
 Editorial Team
⚡ Smart Summary
Calabash is an open-source acceptance testing framework that drives real user interface actions on Android and iOS applications, using plain-English Cucumber scenarios backed by Ruby step definitions and a device-side test server.
What is Calabash?
Calabash is an open-source Acceptance Testing framework that allows you to write and execute tests for iOS and Android Apps.
It is an Automated User Interface Framework that allows tests to be written in Ruby using Cucumber.
Calabash works by enabling automatic UI interactions within a Mobile application such as pressing buttons, inputting text, validating responses, etc. It can be configured to run on different Android and iOS devices, which provides real-time feedback and validations.
⚠️ Version note: Microsoft ended its contributions to Calabash after the final iOS 11 and Android 8 releases, and the calabash-android repository now describes itself as a project looking for a maintainer. The walkthrough below is preserved as written, and the modern replacements are covered in the last section.
Why Calabash Automation?
Before installing anything, it helps to weigh what the framework gives back against what it costs to maintain.
| Advantages | Disadvantages |
| It helps to increase throughput/ productivity. | Proficiency is required to write the automation test scripts. |
| Improved quality or increased predictability of quality | Debugging the test script is a major issue. |
| Improved robustness (consistency) of processes or products. | Test maintenance is costly in case of playback methods. |
| Increased consistency of output and reduce labor costs and expenses | Maintenance of test data files is difficult if the test script tests more screens |
Calabash and BDD
- Calabash is Behavior Driven Development (BDD). It is same as Test Driven Development (TDD), but instead of creating tests to describe the shape of APIs, application behavior is specified.
- BDD is a process in which multiple stakeholders weigh in to create a common understanding of what has to be built.
- BDD is helpful in building the right software and designing from the perspective of the business owner.
The diagram below shows how a Calabash suite is layered, from the business-readable feature file at the top down to the device interaction at the bottom.

How to install Calabash
Calabash on Windows needs four prerequisites installed in order. Complete each part fully before starting the next one, because the calabash-android gem checks for Ruby and the Android SDK during installation.
Part I) Install Java JDK – Refer to this guide – /install-java.html
Part II) Download and install Ruby.
Step 1) Download Ruby from the URL https://rubyinstaller.org/downloads

Step 2) Open the exe, follow the instructions on the screen. Once install is complete you will see the following screen. Click Finish.

Start Command Prompt with Ruby on Windows 10 & type below Command.
ruby -v
The console prints the installed interpreter version, as shown below.

Part III) Download and install Android
Step 1) Download Android Studio at https://developer.android.com/studio

Step 2) Open the exe, follow the on-screen instructions and complete installation. Click the finish button once done

Part IV) Install Calabash Android
Step 1) In the console type gem install calabash-android. The install will start and will take some time to complete

Step 2) Once installation is done Type calabash-android version

Working with Calabash
With the gem installed, the next task is to locate the framework folder and understand the skeleton it ships with.
Open the “calabash-android-0.9.0” folder. It resides at path C:\Ruby23\lib\ruby\gems\2.3.0\gems\calabash-android-0.9.0. The folder names will change in synch with the ruby/ calabash version you install on your machine.
Open the feature skeleton folder. Look out for this basic framework.

- The *.feature file contains scenarios that we are going to automate.
- The method used by the feature file is written in *.rb file inside “step_definitions” folder.
- Common methods, environment setup, app installation and hooks should be placed inside “support” folder.
Resign & Build the app
- Calabash-android resign *.apk
- Calabash-android build *.apk
Resigning replaces the developer signature with a debug key so the test server may instrument the application, and the build step produces that test server, as the console output below shows.

Attach the device to the system /Open the emulator
Check device attached. Type command
adb devices
Attached devices list should be displayed. If the device is missing, the USB debugging and pairing steps in the ADB connect guide resolve most cases.

How to Find the Element Locator
- Open the console. Type the Command.
calabash-android console "APK Path"
start_test_server_in_background
- Above command launch the app on the device. To find the element locator use following command.
query "*"
This will display all the element locators on the current screen. Testers who prefer a visual inspector can cross-check the same hierarchy with uiautomatorviewer.

Calabash Project Structure and Predefined Steps
Rather than copying the gem folder by hand, the framework can generate a working project for you. Running the generator inside your project directory creates the standard Cucumber layout that every Calabash suite expects.
calabash-android gen
The generated tree separates the three concerns of a BDD suite:
- features/ — the Gherkin scenarios, one .feature file per user journey.
- features/step_definitions/ — the Ruby methods that match each Gherkin line, including the bundled calabash_steps.rb.
- features/support/ — environment configuration and the hooks that install, launch and shut down the application around every scenario.
The bundled calabash_steps.rb matters more than it first appears. It ships a large set of ready-made English steps, so a first scenario can press buttons, enter text and assert on visible strings before a single custom method is written. Custom steps are only needed once a journey outgrows those canned phrases.
Two project-level settings are worth knowing early. Screenshots land in the current working directory by default, and the SCREENSHOT_PATH environment variable redirects them elsewhere, which keeps build artefacts tidy on a shared machine. Interacting with system dialogs or another application requires the UIAutomator2 backend, started with start_test_server_in_background(with_uiautomator: true).
Creating New Scripts
Open the feature file and following lines

Feature: Login feature
  Scenario: As a valid user I can log into my app
    When I press "Login"
    And I enter my username
    And I enter my password
    Then I see "Welcome to coolest app ever"
Open the Step Definition file & Define the method into *.rb file.

Given /^I am on the login windows$/ do
   wait_for(:timeout =>100) { element_exists("* id:'loginInput;")}
   check_element_exists("* id:'loginInput;")
end
Execute the test project
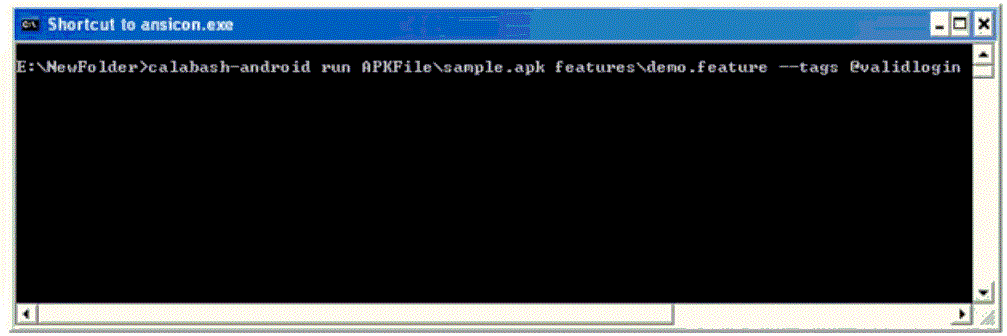
To execute the test project, use command below
calabash-android run "APK Path" "feature file Path" --tags "tag name"
Cucumber prints each step as it executes, and a passing run ends with the scenario and step totals shown here.

Common Calabash Errors and How to Fix Them
Most first-run failures come from the packaging and permission rules the test server depends on, not from the scenario itself. The table below maps the symptoms reported most often to their documented cause.
| Symptom | Likely cause and fix |
| The application crashes the instant a test starts | The APK is missing android.permission.INTERNET, which the test server needs to accept commands. Declare the permission in AndroidManifest.xml and rebuild. |
| Buttons and text refuse to respond to taps | No targetSdkVersion is declared. Add a uses-sdk entry naming the SDK level the application was built against. |
| The test server cannot connect to the application | The APK was not resigned with the debug key. Run the resign command, then build again before running. |
| No devices are listed at run time | USB debugging is off or the driver is missing. Confirm the serial number appears in the adb devices output first. |
| Steps fail with an undefined step error | The Gherkin wording does not match any regular expression in step_definitions. Copy the suggested snippet Cucumber prints and implement it. |
Two manifest entries fix the first two rows. Add them before resigning the APK.
<uses-permission android:name="android.permission.INTERNET" />
<uses-sdk android:targetSdkVersion="SDK_VERSION" />
Timeout failures are usually environmental rather than functional. A slow emulator, a cold application start or a background sync can all push a screen past the wait_for window, so raise the timeout before rewriting a step that was actually correct.
Is Calabash Still Maintained? Alternatives for Modern Mobile Testing
Calabash is no longer actively developed. Microsoft stopped contributing after supporting the final iOS 11 and Android 8 releases, and the project is now an archived open-source code base without a maintainer. Existing suites still run on older devices, but new work should start on a supported framework.
| Framework | Platform | Best suited to |
| Appium | Android and iOS | Cross-platform suites in Java, Python, Ruby or JavaScript, and the closest replacement for a Calabash team. |
| Espresso | Android only | Fast in-process tests written in Kotlin or Java by the application developers themselves. |
| XCUITest | iOS only | Native Xcode suites, the supported successor to the retired UIAutomation framework. |
| Maestro and Detox | Android and iOS | Newer open-source projects aimed at flake resistance and React Native applications. |
The BDD habit itself transfers cleanly. Gherkin feature files stay exactly as they are, and only the step definition bodies change, because Cucumber sits above the driver rather than inside it. Teams migrating usually keep the feature files, rewrite the Ruby steps against Appium, and reuse the same mobile testing device matrix and automation testing pipeline they already run.
