
ASP.NET Hello World Program with Example
 Editorial Team
⚡ Smart Summary
ASP.NET First Program walks through building a simple Hello World web application in Visual Studio, from creating an empty Web Forms project and adding a web form to writing Response.Write and viewing the output in the browser.
Prerequisites for Your First ASP.NET Program
Before building the Hello World application, make sure your environment is ready. You will need the following:
- Visual Studio – the free Community edition is enough, installed with the “ASP.NET and web development” workload.
- The .NET Framework – required for Web Forms and installed automatically with Visual Studio.
- Basic C# and HTML knowledge – helpful for understanding the code you will write.
- A Windows machine – classic ASP.NET Web Forms runs on Windows with IIS or IIS Express.
Once these are in place, you can follow the steps below to create and run your first ASP.NET program.
ASP.NET Hello World Program with Example
Let’s look at an example of how we can implement a simple “hello world” application. For this, we would need to implement the below-mentioned steps.
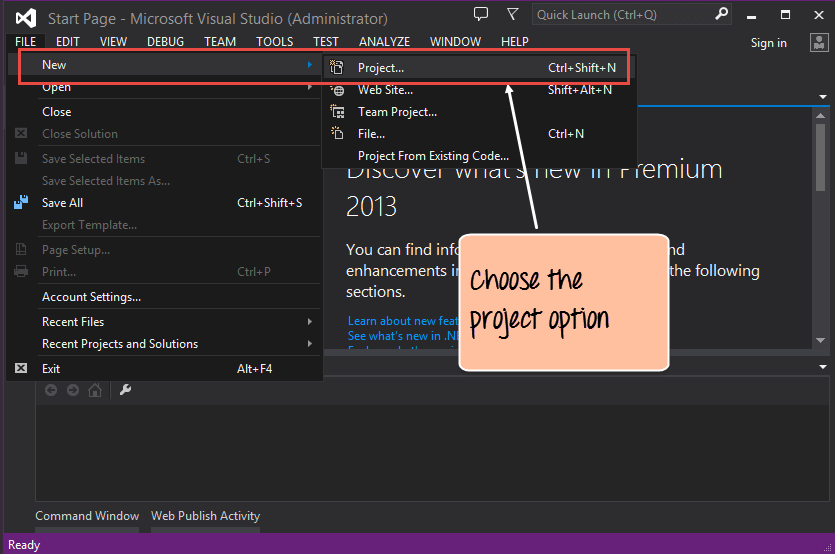
Step 1) The first step involves the creation of a new project in Visual Studio. After launching Visual Studio, you need to choose the menu option New->Project.
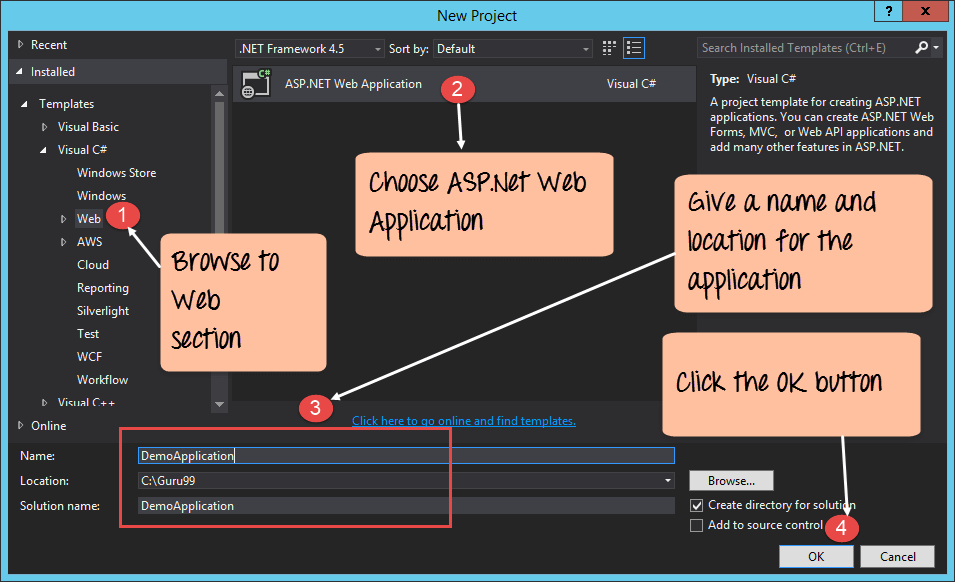
Step 2) The next step is to choose the project type as an ASP.Net Web application. Here we also need to mention the name and location of our project.
- In the project dialog box, you can see various options for creating different types of projects. Click the Web option on the left-hand side.
- When we click the Web option in the previous step, we will be able to see an option for ASP.Net Web Application. Click this option.
- We then give a name for the application, which in our case is DemoApplication. We also need to provide a location to store our application.
- Finally, we click the ‘OK’ button to let Visual Studio create our project.
Step 3) In the next screen, you have to choose the type of ASP.net web application that needs to be created. In our case, we are going to create a simple Web Form application.
- First, choose the project type as ‘Empty’. This will ensure that we start with a basic application which is simple to understand.
- We choose the option “Web Forms”. This adds the basic folders that are required for a basic Web Forms application.
- Finally, we click the ‘OK’ button to allow Visual Studio to create our application.

If the above steps are followed, you will get the below output in Visual Studio.
Output:-
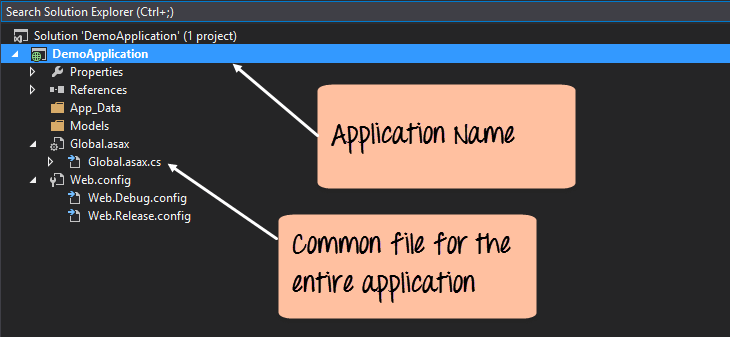
In the Solution Explorer, you will be able to see the DemoApplication solution. This solution will contain 2 project files as shown above. At the moment, one of the key files in the project is the Global.asax.cs. This file contains application-specific information. In this file, you would initialize all application-specific variables to their default values.
Step 4) Now, it’s time to add a Web Form file to the project. This is the file which will contain all the web-specific code for our project.
- Right-click on the DemoApplication project, and
- Choose Add->Web Form from the context menu.
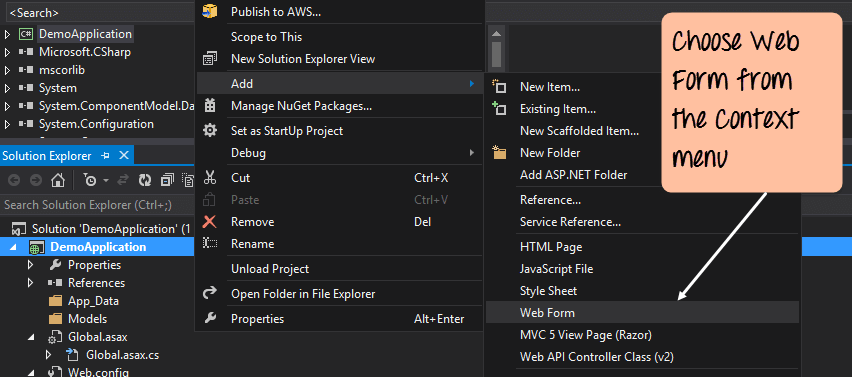
Step 5) In the next screen, we are going to be prompted to provide a name for the web form.
- Give a name for the Web Form. In our case, we are giving it the name Demo.
- Click the OK button.
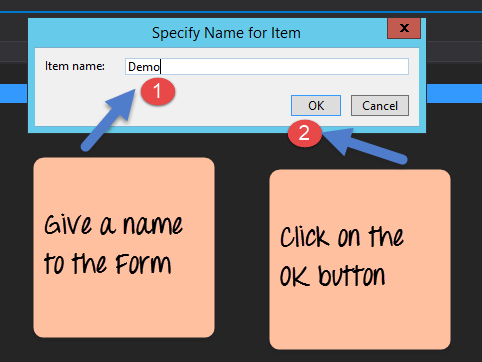
Automatically, Visual Studio will create the Demo Web Form and will open it in Visual Studio.
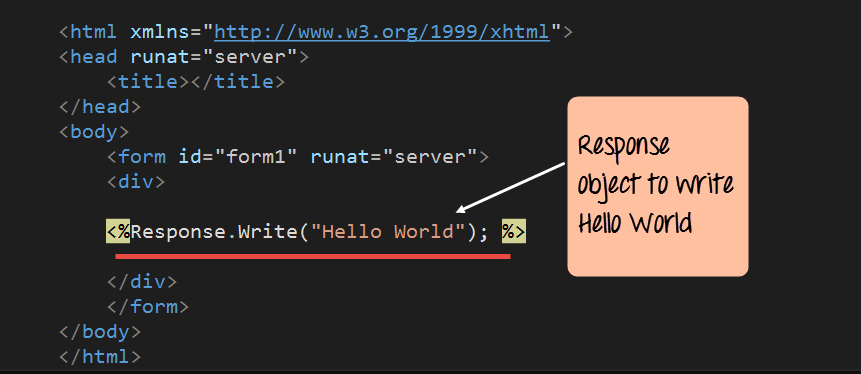
Step 6) The next step is to add the code which will do the work of displaying “Hello World.” This can be done by just adding one line of code to the Demo.aspx file.
<html xmlns="http://www.w3.org/1999/xhtml">
<head runat="server">
	<title></title>
</head>
<body>
	<form id="form1" runat="server">
	<div>

	<% Response.Write("Hello World"); %>

	</div>
	</form>
</body>
</html>
Code Explanation:-
- The Response object in ASP.Net is used to send information back to the user. So in our case, we are using the method “Write” of the Response object to write the text “Hello World.” The <% and %> markers are used to add ASP.net-specific code.
If you follow all of the above steps and run your program in Visual Studio, you will get the following output.
Output:-
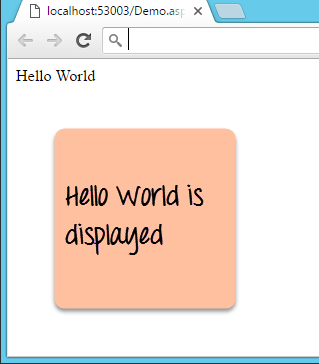
From the output, you can clearly see that ‘Hello World’ was displayed in the browser.
Understanding the Hello World Code
The Demo.aspx file is a standard HTML page with a few ASP.NET additions. The runat="server" attribute tells ASP.NET to process the element on the server rather than treating it as plain HTML. The <% %> markers, called a render block, let you run C# code directly in the page. Inside them, Response.Write("Hello World") sends the text straight to the browser as part of the HTTP response.
While Response.Write is fine for a first example, most real applications use a server control instead. For example, you can drop a <asp:Label> control on the page and set its Text property in the code-behind file. This keeps the markup and logic separated and is easier to maintain as the page grows.
Common Errors When Running Your First ASP.NET Program
Beginners often hit a few predictable issues when running their first ASP.NET page. Watch out for the following:
- Missing runat=”server” – without it on the form and controls, ASP.NET treats them as static HTML and server code does not run.
- Wrong project type – choosing an MVC or Core template instead of Web Forms changes the file structure and the steps above.
- Syntax typos – a missing semicolon or bracket inside the <% %> block causes a build error.
- Port or IIS Express issues – if the page will not launch, restart IIS Express or change the project’s port.
- Case sensitivity – method names like Response.Write must match exactly, since C# is case-sensitive.
