VB.Net ComboBox Control with EXAMPLE
⚡ Smart Summary
ComboBox in VB.Net is a Windows Forms control that combines a text box with a drop-down list, letting the user pick a single item or type one, saving space on a form.

What is Combobox Control?
The combobox control helps you to display a drop-down list with many items. See it as a combination of a textbox in which a user enters text and a dropdown list from which a user selects an item. Note that the combobox shows one item at a time.
Creating a Combobox
A ComboBox can be created as follows:
Step 1) Create a new Application.
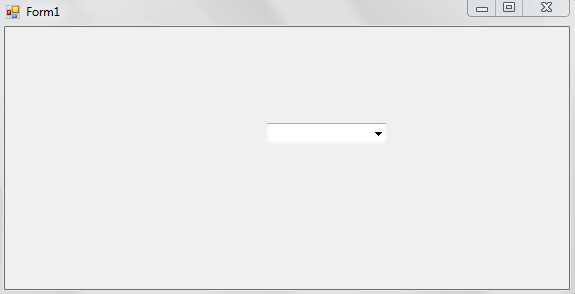
Step 2) Drag a combobox control from the toolbox to the form.

You will have created a combobox control.
Adding Items to Combobox
Now that we have created a combobox, let us demonstrate how to add items to it.
Double click the combobox control that you have added. You will be moved from the design tab to the tab with code.
To add an item to a combobox control, we use the Items property. Let us demonstrate this by adding two items to the combobox, Male and Female:
ComboBox1.Items.Add("Male")
ComboBox1.Items.Add("Female")
We can also choose to add items to the combobox at design time from the Properties window. Here are the steps:
Step 1) Open the design tab and click the combobox control.
Step 2) Move to the Properties window and view the Items option.
Step 3) Click the … located to the right of (Collection).


Step 4) You will see a new window. This is where you should add items to the combobox, as shown below:

Step 5) Once done with typing the items, click the OK button.
Step 6) Click the Start button from the top toolbar and click the dropdown icon on the combobox.

The items were successfully added to the combobox control.
Selecting Combobox Items
You may need to set the default item that will be selected when the form is loaded. You can achieve this via the SelectedItem() method. For example, to set the default selected gender to Male, you can use the following statement:
ComboBox1.SelectedItem = "Male"
When you run the code, the combobox control should be as shown below:
Retrieving Combobox Values
You can get the selected item from your combobox. This can be done using the text property. Let us demonstrate this using our above combobox with two items, that is, Male and Female. Follow the steps given below:
Step 1) Double click the combobox to open the tab with VB.Net code.
Step 2) Add the following code:
Public Class Form1
    Private Sub ComboBox1_SelectedIndexChanged(sd As Object, evnt As EventArgs) Handles ComboBox1.SelectedIndexChanged

        Dim var_gender As String

        var_gender = ComboBox1.Text

        MessageBox.Show(var_gender)

    End Sub
End Class
Step 3) Click the Start button from the toolbar to execute the code. You should get the following form:

Step 4) Click the dropdown button and choose your gender. In my case, I choose Male, and I get the following:

Here is a screenshot of the code:
Explanation of Code:
- Creating a class named Form1. The class will be publicly accessible since its access modifier has been set to Public.
- Starting a sub-procedure named ComboBox1_SelectedIndexChanged. This is generated automatically when you double click the combobox control from the design tab. This sub-procedure will be invoked when you select an item from the combobox. The sd As Object references the object that raised the event, while the evnt As EventArgs holds the event data.
- Creating a String variable named var_gender.
- Setting the value of variable var_gender to the item that is selected on the combobox.
- Printing the value of the variable var_gender on a MessageBox.
- End of the ComboBox1_SelectedIndexChanged sub-procedure.
- End of the Form1 class.
Removing Combobox Items
It is possible for you to remove an item from your combobox. There are two ways through which you can accomplish this. You can use either the item index or the name of the item.
When using the item index, you should use the Items.RemoveAt() property as shown below:
ComboBox1.Items.RemoveAt(1)
In the above example, we are removing the item located at index 1 of the combobox. Note that combobox indexes begin at index 0, meaning that the above command will remove the second item of the combobox.
To remove the item using its name, you should use the Items.Remove() property as shown below:
ComboBox1.Items.Remove("Female")
The above code should remove the item named Female from the ComboBox1.
Binding DataSource
A ComboBox can be populated from a Dataset. Consider the SQL Query given below:
select emp_id, emp_name from employees;
You can create a datasource in a program then use the following code to bind it:
comboBox1.DataSource = ds.Tables(0)
comboBox1.ValueMember = "emp_id"
comboBox1.DisplayMember = "emp_name"
This will provide you with an easy way of populating your combobox control with data without having to type each individual item.
SelectedIndexChanged event
You will often want your program to react the moment the user picks a new value.
This type of event is invoked when you change the selected item on your combobox. It is the event you should use when you need to implement an action upon a change on the selected item of a combobox. Let us demonstrate this by use of an example:
Step 1) Create a new Windows Forms Application.
Step 2) After that you need to drag and drop two combobox controls into the form.

Step 3) Double click inside the form to open the tab for code. Enter the following code:
Public Class Form1
    Private Sub Form1_Load(sd As Object, evnt As EventArgs) Handles MyBase.Load

        ComboBox1.Items.Add("Males")

        ComboBox1.Items.Add("Females")

    End Sub

    Private Sub ComboBox1_SelectedIndexChanged(sender As Object, e As EventArgs) Handles ComboBox1.SelectedIndexChanged

        ComboBox2.Items.Clear()

        If ComboBox1.SelectedItem = "Males" Then

            ComboBox2.Items.Add("Nicholas")

            ComboBox2.Items.Add("John")

        ElseIf ComboBox1.SelectedItem = "Females" Then

            ComboBox2.Items.Add("Alice")

            ComboBox2.Items.Add("Grace")

        End If
    End Sub
End Class
Step 4) Click the Start button from the top bar to run the code. You should get the following output:

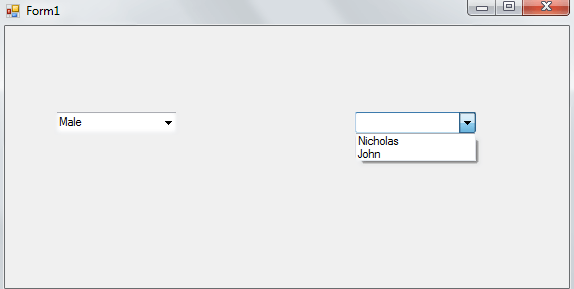
Step 5) Click the dropdown button on the first combobox and choose Male. Move the mouse cursor to the second combobox and click its dropdown button. See the available items:
Step 6) Move to the first combobox and choose Female. Move to the second combobox and see the available items:

Here is a screenshot of the code:

Explanation of Code:
- Creating a class named Form1.
- Start of a sub-procedure named Form1_Load(). This will be triggered once the form is loaded. The sd As Object references the object that raised the event, while the evnt As EventArgs holds the event data.
- Adding the item Males to the ComboBox1.
- Adding the item Females to the ComboBox1.
- End of the Form1_Load() sub-procedure.
- Start of a sub-procedure named ComboBox1_SelectedIndexChanged(). This will be invoked when an item is selected on the first combobox. The sender As Object references the object that raised the event while the e As EventArgs has the event data.
- Make ComboBox2 empty, clear all items from it.
- Creating a condition. Checking for whether the selected item on ComboBox1 is Males.
- Add the item Nicholas to the ComboBox2 when the above condition is true, that is, item selected on ComboBox1 is Male.
- Add the item John to the ComboBox2 when the above condition is true, that is, item selected on ComboBox1 is Males.
- Creating a condition. Checking for whether the selected item on ComboBox1 is Females.
- Add the item Alice to the ComboBox2 when the above condition is true, that is, item selected on ComboBox1 is Females.
- Add the item Grace to the ComboBox2 when the above condition is true, that is, item selected on ComboBox1 is Females.
- End of the If block.
- End of the ComboBox1_SelectedIndexChanged() sub-procedure.
- End of the class Form1.