
How to Find & Change MAC Address in Mac OS
 Editorial Team
⚡ Smart Summary
Finding and changing a MAC address on macOS uses built-in tools: System Preferences, the Wi-Fi toolbar, and the Terminal reveal the hardware address, while an ifconfig command temporarily assigns a new one.
How to Find a MAC Address on macOS
Every network adapter has a MAC address, and macOS offers three easy ways to look it up: System Preferences, the Terminal, and the Wi-Fi toolbar. Each method is shown below.
Using System Preferences
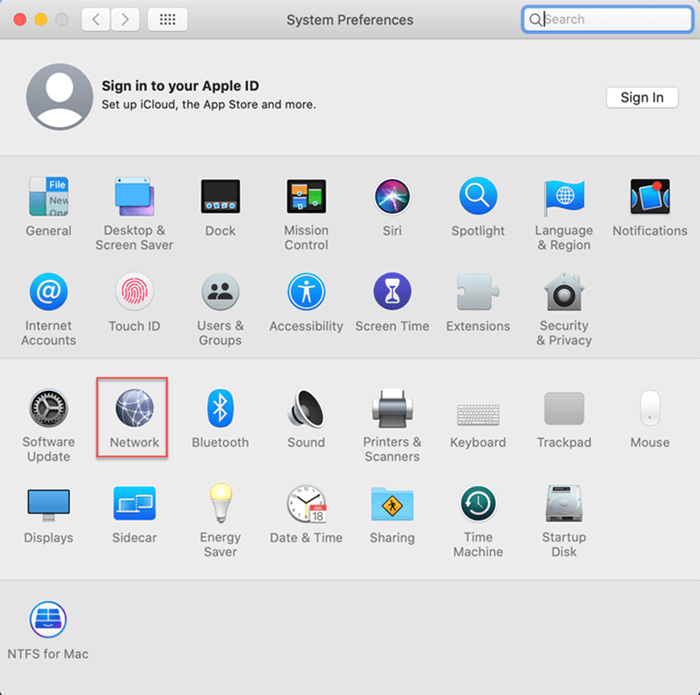
Step 1) Go to System Preferences and click on Network.
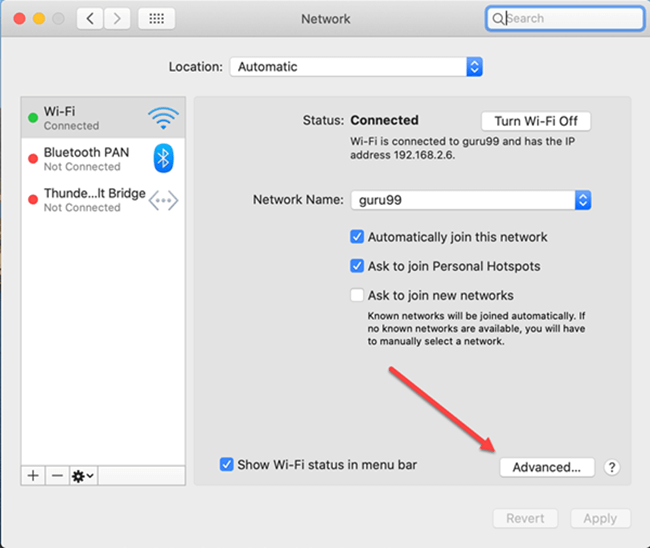
Step 2) In the Network menu, click on the Advanced button.
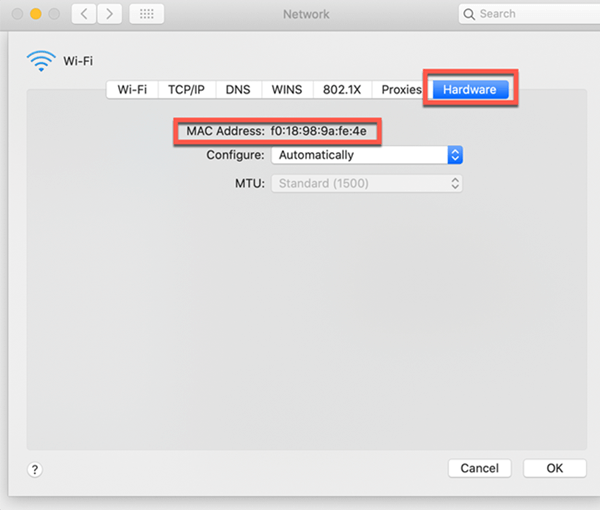
Step 3) Go to the Hardware tab, where you can see the MAC address of your Mac.
On macOS Ventura and later, the layout changed: open System Settings, choose Wi-Fi, click Details next to your network, and read the Wi-Fi Address entry.
Using the Terminal
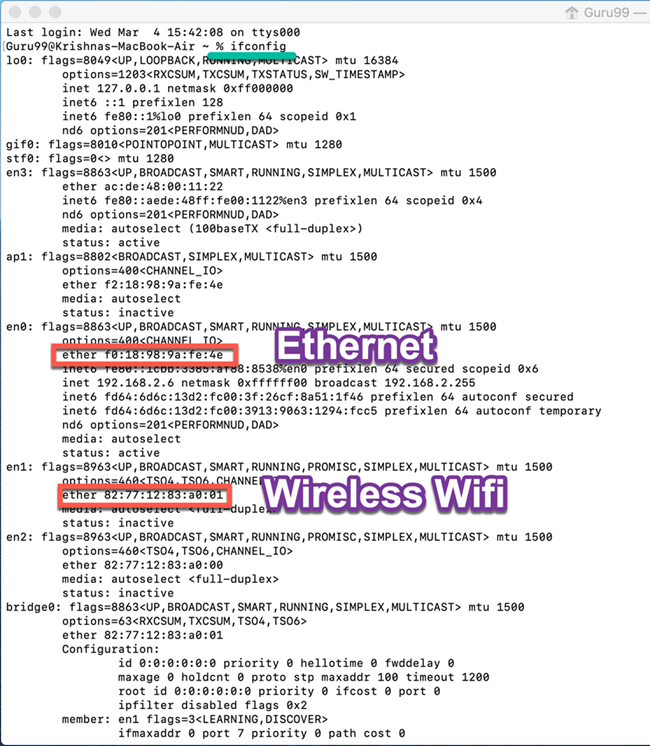
Step 1) Open the Terminal application from Launchpad, type ifconfig, and read your MAC address from the output.
Using the Wi-Fi Toolbar
Step 1) Press the Option (Alt) key and click the Wi-Fi icon in the toolbar; the menu then shows the Wi-Fi address.

Why Change Your MAC Address?
Changing, or spoofing, a MAC address is a common networking task with several practical reasons. Because the address is broadcast on every local network you join, it can be logged and used to recognize your device, so replacing it has clear privacy and testing uses.
- Privacy: A rotating address makes it harder for networks and advertisers to track a device across locations.
- Access control: Some public or corporate networks limit devices by MAC or impose time limits, and a new address can restore access where the old one is blocked.
- Testing: Network engineers change a MAC to test firewalls, DHCP reservations, or MAC-based rules without swapping hardware.
- Replacement: When an adapter fails, cloning the old MAC lets a replacement inherit any address-based permissions.
Whatever the reason, remember that spoofing only changes the address the operating system presents; the burned-in hardware address stays the same.
How to Change the MAC Address on macOS
Here is how you can change the MAC address on macOS. Follow the steps in order:
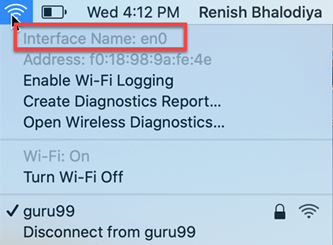
Step 1) Hold the Option key and click the Wi-Fi symbol to check the interface name. In the diagram below, it is “en0”.
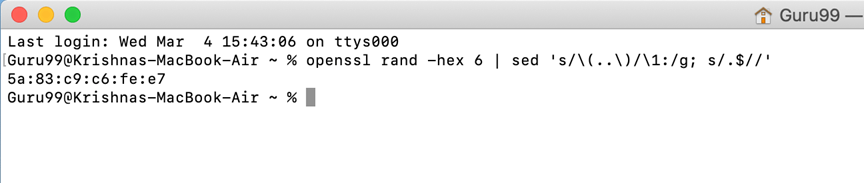
Step 2) Go to the Terminal and run the command below to generate a random address:
openssl rand -hex 6 | sed 's/\(..\)/\1:/g; s/.$//'
It returns a new hexadecimal number that can be used as a MAC address.
Step 3) Disconnect from your current Wi-Fi network by holding Option, clicking the Wi-Fi icon in the menu bar, and choosing “Disconnect”.

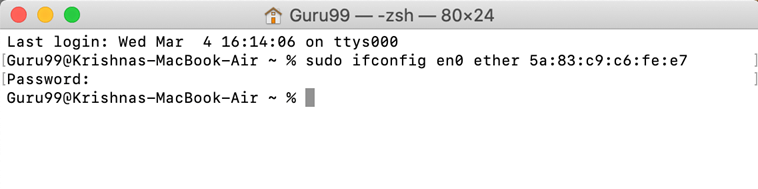
Step 4) Go back to the Terminal and run:
sudo ifconfig en0 ether <MAC address>
Step 5) You have now changed your MAC address. Reconnect to your Wi-Fi network and verify your MAC address one more time.
Is Changing a MAC Address on macOS Permanent?
On macOS, a MAC address changed with ifconfig is temporary. The operating system presents the new address only until the next restart, when the interface reloads its original, burned-in hardware address. There is no built-in setting that makes an ifconfig change permanent.
This behavior is intentional. macOS treats the hardware address as the default and reapplies it on boot, so a reboot is the simplest way to undo any change. If you need the new address to persist, you must reapply the command after each login, usually through a startup script or a LaunchDaemon.
- Temporary by default: The spoofed address disappears on reboot or when the Wi-Fi interface resets.
- No native persistence: Apple provides no menu toggle to lock in a custom MAC address.
- Manual persistence: A startup script that runs the ifconfig command re-applies the address automatically.
Common Errors When Changing a MAC Address on macOS
A few predictable problems stop a MAC address change from taking effect. Working through them in order usually resolves the issue:
- Still connected to Wi-Fi: You cannot change the address while the interface is joined to a network. Disconnect from Wi-Fi first, then run the command.
- Wrong interface name: The command targets en0, but Wi-Fi is en1 on some Macs. Run networksetup -listallhardwareports to confirm the correct interface.
- Invalid MAC format: The new value must be a valid 48-bit hexadecimal address; a locally administered, unicast address is safest.
- Missing sudo: Changing an interface needs administrator rights, so the command must start with sudo and prompt for your password.
- Change did not stick: Because the change is temporary, verify it immediately with ifconfig en0 before reconnecting.
