
How to Use Photoshop Workspace (Tutorial)
 Henry Cooper
⚡ Smart Summary
Workspace customization in Photoshop arranges panels, tools, and menus around a specific task such as photo editing, motion, or 3D design. This walkthrough demonstrates the preset workspaces and the exact steps to build and save a personal workspace.
Photoshop Workspace
In this article and the below video, we will learn how we can create a “workspace” to customize Photoshop as per your workflow.
We all use Photoshop for different purposes, such as photo editing, graphics designing, 3D designing, and video editing.
Photoshop can do many things, and you are able to customize your own workflow in Photoshop. You can individually deal with all the panels that you want to see or not see in your workflow.
Depending on your work purpose, there might be some panels that you are never going to use and never need to see.
So you can create your own Adobe workspace depending on what you are working on.
Photoshop’s Default Workspace
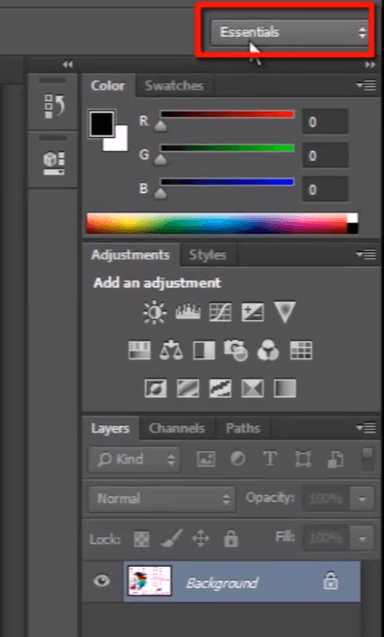
Right now, I have a default workspace known as “Essentials”. By default, Photoshop uses a workspace known as Essentials. If you have never chosen a different workspace, you are using the Essentials workspace.
Photoshop’s Other Workspaces
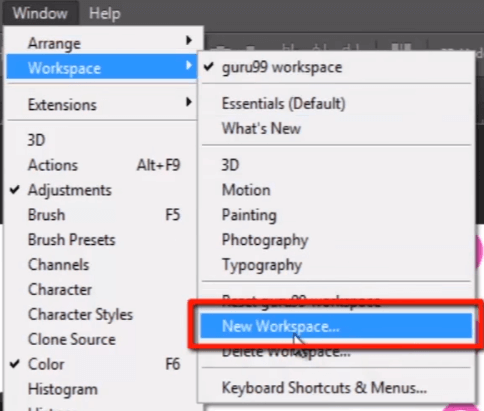
We can find the workspace panel in the second position from the top of the Window menu.
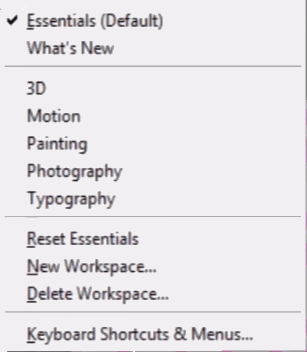
Here you can see some preset Adobe workspaces designed for specific industries, like 3D, Graphic and Web, Motion, Painting, and Photography.
Choosing A Different Workspace – Photography
If I want to work on 3D in Photoshop, then I will select 3D in the workspace panel and make all the specific panels visible that are related to 3D and needed to edit 3D objects.
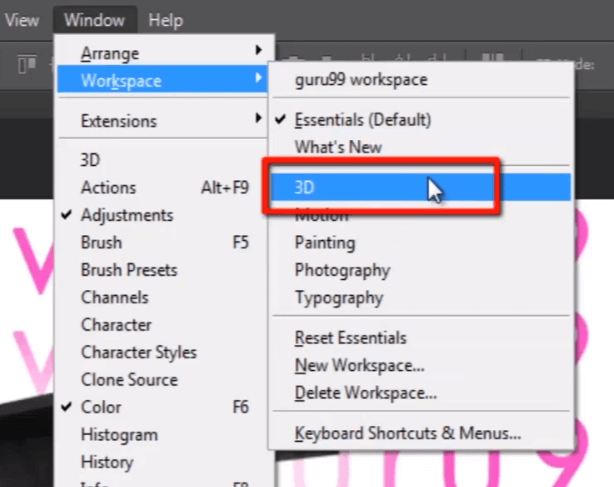
Panels such as the 3D panel, properties, layers, and channels are all related to editing 3D objects.

The Motion Workspace
Let us learn about the Motion Workspace. If I want to create animations, this workspace is particularly useful. It provides a timeline panel and other essential panels required for working with videos and animations.

The Photography Workspace
Now go to the workspace and check out the Photography workspace, which is useful if we want to do some photo editing. It will show panels that are related to the photography purpose.

MY Workspace
These are all some preset Adobe workspaces. But now I want to create my own workspace because, based on my working methods, I already know which panels I need and which panels I do not need to work on.
Look here. I have already created my own workspace called “guru99 workspace”.

In this workspace, I have some selected panels, such as “brush, history, character, layers, channels, paths, adjustments, swatches, and color”.
How to create a new custom workspace
Let us make a few quick changes to Photoshop’s default panel layout. Arrange all the individual panels as per your need.
When you are done with it, go to the “Window menu”, then “Workspace”, then click on “New Workspace”.
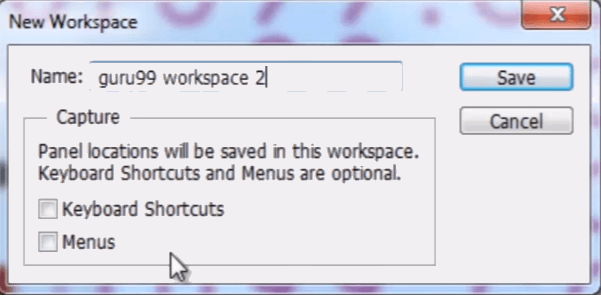
Now give any name to your own workspace.
Here you can save any keyboard shortcuts in your workspace, and you can even set menus. You can keep visible only the menus that you want in your workspace.
Then click on Save.
Now you can see that your workspace is created.
And if you are new to Photoshop, then it will take time to develop your habits and realize which panels are useful and which are not useful as per your way of working.
