How to Create a Vendor Master Data in SAP
⚡ Smart Summary
Vendor master data in SAP stores the accounting, address, and payment details of every supplier a company buys from. This walkthrough shows how to create a vendor with transaction FK01 and how to track later changes with FK04.

What is Vendor Master Data in SAP?
Vendor master data is the central record that holds every detail SAP needs to do business with a supplier. It is organized into three areas: general data such as name and address, company-code data such as the reconciliation account and payment terms, and purchasing data used by the buying process. Because both Financial Accounting and Purchasing read the same record, accurate vendor master data prevents duplicate payments and reporting errors.
The record is created once and reused on every invoice, payment, and purchase order for that supplier. Maintaining it correctly is therefore a foundation of clean accounting and procurement.
In this tutorial, we will learn,
- How to create a Vendor
- How to Display Changes in Vendor Master
How to create a Vendor
This tutorial takes you through the steps to create Vendor Master Data
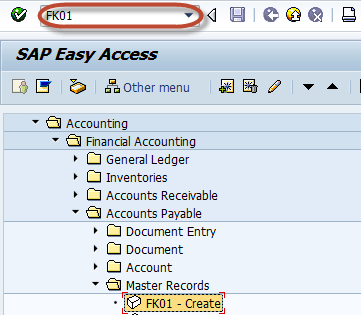
Step 1) Enter Transaction code FK01 in SAP Command Field
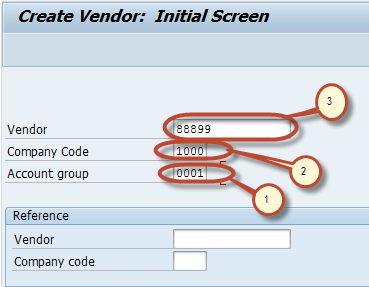
Step 2) In the Initial Screen, Enter
- Select Account Group
- Enter the Company code in which you want to create the vendor
- Enter unique Vendor id according to number range in Account Group You can also leave the Vendor field blank. The system will assign a number when the data is saved
Optional – In the Reference section:
- In the Vendor field, you can enter a reference Vendor if the details are similar to the new Vendor.
- In the Company Code field, you can enter the reference Vendor’s company code.
In this tutorial we will create a vendor without a reference. Click the Enter button.
Press Enter
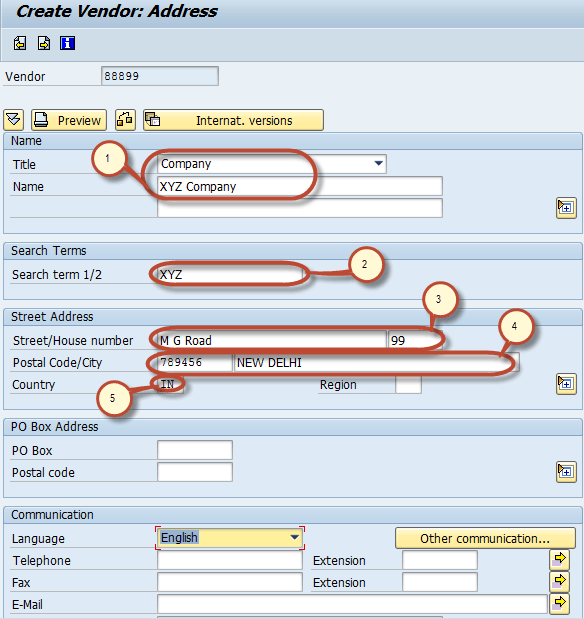
Step 3) In the next screen, In Address Tab Enter the Following
- Enter the name of the Vendor
- Enter Search Term, for searching the Vendor Id
- Enter Street/House Number
- Enter Postal code/City
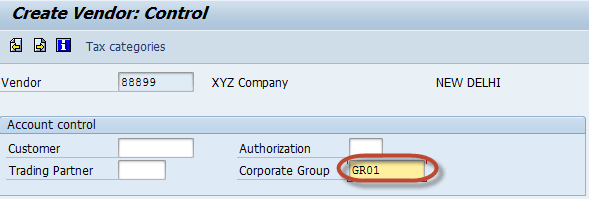
Step 4) Next in the Account Control section page Enter the Corporate Group if the Vendor belongs to a corporate group enter the group key
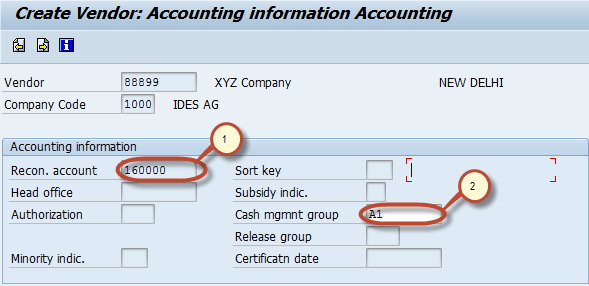
Step 5) Next in the Account Management Section
- Enter the Reconciliation Account
- Enter the Cash Management Group
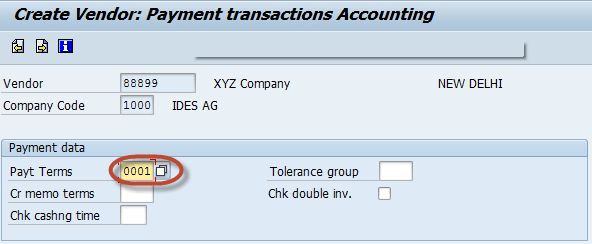
Step 6) Next in Payment Accounting Section, Enter the Payment Terms
Step 7) Choose Save from the Standard Toolbar
![]()
Check the Status bar for Confirmation of successful creation of Vendor Master.
![]()
Change an existing vendor account – transaction FK02
Display a vendor account – transaction FK03
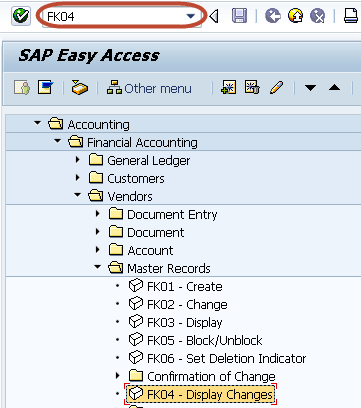
How to Display Changes in Vendor Master
Enter the Transaction Code FK04 in the SAP Command Field
In the next screen, Enter the Following
- Enter the Vendor Account Number
- Enter the Company Code

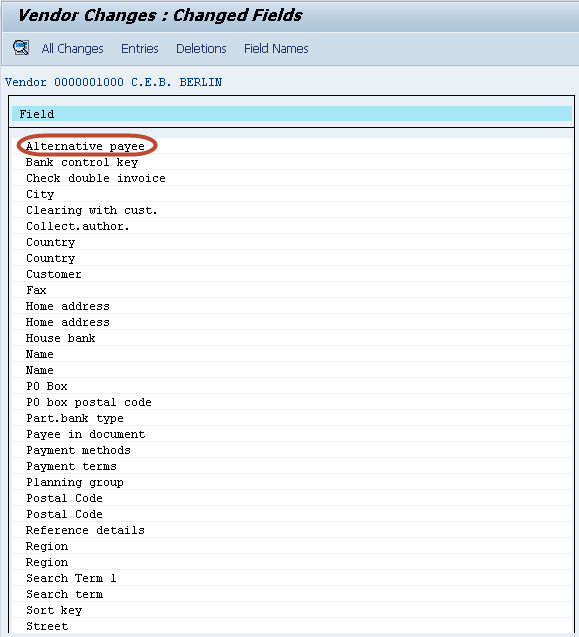
In the next screen, Select the Field from the list of Changed Fields
In the next screen, List is generated with New Value and Old Value of the field

FK01 vs XK01 vs MK01: Vendor Creation Transactions
SAP offers three transactions to create a vendor, depending on which views you need. Choosing the right one avoids incomplete master records.
| Transaction | Scope | Views maintained |
|---|---|---|
| FK01 | Financial Accounting | General and company-code data |
| MK01 | Purchasing | General and purchasing data |
| XK01 | Central | General, company-code, and purchasing data |
Best Practices for Vendor Master Data
Consistent vendor records keep procurement and payments reliable. Apply these best practices:
- Prevent duplicates: Search existing vendors before creating a new record.
- Use account groups: Let the account group control number ranges and field status.
- Set the reconciliation account: Always link the correct reconciliation account for correct GL posting.
- Standardize search terms: Enter meaningful search terms so users find the vendor quickly.
- Track changes: Review changes with FK04 to keep an audit trail.