
How to Download & Install CUCUMBER in Windows
 Editorial Team
⚡ Smart Summary
Cucumber installation on Windows needs four pieces in order: Ruby with its development kit, the Cucumber gem itself, an editor such as RubyMine, and a browser driver library. Each one installs in minutes.

Cucumber installation can look tiresome, but it is relatively easy once the pieces are taken in the right order. Here is the roadmap of components that need to be installed to make Cucumber work.
Prerequisites for Installing Cucumber on Windows
Cucumber is distributed as a Ruby gem, so nothing works until Ruby is present. Confirm the following before you download anything:
- Windows 10 or later, 64-bit. RubyInstaller no longer recommends the 32-bit build unless you depend on 32-bit native DLLs or COM objects.
- Administrator rights. The installer writes to Program Files and edits the PATH environment variable.
- An internet connection. Both gem install commands below fetch packages from RubyGems.
- Around 1 GB of free disk space for Ruby plus the MSYS2 development kit, and more again if you add RubyMine.
- A browser to automate. Watir drives Chrome, Edge or Firefox through Selenium, so at least one must be installed.
Two commands are worth remembering for later: ruby -v prints the Ruby version, and gem -v prints the RubyGems version. If either fails, the PATH was not updated and the installer should be run again rather than debugged.
Install Ruby and DevKit
Start with the Ruby+Devkit package, which bundles the compiler toolchain that gems with C extensions need.
Step 1) Go to https://rubyinstaller.org/downloads/ and pick an installer. The download page is shown below.
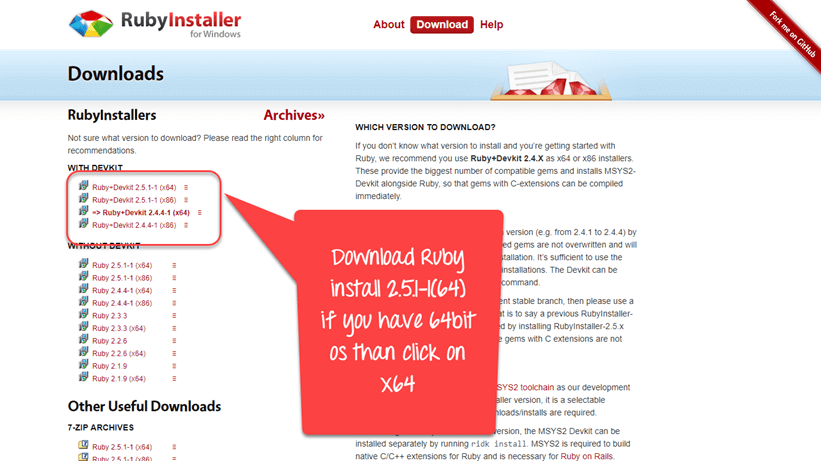
⚠️ Version note: the separate DevKit archive the original walkthrough refers to has been replaced by the MSYS2 toolchain, which the Ruby+Devkit installer bundles as a selectable component. RubyInstaller currently recommends the Ruby+Devkit 4.0.X (x64) build for new users, and the kit is updated later with ridk install rather than by re-running dk.rb. The steps below are otherwise unchanged.
Step 2) Open the downloaded file. On the first screen:
- Accept the license
- Click the Next button
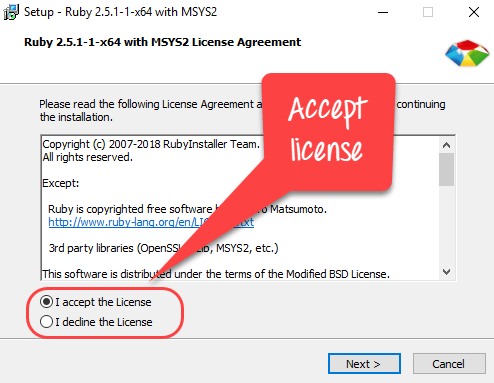
Step 3) On the next screen:
- Select your installation directory
- Select all options
- Click Install

Step 4) On the following screen, click Next.

Step 5) Wait for the installation to complete.

Step 6) Click Finish.

Step 7) Once the installation is complete, run Ruby from the Windows Start menu.

Step 8) You will see a Ruby command prompt similar to the Windows cmd window.

Install Cucumber
With Ruby on the PATH, the gem itself is a single command.
Step 1) Type gem install cucumber in the Ruby command prompt. This command downloads and installs Cucumber at the command line itself.

After a few seconds the Cucumber installation procedure starts and reports each dependency it fetches.

Step 2) To verify whether Cucumber installed successfully, type cucumber –version. Note the two hyphens — a single hyphen is not a valid long option.

Install IDE RubyMine
An editor is not strictly required, but RubyMine understands Gherkin and can jump from a step to its definition. Follow the steps below to install it.

Step 1) Click Next to continue with the RubyMine installation.

Step 2) Choose the install location.

Step 3) Set the installation options.
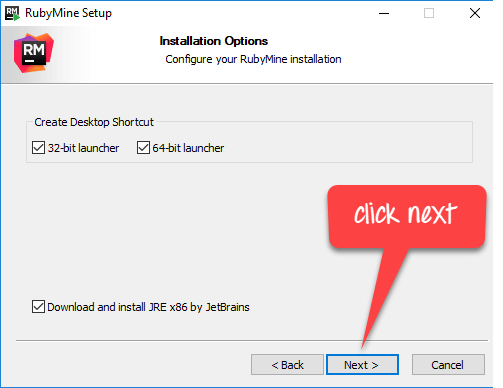
Step 4) Choose the Start menu folder.

Step 5) Click Install.

Step 6) Click Finish.

Step 7) Select Do not import settings.

Step 8) Click Evaluate.

Step 9) Accept the license.

Step 10) Choose Skip Remaining and Set Defaults.

Step 11) Open the editor.

Step 12) Create a new project.

⚠️ Version note: RubyMine is a paid JetBrains product with a time-limited evaluation, which is what the Evaluate button in Step 8 starts. A free alternative is Visual Studio Code with a Ruby and a Cucumber (Gherkin) extension; the rest of this walkthrough works the same way in either editor.
Install watir-webdriver
Cucumber only runs the steps. Something else has to open the browser, and that job belongs to Watir, a Ruby wrapper around Selenium. If you prefer to drive the browser directly, the same project can call a plain WebDriver script.
Step 1) Click on Start Command Prompt With Ruby and run the install command gem install watir-webdriver.

Step 2) The watir-webdriver gem installs successfully.

⚠️ Deprecation note: the watir-webdriver gem was folded into the main watir gem at Watir 6.0, and its own repository now only points users at the replacement. On a new machine run gem install watir instead. The historical command above is kept because it is what the screenshots show.
Cucumber Project Folder Structure
Cucumber discovers files by convention, not by configuration, so the layout matters more than it first appears. A minimal project looks like this:
| Path | Holds |
|---|---|
| features/ | Every .feature file, written in Gherkin. Cucumber searches here by default. |
| features/step_definitions/ | The Ruby files whose blocks match each Given, When and Then line. |
| features/support/ | Setup code loaded before any step runs, such as env.rb, which is where the browser is usually opened and closed. |
Two rules save a great deal of confusion later. Cucumber ignores the keyword when it matches a step, so Given I have variable a and Then I have variable a collide with the same definition. And the step text in the feature file must match the regular expression in the step file exactly, including punctuation.
First Cucumber Script
The example below multiplies two numbers, which is enough to prove that the feature file, the step file and the gem are all talking to each other.
Step 1) Open the RubyMine editor from the Windows Start menu.
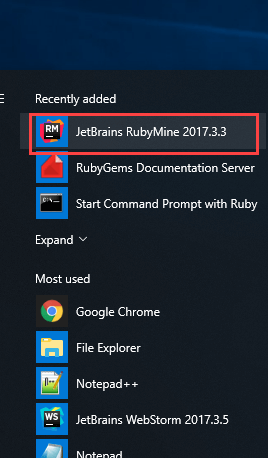
The RubyMine dashboard appears as shown below.

Step 2) Create a new project in the RubyMine editor.

Give the project a name and a location, then confirm.

Step 3) Create a file directory.

The new directory appears in the project tree.

Step 4) Create and save a file in yourfolder/features/ with the name yourfilename.feature.

Confirm the file name so it ends in the .feature extension.

Step 5) To execute our scenario, save the following commands in the feature file.

Code:
Feature: Multiplication
I multiply two numbers
	Scenario: multiply a and b
		Given I have variable a
		And I have variable b
		When I multiplication a and b
		Then I display the Result
Step 6) Now run the first feature file.
Click on Start Command Prompt With Ruby and run the cucumber command from the project folder.

The console reports the result as shown below.

Step 7) Create the step definition file for the feature file.
Create a new folder in the RubyMine editor.

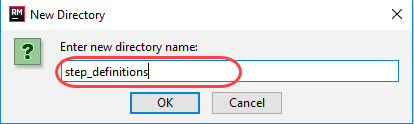
Step 8) Save the file in yourfolder/features/step_definititons with the name test_step.rb.


Step 9) Write the following code into the step file.

Code:
Given(/^I have variable a$/) do
@a = 50
end

And(/^I have variable b$/) do
@b = 70
end

When(/^I multiplication a and b$/) do
@mul = @a * @b
end

Then(/^I display the Result$/) do
puts "Multiplication of #{@a} and #{@b} is #{@mul}"
end
Step 10) Now run the feature file again.

The result is printed in the console, and each step is reported as passed.

Common Cucumber Installation Errors and How to Fix Them
Most failures at this stage come from the environment rather than from Cucumber. These are the ones worth recognising on sight.
| Message | Cause | Fix |
|---|---|---|
| ‘cucumber’ is not recognized as an internal or external command | The Ruby bin directory is not on the PATH, or you are in a plain cmd window. | Open Start Command Prompt With Ruby, or reinstall Ruby with the PATH option selected. |
| SSL_connect returned=1 errno=0 state=error: certificate verify failed | RubyGems cannot validate the certificate chain, usually behind a corporate proxy. | Update RubyGems with gem update –system, or configure the proxy with the –http-proxy switch. |
| ERROR: Failed to build gem native extension | The MSYS2 development kit is missing. | Run ridk install and choose the MSYS2 and MINGW toolchain options. |
| invalid option: -version | A single hyphen was used for a long option. | Type cucumber –version with two hyphens. |
| Undefined step, with a suggested snippet printed below it | Cucumber found the feature file but no matching definition. | Paste the suggested snippet into a file under features/step_definitions and fill in the body. |
| cannot load such file — watir | The gem installed for a different Ruby version than the one running. | Check ruby -v and gem list watir in the same prompt, then reinstall the gem there. |
Once the multiplication scenario reports a pass, the installation is finished and the same project can grow into a full automation testing suite, whether it is used for functional testing or nightly regression testing.
