
Excel VBA Range Object
 Editorial Team
⚡ Smart Summary
Excel VBA Range Object represents one cell or a group of cells on a worksheet. This page explains the object hierarchy, the Range and Cells properties, selecting and referencing cells, reading and writing values, and the Offset property.
What is VBA Range?
The VBA Range Object represents a cell or multiple cells in your Excel worksheet. It is the most important object of Excel VBA. By using Excel VBA range object, you can refer to,
- A single cell
- A row or a column of cells
- A selection of cells
- A 3-D range
As we discussed in our previous tutorial, VBA is used to record and run a Macro. But how does VBA identify which data on the sheet needs to be worked on? This is where VBA Range Objects are useful.
Introduction to Referencing Objects in VBA
Referencing Excel’s VBA Range Object and the Object Qualifier.
- Object Qualifier: This is used for referencing the object. It specifies the workbook or worksheet you are referring to.
To manipulate these cell values, Properties and Methods are used.
- Property: A property stores information about the object.
- Method: A method is an action of the object it will perform. Range object can perform actions like selected, copied, cleared, sorted, etc.
VBA follows an object hierarchy pattern to refer to an object in Excel. You have to follow the structure below. Remember, the .dot here connects the object at each of the different levels.
Application.Workbooks.Worksheets.Range
That hierarchy can be reached through two different properties, and the Range property is the one used most often.
How to refer to Excel VBA Range Object using Range property
Range property can be applied in two different types of objects.
- Worksheet Objects
- Range Objects
Syntax for Range Property
- The keyword “Range.”
- Parentheses that follow the keyword
- Relevant Cell Range
- Quotation (” “)
Application.Workbooks("Book1.xlsm").Worksheets("Sheet1").Range("A1")
When you refer Range object, as shown above, it is referred as fully qualified reference. You have told Excel exactly which range you want, what sheet and in what worksheet.
Example: MsgBox Worksheets(“Sheet1”).Range(“A1”).Value
Using Range property, you can perform many tasks like,
- Refer to a Single cell using range property
- Refer to a Single cell using the Worksheet.Range Property
- Refer to an entire row or column
- Refer to merged cells using Worksheet.Range Property and many more
As such it will be too lengthy to cover all scenarios for range property. For scenarios mentioned above, we will demonstrate an example only for one. Refer to a Single cell using range property.
Refer to a Single cell using the Worksheet.Range Property
To refer to one cell, pass its address to the Range property as a text string.
Syntax is simple “Range(“Cell”)”.
Here, we will use “.Select” command to select the single cell from the sheet.
Step 1) In this step, open your Excel.
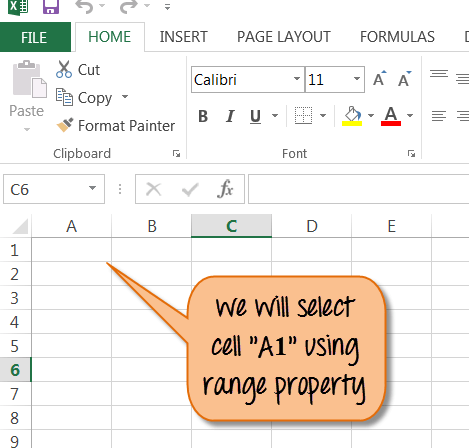
Step 2) In this step,
- Click on
 button.
 - It will open a window.
- Enter your program name here and click ‘OK’ button.
- It will take you to main Excel file, from top menu click on ‘stop’ record button to stop recording Macro.
 button.
Step 3) In next step,
- Click on Macro button
 from the top menu. It will open the window below.
 - In this window, Click on the ‘edit’ button.
 from the top menu. It will open the window below.
Step 4) The above step will open VBA code editor for file name “Single Cell Range”. Enter the code as shown below for selecting range “A1” from the Excel sheet.
Sub SingleCellRange()
    Range("A1").Select
End Sub

Step 5) Now save the file  and run the program as shown below.

Step 6) You will see Cell “A1” is selected after execution of the program.

Likewise, you can select a cell with a particular Name. For example, if you want to search cell with name “Guru99- VBA Tutorial”. You have to run the command as shown below. It will select the cell with that name.
Range(“Guru99- VBA Tutorial”).Select
To apply other range object here is the code sample.
| Range for selecting cell in Excel | Range declared |
|---|---|
| For single Row | Range(“1:1”) |
| For single Column | Range(“A:A”) |
| For Contiguous Cells | Range(“A1:C5”) |
| For Non-Contiguous Cells | Range(“A1:C5, F1:F5”) |
| For Intersection of two ranges | Range(“A1:C5 F1:F5”) (For intersection cell, remember there is no comma operator) |
| To merge Cell | Range(“A1:C5”) (To merge cell use “merge” command) |
Selecting a cell is only the first step. In practice a macro reads what a cell holds and writes a new value back.
How to Read and Write Values with the Range Object
Almost every macro that touches a worksheet does one of two things: it reads a value out of a cell, or it writes one in. Both go through the Value property, and neither needs the cell to be selected first.
Sub ReadAndWrite()
    Dim Price As Double
    Dim Qty As Long

    ' Read two values out of the sheet
    Price = Range("B1").Value
    Qty = Range("B2").Value

    ' Write the calculated result back
    Range("B3").Value = Price * Qty

    ' Fill a whole block in one statement
    Range("D1:D10").Value = "Guru99"

    ' Clear only the contents, keeping the formatting
    Range("F1:F10").ClearContents
End Sub
Four points make this pattern reliable.
- Select is not required: Writing Range(“B3”).Value = 10 is faster and safer than selecting the cell first. Recorded macros are full of .Select because the recorder mirrors mouse actions, not because the code needs it.
- Value versus Text: .Value returns the underlying data, while .Text returns the formatted string shown on screen, which can be truncated by column width. Read .Value in calculations.
- Whole blocks in one line: Assigning to a multi-cell range fills every cell at once, which is far quicker than looping.
- Clear the right thing: ClearContents removes values only, Clear removes formatting too, and Delete removes the cells and shifts the ones around them.
Range addresses a cell by its letter and number. A second property addresses the same cell by two numbers instead.
Cell Property
Similarly to the range, in VBA you can also use the “Cell Property”. The only difference is that it has an “item” property that you use to reference the cells on your spreadsheet. Cell property is useful in a programming loop.
For example,
Cells.item(Row, Column). Both the lines below refer to cell A1.
- Cells.item(1,1) OR
- Cells.item(1,”A”)
Difference Between Range and Cells in VBA
Range and Cells reach the same worksheet cells by different routes, and choosing correctly makes code shorter and easier to read.
| Point of difference | Range | Cells |
|---|---|---|
| Address format | A text string, Range(“A1”) | Two numbers, Cells(1, 1) |
| Multiple cells | Yes, Range(“A1:C5”) | One cell at a time |
| Inside a loop | Needs string concatenation | The row number can be the loop counter |
| Readability | Matches the address you see in Excel | Column 27 is harder to picture than AA |
| Combined use | Range(Cells(1, 1), Cells(5, 3)) builds A1:C5 from numbers | |
The practical rule is to use Range for a fixed address you can read at a glance, and Cells whenever a row or column number is calculated at run time.
Range Offset property
Range offset property will select rows/columns away from its original position. On the basis of the range declared, cells are selected. See example below.
For example,
Range("A1").Offset(RowOffset:=1, ColumnOffset:=1).Select
The result for this will be cell B2. The offset property will move the A1 cell 1 column and 1 row away. You can change the value of RowOffset / ColumnOffset as per requirement. You can use a negative value (-1) to move cells backward.
Download Excel containing above code
