How to Install Python on Windows [Pycharm IDE]
⚡ Smart Summary
Python installation on Windows takes only a few steps: download the installer from python.org, run it, then add the PyCharm IDE from JetBrains. The following steps show the full process for Python and PyCharm on Windows.
PyCharm is a cross-platform editor developed by JetBrains. PyCharm provides all the tools you need for productive Python development.
Below are the detailed steps for installing Python and PyCharm.
How to Install Python IDE
Below is a step-by-step process on how to download and install Python on Windows:
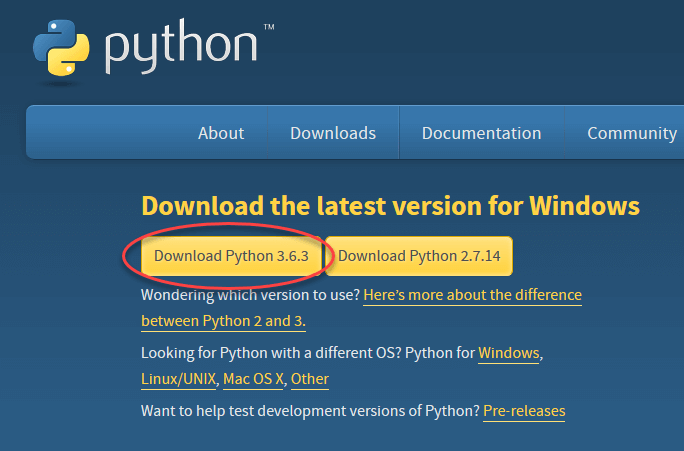
Step 1) To download and install Python, visit the official website of Python https://www.python.org/downloads/ and choose your version. We have chosen Python version 3.6.3 for this tutorial. You should download the latest stable version available.
Step 2) Once the download is completed, run the .exe file to install Python. Now click on Install Now.

Step 3) You can see Python installing at this point.

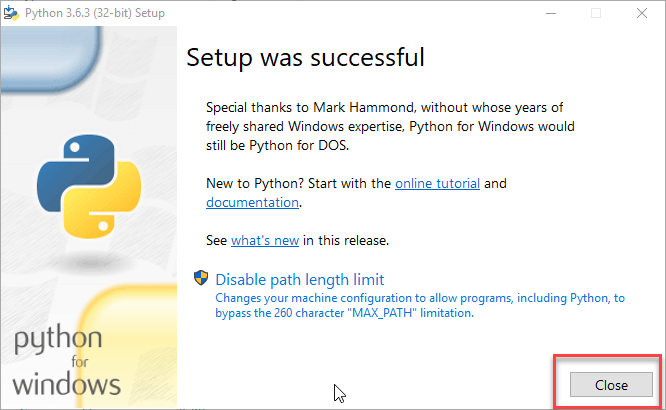
Step 4) When it finishes, you can see a screen that says the Setup was successful. Now click on “Close”.
How to Install Pycharm
Here is a step-by-step process on how to download and install PyCharm IDE on Windows:
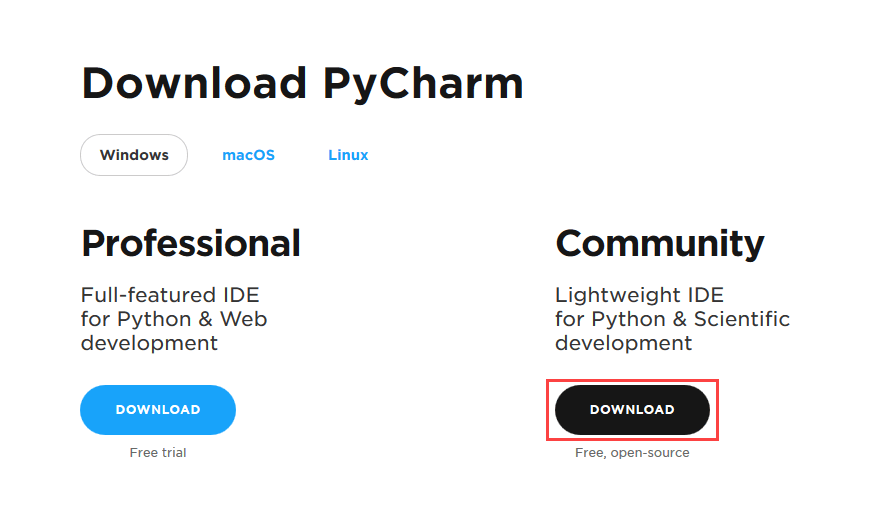
Step 1) To download PyCharm, visit the website https://www.jetbrains.com/pycharm/download/ and click the “DOWNLOAD” link under the Community Section.
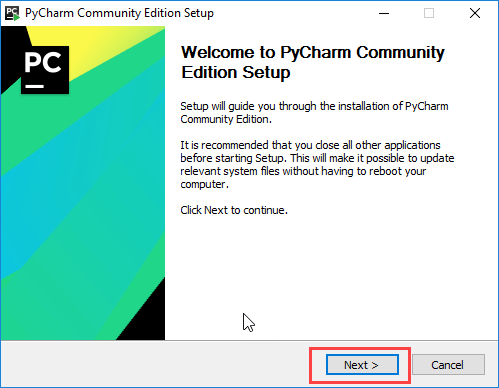
Step 2) Once the download is complete, run the exe to install PyCharm. The setup wizard should have started. Click “Next”.
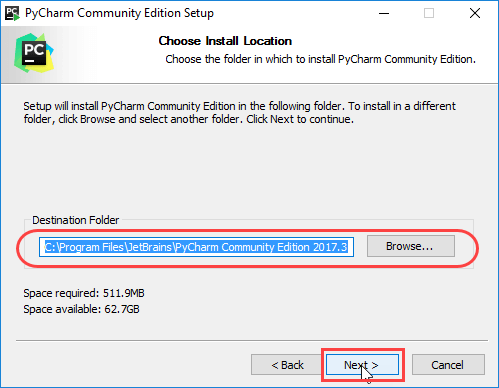
Step 3) On the next screen, change the installation path if required. Click “Next”.
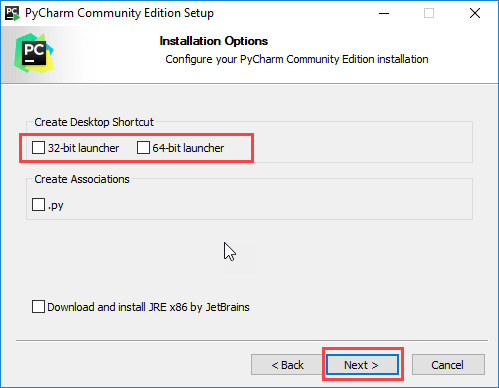
Step 4) On the next screen, you can create a desktop shortcut if you want and click on “Next”.
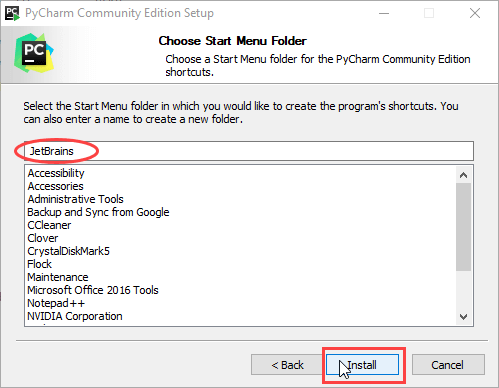
Step 5) Choose the start menu folder. Keep JetBrains selected and click on “Install”.
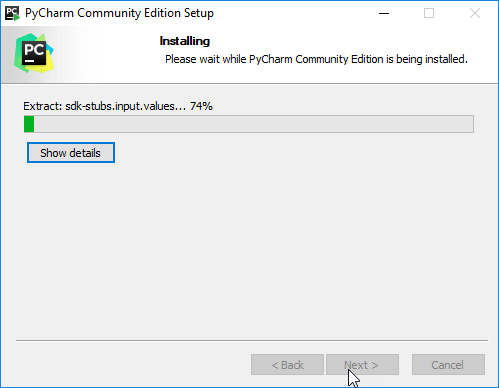
Step 6) Wait for the installation to finish.
Step 7) Once installation is finished, you should receive a message screen that PyCharm is installed. If you want to go ahead and run it, click the “Run PyCharm Community Edition” box first and click “Finish”.
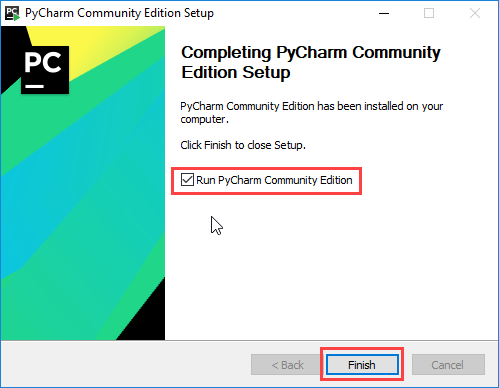
Step 8) After you click on “Finish”, the following screen will appear.

How to Verify the Python Installation
After the setup finishes, it is a good idea to confirm that Python was installed correctly before you start coding. You can verify the installation from the Windows Command Prompt in a few seconds.
Follow these steps to check your Python installation:
- Press the Windows key, type cmd, and open the Command Prompt.
- Type the command below and press Enter to display the installed Python version.
python --version
If Python is installed correctly, the Command Prompt returns the version number, for example Python 3.6.3. You can also confirm that the package manager pip is available by running:
pip --version
If either command returns an error such as “python is not recognized”, it usually means Python was not added to the system PATH. In that case, re-run the installer and enable the Add Python to PATH checkbox on the first screen, or add the installation folder to the PATH environment variable manually. Once both commands return version numbers, your Python environment is ready to use.
How to Run Your First Python Program
With Python and PyCharm installed, you can write and run your first program. PyCharm makes this easy by managing the project and the Python interpreter for you.
Use the following steps to run a simple program:
- Open PyCharm and select New Project. Choose a location and click Create.
- Right-click the project folder, choose New > Python File, and name it hello.py.
- Type the code shown below into the editor.
- Right-click the file and select Run ‘hello’, or press Shift + F10.
# My first Python program
message = "Hello, World!"
print(message)
When you run the program, the output Hello, World! appears in the Run window at the bottom of PyCharm. If you prefer not to use an IDE, you can also save the same code in a file and run it from the Command Prompt with the command python hello.py. Congratulations, you have written and executed your first Python program.