How to Upload Flat File to SAP HANA: CSV, XLS & XLSX
⚡ Smart Summary
Flat File Upload to SAP HANA loads CSV, XLS, and XLSX data directly from a client machine without any ETL tool. HANA Studio proposes column names and data types, then maps source columns onto a new or existing table.
SAP HANA support uploading data from a file without ETL tools (SLT, BODS, and DXC). It is a new feature of HANA Studio Revision 28 (SPS04).
SAP HANA Support following type of files which will be available on client system as below –
- .CSV (Comma Separated value files)
- .XLS
- .XLSX
Prior to this option, the user needs to create control file (.CTL file). To upload data in SAP HANA, table need to exist in SAP HANA. If table exists, records will be appended at the end of the table, if table not present then table need to be created.
This application suggests column name and data type for the new tables.
Before You Upload: File Preparation Checklist
Most failed uploads are caused by the file rather than by HANA, and every one of these problems is cheaper to fix before starting than after a partial load.
- One header row, no merged cells. The wizard proposes column names from the header. Merged cells, a title row above the header, or a blank first row all produce meaningless column names.
- Column names without spaces or special characters. Proposed table columns inherit the header text. Names such as Sales Org become awkward identifiers that later need double quotes in every query.
- Consistent data types down each column. A column holding numbers with one text entry is proposed as character, and every downstream calculation then needs a conversion.
- Dates in an unambiguous format. YYYY-MM-DD removes the day and month ambiguity that silently corrupts a load.
- No thousands separators in numeric columns. A value of 1,000 is read as text, not as a number.
- Correct encoding on CSV. UTF-8 preserves non-ASCII characters; other encodings turn them into replacement characters that are hard to correct afterwards.
- Only one worksheet with data. For XLSX, extra sheets and hidden rows frequently confuse the row count.
Spending a few minutes on the file also makes the type proposals better, since HANA infers each column from the values it can see. Type behaviour is covered in SAP HANA data types.
How to Upload Data from Flat File to SAP HANA
Steps for upload data from flat file to SAP HANA is as below-
- Create the table in SAP HANA
- Create file with data in our local system
- Select the file
- Manage the mappings
- Load the data
Create the table in SAP HANA
If table are not present in SAP HANA, then we can create a table by SQL Script or by this process by selecting “NEW” option.
We will use “NEW” option for creating a new table.
Create file with data in our local System
We are going to upload Sales Organization master data. So create a .csv file and .xls file for it on local system.
We are going to upload SalesOrg.xlsx file into SAP HANA, so we have created a file SalesOrg.xlsx in the local system.
| SalesOrg | Name | Currency | CoCode | Address | Country | Ref_Sorg |
|---|---|---|---|---|---|---|
| 1000 | ABC Pvt. Ltd. | USD | 1000 | NEW YORK | USA | 1000 |
| 2000 | ABC Enterprises | INR | 2000 | INDIA | INDIA | 2000 |
Select the file
Step 1) Open modeler perspective -> ‘Main Menu’ -> ‘Help’ -> ‘Quick View’ as shown below.

A Quick View screen appears as below-
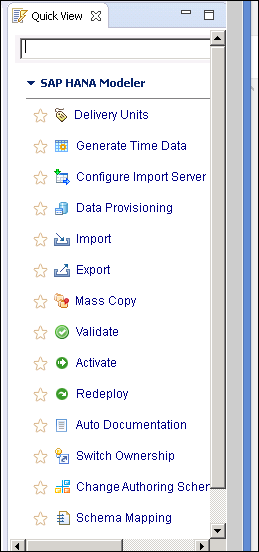
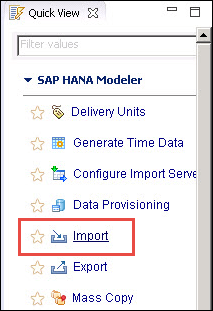
Select ‘Import’ option from Quick View. A pop-up for import option will be displayed.
A Pop-Up for import screen is displayed. Go to SAP HANA Content -> ‘Data from Local File’.

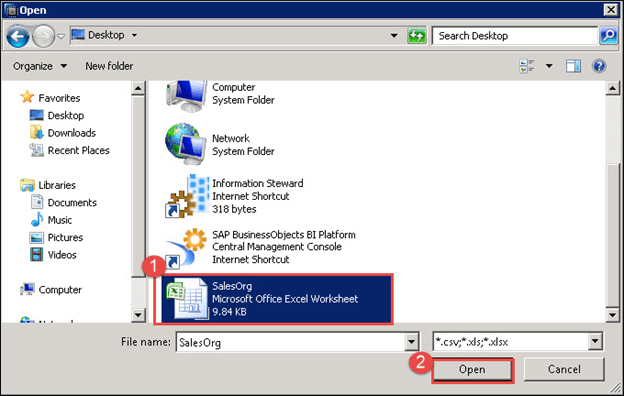
Click Next. A pop-up for File selection will be displayed, follow below steps for the select file.
- Select SalesOrg.xls file.
- Click on “Open” button.
A screen for file selection for import will be displayed, in which we can select a file for loading data from local system to SAP HANA database.
Available options can be categorized into three main areas, they are
- Source File Section
- File Details Section
- Target Table
Step 2) In this step we have to enter following detail –
- Select File – Selected file path will be displayed here.
- Header Row Exists – If SalesOrg.xls file has a header (column Name). So, we have ticked it.
- Import All Data – Tick this option if you want to import all data from a file, otherwise mention Start Line and End line for specific data load from file.
- Ignore leading and trailing white space – Tick this option for ignoring leading and trailing white space in the file.
- Target Table – New: If the table is not present in SAP HANA, then choose this option, and provide an existing schema name and the table name to be created.
- Target Table – Existing: If the table exists in SAP HANA, then choose this option. Select Schema name and Table. Data will be appended to end of the table.
- Click on “Next” button

Manage the Mappings
A mapping screen will be used for performing the mapping between source and target columns.
There are two different types of mapping available. When we click on ![]() we get two option as below –
we get two option as below –
- One to One: By using this option, we can map column to column based on the sequence. This option can be used if we know all the columns are in sequence.
- Map by Name: By using this option, we can map the source and target columns based on the name. This can be used if we know that the columns names are same.
Mapping of Source to Target – We will map here Source File column to Target Table, and also, we can change target table definition.
- Proposed Table structure from Source File- Table column Name is supposed from Excel file Column Name (Header).
- Target Table Structure: Target Table store type is selected as column store by default.
- Click File name and drag to target field, File will be mapped. The field can be mapped automatically by one to one or map By Name option. We can manually do the mapping using drag and drop option if our column name could not be mapped with the above options.

- In the File data section of the same screen, we can also see how the data looks in the source file for all the columns. File data section displays data of SalesOrg file.
- Click on “Next” button.

A window for import data from the local file will appear.
Load the data
It is final screen before we start the loading process. By this screen data that already exist in the table will display and also the information about the schema and table to which we are going to load the data will display.
- Detail Sections: In this section Selected Source File name, Target Table Name, and Target Schema Name detail will be displayed.
- Data from File: It will display data extracted from the file.
- If displayed data in Data from file section has been verified, click ‘Finish’ to Start loading the data to the table.

After successful import option completing, we should see the entry in the job log view with status ‘Completed Successfully.’

Once the data importing job is successful,
- We can see the data in table by selecting the table of the respective schema and right click on Table -> ‘Data Preview’ as shown below.
- Data of table will display in Data preview screen as below-

Common Flat File Upload Errors
The wizard is forgiving, which is a mixed blessing: some problems produce a clear error and others load quietly with the wrong result. Both kinds are listed here.
| Symptom | Cause | Fix |
|---|---|---|
| Column names appear as COL1, COL2 | Header Row Exists was not ticked | Return to the file details screen and tick it |
| Load fails with a length error | Proposed column length is shorter than a value further down the file | Widen the column on the mapping screen before loading |
| Numbers arrive as text | Thousands separators or a stray text value in the column | Clean the source column and reload |
| Dates are wrong or rejected | Ambiguous or locale specific date format | Reformat the file to YYYY-MM-DD |
| Rows are duplicated | Existing was chosen and the load repeated; data appends, it does not replace | Truncate the table before reloading |
| Accented characters are corrupted | CSV saved in a non-UTF-8 encoding | Re-save as UTF-8 and reload |
| Fewer rows loaded than expected | Start and End line were set instead of Import All Data | Tick Import All Data |
The duplication case is the one to watch. Selecting an existing table always appends, so re-running a failed load without clearing the table doubles the data silently.
Flat File Upload vs Other Provisioning Methods
Flat file upload is the simplest option available and also the most limited. Knowing where it stops prevents it being used where a scheduled method belongs.
| Parameter | Flat file upload | SLT | Data Services |
|---|---|---|---|
| Automation | Manual only | Scheduled or real time | Scheduled |
| Repeatable | No, each run is by hand | Yes | Yes |
| Transformation | Column mapping only | Simple rules | Rich transformations |
| Volume | Small files | Large tables | Large and heterogeneous |
| Setup effort | None | An SLT server | A Data Services landscape |
| Best for | Prototyping, small reference data | Live operational data | Consolidating many sources |
The rule is simple: if the same file will be loaded again next month, the load belongs in Data Services or SLT rather than in a wizard someone must remember to run. The full set of options is compared in the data provisioning tutorial, and the equivalent option inside the File menu is described in SAP HANA import and export.