
Jenkins Pipeline Tutorial: How to Create JenkinsFile (Example)
 Editorial Team
⚡ Smart Summary
Jenkins Pipeline links build, test and deploy jobs into one ordered sequence that runs as code. A JenkinsFile committed beside the project turns that sequence into a reviewable, versioned definition of delivery.
What is Jenkins Pipeline?
Jenkins Pipeline is a combination of plugins that supports integration and implementation of continuous delivery pipelines. It is an extensible automation server for creating simple and complex delivery pipelines as code through the pipeline DSL. A pipeline is a group of events interlinked in a sequence.
What is Continuous Delivery Pipelines? How it Works?
In a Jenkins pipeline, every job or event has some sort of dependency on at least one or more events, as the diagram below shows.
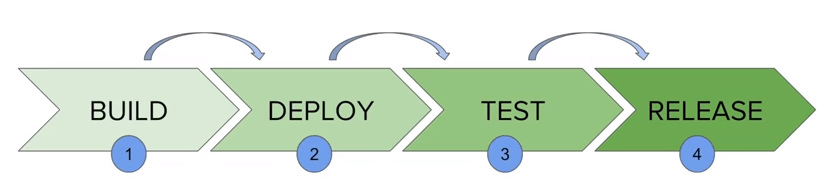
The picture above represents a continuous delivery pipeline in Jenkins, made of states called build, deploy, test and release. Every state has its own events, which run in sequence.
A continuous delivery pipeline expresses that process automatically, carrying software from version control to release through one repeatable sequence of builds, testing and deployment stages.
What is a JenkinsFile?
Jenkins pipelines can be defined in a text file called JenkinsFile. It expresses pipeline as code in a domain specific language (DSL) and holds every step needed to run the pipeline.
The benefits of using JenkinsFile are:
- One JenkinsFile can create pipelines for every branch and execute pull requests.
- You can review your Jenkins code on the pipeline
- You can audit your Jenkins pipeline
- This is the singular source for your pipeline and can be modified by multiple users.
A pipeline can be defined in the Jenkins web UI or in a JenkinsFile committed to source control. A minimal declarative file has a fixed shape — a pipeline block, an agent, and stages holding one stage per phase.
pipeline {
    agent any
    stages {
        stage('Build') {
            steps {
                echo 'Building'
            }
        }
        stage('Test') {
            steps {
                echo 'Testing'
            }
        }
        stage('Deploy') {
            steps {
                echo 'Deploying'
            }
        }
    }
}
Saving it at the repository root versions the pipeline with the code.
Declarative versus Scripted pipeline syntax
There are two types of Jenkins pipeline syntax used for defining your JenkinsFile.
- Declarative
- Scripted
Declarative
Declarative pipeline syntax is the easier route. It follows a predefined hierarchy and still controls every aspect of pipeline execution in a straightforward manner.
Scripted
Scripted Jenkins pipeline runs on the Jenkins controller through a lightweight executor, using very few resources to translate the pipeline into atomic commands. The two are written quite differently, so choose one per JenkinsFile.
⚠️ Note: Jenkins now calls the master the controller.
Why Use Jenkins Pipeline?
Jenkins is an open continuous integration server that automates software development processes. You can create multiple automation jobs from your use cases and run them as one pipeline.
Here are the reasons why you should use Jenkins pipeline:
- Pipeline is implemented as code, so multiple users can edit and execute the process.
- Pipelines are robust: if the server restarts unexpectedly, the pipeline resumes automatically.
- You can pause a pipeline and hold it until a user provides input.
- Pipelines support big projects: run multiple jobs, and even use pipelines in a loop.
Jenkins Pipeline Concepts
Four terms recur in every JenkinsFile:
| Term | Description |
|---|---|
| Pipeline | A set of instructions written as code that covers the entire build process for continuous delivery. With a pipeline you can build, test, and deliver the application. |
| Node | The machine on which Jenkins runs is called a node. A node block is mainly used in scripted pipeline syntax. |
| Stage | A stage block contains a series of steps. The build, test, and deploy processes each come together in a stage, which is also what the pipeline view visualizes. |
| Step | A single task that executes a specific process at a defined time. A pipeline is a series of steps. |
Install Build Pipeline Plugin in Jenkins
The build pipeline plugin creates a pipeline view of incoming and outgoing jobs and adds manual-intervention triggers.
Install it as follows:
Step 1) The settings for the plugin can be found under Manage Jenkins > Manage Plugins, shown below.
⚠️ Version note: current Jenkins releases label this screen Manage Jenkins → Plugins; the tabs behave as described here.

If you have already installed the plugin, it is shown under the installed tab.

Step 2) If the plugin is not installed already, it shows up under the Available tab.
With the plugin installed:
How to Create Jenkins Pipeline
Once you are logged in to your Jenkins dashboard:
Step 1) Click on the “+” button on the left-hand side of your Jenkins dashboard to create a pipeline.

Step 2) Fill in the new view dialog:
- Give the pipeline view a name. We shall call it “Guru99 Pipeline” for this demo.
- Select Build a pipeline view under options
- Click ok, as shown below.

Step 3) The next page asks for more configuration details. Accept the default settings, and make sure you choose the first job under the settings.
Click on Apply and then OK.

The sample pipeline view of your item then appears:

Running a Pipeline build
Step 1) Chain your jobs first: open your first job and click on configure.

Step 2) Now, under Build Triggers, check the Build after other projects are built option.

A chain for all your jobs now exists.
Step 3) Install the Build Pipeline view plugin if you do not have it installed already.
Step 4) On the Jenkins dashboard, create a view with the “+” button, select the Build Pipeline View option and click OK.

Step 5) Under Pipeline view configuration, locate Pipeline Flow.
Under Pipeline flow, select the initial job to run — the job chained to the others in Steps 1 and 2.

Guru99 Project 1 is selected here as the initial job, so the chained jobs run one by one.
While the pipeline runs, red and green symbols report its state: red is failure, green is success.
In this example the button is green, so the pipeline succeeded.

Running Jenkins pipeline
Click on Run to run the Jenkins pipeline. It will look something like this:
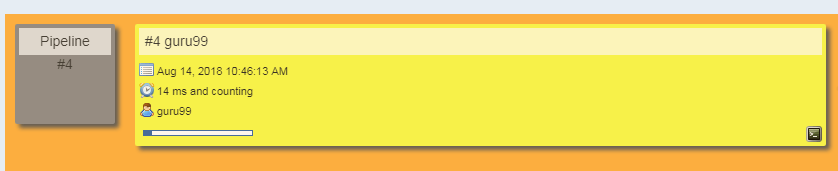
The example above builds a simple “helloworld.java” program. Real projects chain far more complex pipelines, as the fuller view below shows.
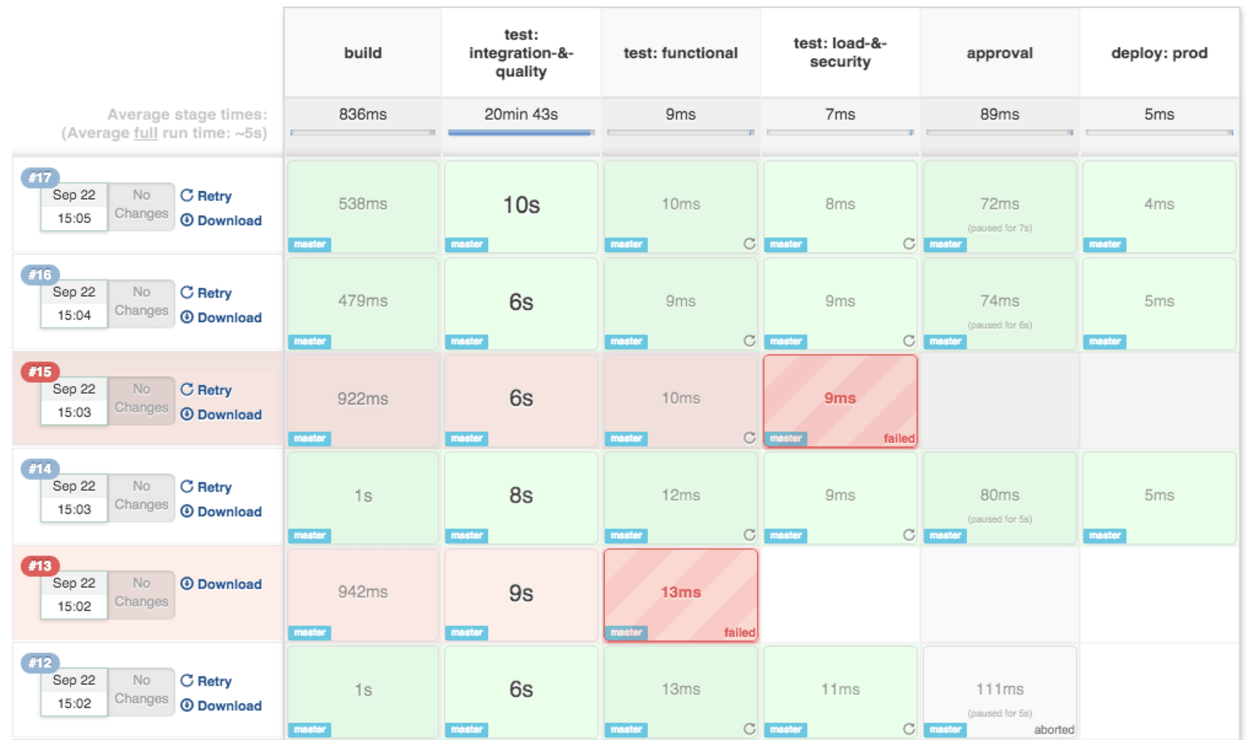
⚠️ Version note: the Build Pipeline view plugin is the legacy way to visualize chained freestyle jobs; current practice defines the same flow in a JenkinsFile. Blue Ocean is no longer enhanced.
Best Practices using Jenkins Pipeline
Seven habits keep a pipeline maintainable:
- Use the genuine Jenkins Pipeline
- Develop your pipeline as code
- Any non-setup work in your pipeline should occur within a stage block.
- Any material work in a pipeline must be performed within a node block.
- Do not use input within a node block.
- Never set environment variables with env global variable
- Wrap your inputs in a timeout
