How to Recall an Email in Outlook?

Even seasoned professionals can make errors and blunders while sending emails. However, if you are using Microsoft Outlook, you can recall your sent message. It allows you to recall messages sent up to two hours earlier. With its unique feature, you can delete or replace the wrong message with a new one.
This article will teach you how to retract an email in outlook sent in error or to the wrong recipient. You will also learn about the requirements needed to retrieve an email and its limitations.
How to Recall an Email in Outlook
Recalling an email allows you to either unsend an outlook email or delete it from your inbox. Once you have recalled your email, the recipient will not see it in their messages.
Here are steps to recall an email using Outlook:
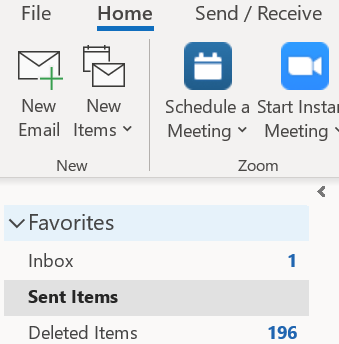
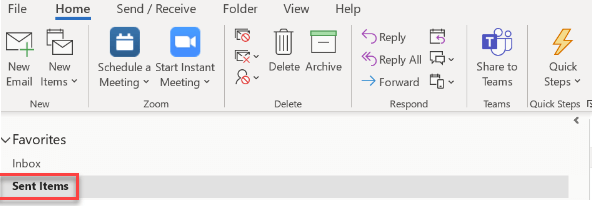
Step 1) First, select the ‘sent’ folder on the left taskbar.
Step 2) Double-click on the email message you want to recall. It should be at the top or close, depending on when you sent it.
Step 3) Click on the message tab and then click on action.

Step 4) Tap on the Recall This Message tab
Note: If you have the simplified version, select the ‘File’ option, then click on ‘Info. ’Select the ‘Message resend and recall’ option.
Step 5) After selecting the “Recall this message” option, you have choices as shown below.
1. Select the option Delete unread copies of this message.
2. Then, Check “Tell me if recall succeeds or fails for each recipient,” then press “ok” button.
Rules for unsending an Outlook email
The outlook recall message in outlook is simple, but the following factors determine the success of the recall attempt.
- The message should be unread.
- The email should be in the recipient’s inbox.
- The recipient should not have any software protecting their inbox, as this will hinder the outlook message recall.
- You and the recipient should have the same Exchange Server email account. So, if you try to unsend a message to a Gmail, Yahoo account- it will not work
- The recipient uses the web version of Outlook.
- The recipient’s mailbox must be open to recall the email. The recipient should have their Outlook connection active and be logged in.
Why Sometimes Recall Email in Outlook Doesn’t Work?
Here are some reasons the message recall in Outlook may fail:
- The email was in public folders that have been accessed.
- Email redirects to other folders. Some Outlook emails automatically reshuffle emails to different folders.
- The sent message has already been read. If the recipient has opened your message before you can retract it, then it won’t be recalled.
- Different email servers. It is not adequate that you both use Outlook; you both should be on the same server. Example: Email sent from Company A outlook exchange server to Company B outlook exchange server cannot be recalled. As they both use different email servers.
How to tell if an Outlook email recall is successful
When the outlook message recall is successful, you will receive a “message recall success’ text just before the subject of the email. However, if it does not go through, you will receive a ‘recall failed’ message.
In case you forget to check the “tell me if the recall succeeds or fails for each recipient” option, you could track the email using these simple steps:
Step 1) First, open the ‘sent’ folder.
Step 2) Select the email you have recalled.

Step 3) Click on the tracking feature to monitor the success or failure of the process
Step 4) You will see a screen that shows whether the recall was successful or not
Alternatives to retracting an outlook email
If you emailed in error, you can either recall the message or apologize. The delay option can help you avoid such a mistake in the future. Here is how to create a delay in outlook.
Step 1) Go to the info menu and select Rules and Alerts.

Step 2) Under email rules, select the new rule, then the new template. ‘Tap on the applicable rule on messages I send ’option
Step 3) Click next and select the conditions you want to apply. If none of the conditions apply, select next

Step 4) Click next and confirm whether you want the rule to apply to every message you send.

Step 5) After clicking yes, the rule wizard pops up, and you can select defer delivery by a number of minutes.
Step 6) Set the number of minutes to delay the emails. In our case, we have selected 5 minute delay. Click Finish.

Step 7) Give your rule a name. Click on the finish menu, and your rule is set.

How to Turn on the Undo feature on Mac
However, none of the versions of Outlook allow you to recall emails sent in Outlook for Mac. You have no choice but to do damage control if you have already sent the email.
Here are steps to Turn on Undo feature On Mac:
Step 1) Go to Settings at the top of the mailbox
Step 2) Then, select View all settings
Step 3) In the settings window, click on Mail then Compose and Reply
Step 4) Under Undo, you can set how long Outlook will wait before sending your email.
Step 5) Click Save button.
Step 6) You can test undo feature by sending a test email message.
Once you send a new email you will see an undo option. If you click it, it will automatically send the email to Unsent Mail.
Troubleshooting – Outlook Retract Email
Final Thoughts:
Recalling an email can be nerve-wracking, especially if you are not sure if it will work. Although the recall feature is great, it is not always guaranteed to work. You should therefore read through your emails carefully. However, delaying the email before sending is a safer alternative.


