
How to Download & Install Cassandra on Windows
 Editorial Team
⚡ Smart Summary
Download and install Cassandra on Windows by unpacking the official Apache binary distribution, since the DataStax Community Edition installer shown in the legacy screenshots was retired in 2017. This page covers prerequisites, both installation routes, and startup verification.
Apache Cassandra is used by smaller organizations while DataStax enterprise is used by the larger organization for storing huge amount of data.
Apache Cassandra is managed by the Apache Software Foundation.
Prerequisite for Apache Cassandra Installation
Three items must be in place before Cassandra will start on Windows.
- Apache Cassandra binaries. You can download Cassandra from the Apache website. Take the binary tarball for the current stable release.
- A supported JDK. Java must be installed, and the JAVA_HOME environment variable must point at the JDK folder. Cassandra 4.x runs on Java 8 or 11; Cassandra 5.x runs on Java 11 or 17.
- Python. The cqlsh command-line client is a Python program, so a Python 3 installation is needed to open the CQL shell.
A 64-bit Windows platform is assumed throughout. Note that Windows is a lightly tested platform for Cassandra, which is why the container route described later is often the smoother option.
How to Download and Install Cassandra
Two routes exist. The screenshots in this section come from the DataStax Community Edition wizard, which is the route most existing tutorials describe. That installer is no longer published, so the current binary method is given first and the wizard is retained afterwards for readers working with an archived copy.
Method 1: Install from the Apache binary archive (current method)
Step 1) Download the binary tarball, for example apache-cassandra-x.y.z-bin.tar.gz, from the Apache download page linked above. Verify the file against the published checksum on the same page.
Step 2) Extract the archive to a path without spaces, such as C:\cassandra. Spaces in the path cause the startup scripts to fail.
Step 3) Create the two environment variables Cassandra expects, then add the bin folder to PATH.
setx CASSANDRA_HOME "C:\cassandra"
setx JAVA_HOME "C:\Program Files\Java\jdk-17"
setx PATH "%PATH%;C:\cassandra\bin"
Step 4) Open a new command prompt so the variables take effect, then start the node in the foreground.
cd C:\cassandra\bin
cassandra -f
Leave that window open. The startup log ends with a line stating that the node is listening for CQL clients on port 9042.
Step 5) In a second command prompt, confirm the node is up and then open the shell.
nodetool status
cqlsh 127.0.0.1 9042
A status line beginning with UN means the node is Up and Normal. The cqlsh prompt confirms the installation is complete.
Method 2: DataStax Community Edition wizard (legacy)
The screenshots below document the retired MSI installer. They remain useful for readers who already hold a copy, and the resulting shell behaves identically.
Step 1) Run the DataStax community edition setup. After running the Setup, following page will be displayed. Here in the screenshot 64 bit version is being installed. You can download 32 bit version as well according to your requirements. But the 64 bit version is recommended.

This page gives you information about the Cassandra version you are going to install. Press the ‘next’ button.
Step 2) Press the ‘next’ button. After pressing the ‘next’ button, following page will be displayed.

This page is about the license agreement. Mark the checkbox and press the next button.
Step 3) Press the ‘next’ button. The following page will be displayed asks about the installation location.
- Default location is C:\Program Files. You can change installation location if you want to change. It is recommended not to change installation location.
- After setting installation location, press the ‘next’ button

Step 4) Start Cassandra and OpsCenter. After pressing ‘next’ button in above step, the following page will be displayed. This page asks about whether you want to automatically start Cassandra and OpsCenter.
- Mark the checkboxes if you want to automatically start Cassandra and OpsCenter.
- After providing this information, press the ‘next’ button.

Step 5) Click on install button. Setup has collected all the necessary information and now the setup is ready to install. Press install button.

Step 6) Click on Next. After pressing ‘install’ button, following page will be displayed.
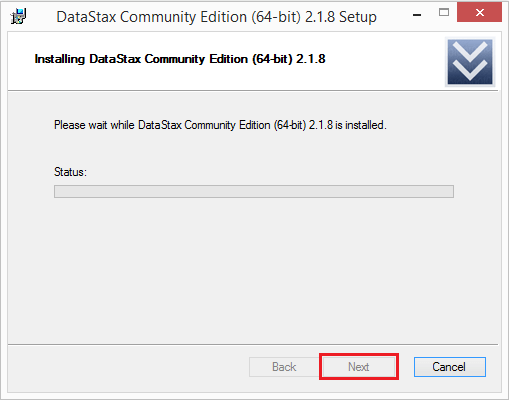
DataStax community edition is being installed. After installation is completed, click on next button. When setup is installed successfully, press the ‘Finish’ button.

Go to windows start programs, search Cassandra CQL Shell and run the Cassandra Shell. After running Cassandra shell, you will see the following command line

Now you can create a keyspace, tables, and write queries.
Running Cassandra in Docker on Windows
Both methods above run Cassandra directly on Windows, which is the least tested platform for the project. A container avoids the Java path, service registration, and file permission problems that cause most Windows installation failures, and it removes the node cleanly afterwards.
With Docker Desktop installed, one command starts a working single node.
docker run --name cassandra-node -p 9042:9042 -d cassandra:latest
Give the node about a minute to bootstrap, then check its state and open the shell inside the container.
docker exec -it cassandra-node nodetool status
docker exec -it cassandra-node cqlsh
Data written this way lives inside the container and disappears when the container is removed. To keep it, attach a volume to the data directory:
docker run --name cassandra-node -p 9042:9042 \
  -v cassandra-data:/var/lib/cassandra -d cassandra:latest
This route is the practical choice for learning and local development, because a broken node is discarded and recreated in seconds.
Troubleshooting a Cassandra Installation on Windows
Startup failures on Windows fall into a small number of recurring causes. Each produces a distinctive message in the console.
| Symptom | Cause and fix |
|---|---|
| “JAVA_HOME is not set” | The variable is missing or points at a JRE rather than a JDK. Set it to the JDK folder and open a new command prompt. |
| Process exits immediately with no log | The install path contains a space. Move the folder to a path such as C:\cassandra. |
| “Unable to gossip with any peers” | An earlier failed start left stale data. Stop the node and clear the data and commitlog folders under the installation directory. |
| “Address already in use” | Port 9042 or 7000 is taken by another process, often a previous Cassandra run. Close it or change the ports in cassandra.yaml. |
| cqlsh reports “no module named cqlshlib” | Python is missing or the wrong version is first on PATH. Install Python 3 and confirm with python –version. |
Once the node reports UN and cqlsh connects, the next step is creating storage structures, covered in the Cassandra keyspace tutorial, followed by the Cassandra table tutorial.
