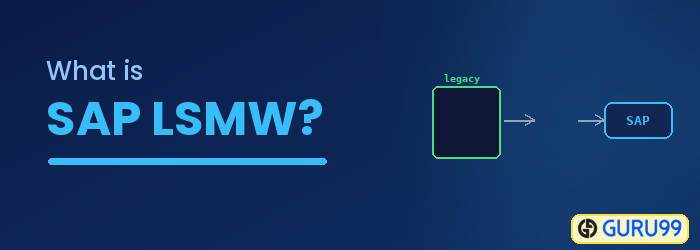
What is SAP LSMW? Steps to Migrate Data using LSMW
⚡ Smart Summary
SAP LSMW, the Legacy System Migration Workbench, transfers data from non-SAP legacy systems into SAP R/3. It supports one-time or periodic loads through batch input, direct input, BAPIs, or IDocs, using a structured sequence of migration steps.
What is SAP LSMW?
LSMW is a tool that supports the transfer of data from non-SAP systems (“Legacy Systems”) to SAP R/3 systems. This can be a one-time transfer as well as a periodic one.
LSMW also supports conversion of data of the legacy system in a numerous way. The data can then be imported into the SAP R/3 system via batch input, direct input, BAPIs or IDocs.
Furthermore, the LSM Workbench provides a recording function that allows generating a “data migration object” to enable migration from any required transaction.

LSMW can be used for following 3 functions –
The main functions of the LSM Workbench are:
- Import data (legacy data in spreadsheet tables and/or sequential files)
- Convert data (from source format to target format)
- Import data (into the database of the R/3 application)
To start the LSMW workbench use transaction LSMW
Also, check out next tutorial on executing LSMW Step by Step
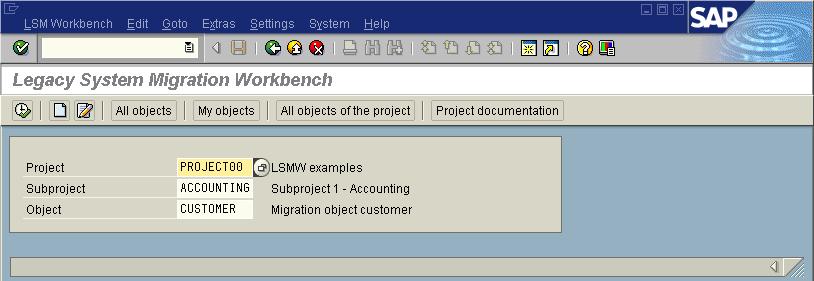
Enter Transaction LSMW in SAP, to start the workbench.

LSMW workbench shows the following information-
- Project: An ID with a maximum of 10 characters to name your data transfer project. If you want to transfer data from several legacy systems, you may create a project e.g. for every legacy system.
- Subproject: An ID with a maximum of 10 characters that is used as a further structuring attribute.
- Object: An ID with a maximum of 10 characters to name the business object.
Enter Project ID, Subproject ID, Object ID. Click Execute The next screen gives the STEPS in your LSMW data Migration
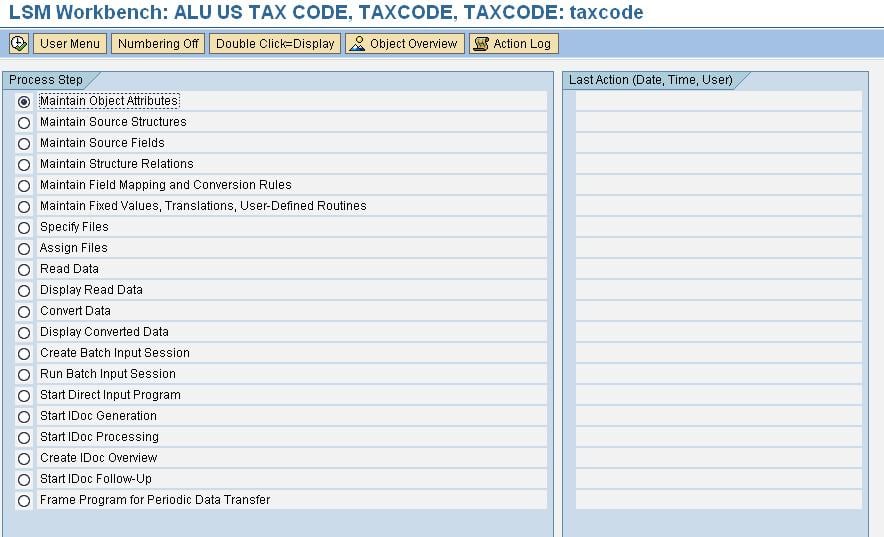
You can select the desired step and click execute. Let’s look into each step in details
Step 1) Maintain Object Attributes
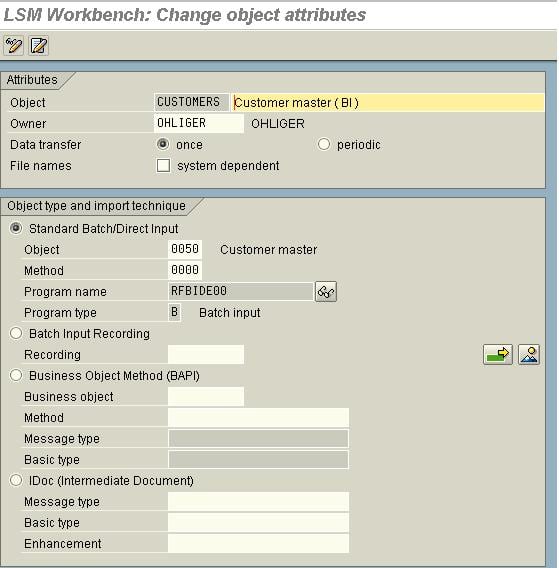
There are four Modes of Data Transfer:
- Standard/ Batch Input: Standard upload Programs
- Batch Input Recording: Here you can create a recording of your own and use it to upload/change data
- BAPIs: Standard BAPIs are used to upload Data
- IDOCs: Any Inbound IDOC function modules can be used to process the data
Based on the requirement we try to find a suitable method to be processed. If it is a standard Master we can find it in the first method. Otherwise, we try to use BAPIs or Idocs. If the requirement is a very custom one we use a recording to process the data.
Step 2) Maintain Source Structures

The source structures can be used to design the hierarchy of the files to be uploaded.
Step 3) Maintain Source Fields
In this screen, the Fields which will be uploaded from the text file can be maintained here. The fields with identical names are taken as the Key
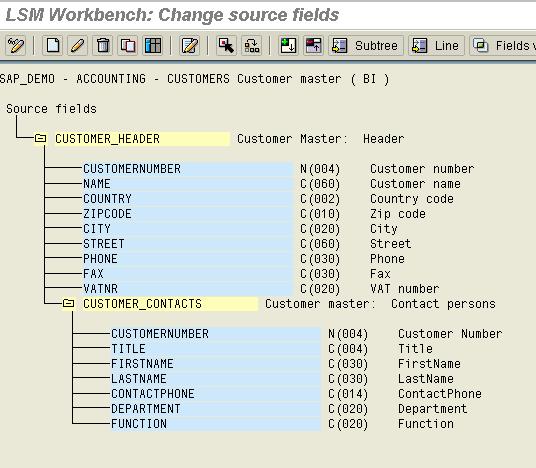
Source Filed is used to identify whether a certain record should go to the specified structure. Eg: Suppose a file contains header rows and item rows, we can specify the first field as the indicator say ‘H’ for a header and ‘I’ for Item. Thus when the file is being read, it checks the first field, if it is ‘H’ then it is read into the Header source structure else it is written to the item source structure.
The Source fields can be easily maintained in the form of a table maintenance.
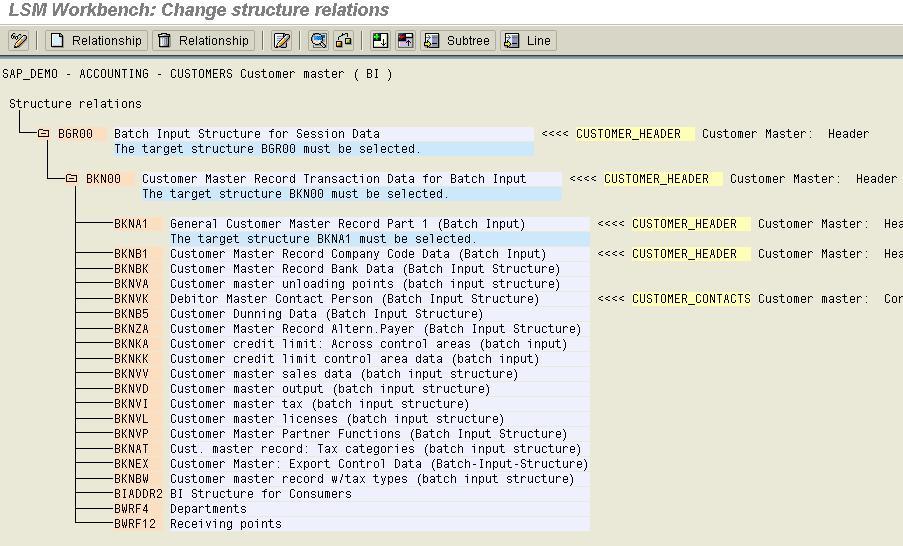
Step 4) Maintain Structure Relationships
The Structures which are needed for the processing of the data need to be assigned here. The Object may contain many structures and many source structures. The Mapping between the source and the target structures should be done after careful checking.
Step 5) Maintain Field Mapping and Conversion Rules
In this step, you assign source fields to target fields and define how the field contents will be converted.
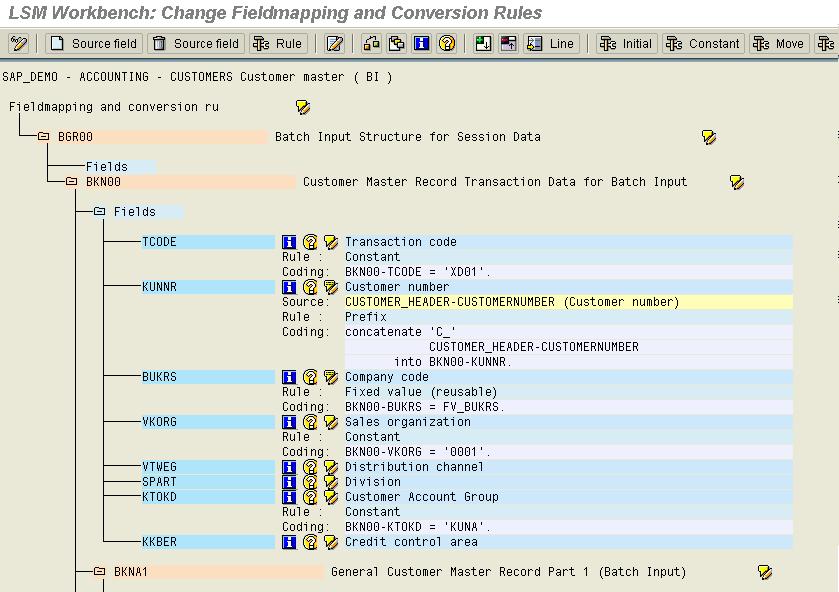
All fields of all target structures, which you selected in the previous step, will be displayed. For each target field the following information is displayed:
- Field description
- Assigned source fields (if any)
- Rule type (fixed value, translation etc.)
- Coding.
Note: Some fields are preset by the system. These fields are called “technical fields” are marked with “Default setting”. The coding for these fields is not displayed when first entering the field mapping; it can be displayed via the display variant. Changing the default setting may seriously affect the flow of the data conversion. If you erroneously changed the default setting, you can restore it by choosing Extras -> Restore to default.
Step 6) Maintain Fixed Values, Translations and User-written Routines
Here the 3 reusable functions are maintained:
- Fixed Values: Fixed values are values which are fixed across the project eg: Company Code. We can assign a fixed value to BUKRS and this fixed value can be used in all the objects in this project. So if the value changes we can only change at one place i.e. in the fixed values instead of changing in each and every object.
- Translations: Here you can maintain the fixed translation for any legacy field and the translation can be assigned to the filed, in Field Mapping and Conversion Rules. Translation can be 1:1 or many: 1 etc.
- User Defined Routines: These are user defined subroutines that are used in the object for processing the data.
All the Three functions mentioned above are reusable Rules which are valid for all objects in one Project.

Step7) Specify Files
Here we define the Files that we use to upload the data. The File can be on the Front end or in the application server.

Step 8) Assign Files
Here we define which file we are going to use for current upload i.e. whether the file is on Presentation server or application server.

Step 9) Read Data
Reading the data from the file gives us an option to read only a few records and not the entire chunk in order to enable Testing of first few records. This also provides the user defined selection parameter which can be used to restrict the read data based on the condition specified.

Step 10) Display Read Data
- In this step, you can display all or a part of the read data in table form. Clicking on a line displays all information for this line in a clear way. The same happens when you click on Field contents.
- Change display allows selecting either a one-line or multi-line view.
- Display color palette displays the colors for the individual hierarchy levels.
Step 11) Convert Data
Converting the data is the transfer of data from source to target structures based on the conversion routines written in maintain Field Mapping and conversion routines.

Step 12) Import Data
The steps displayed by the program depend on the selected object type:
Standard batch input or recording:
- Generate batch input session
- Run batch input session
Standard direct input:
- Start direct input session
BAPI or IDoc:
- Start IDoc creation
- Start IDoc processing
- Create IDoc overview
- Start IDoc post processing
This completes a detailed overview of steps to transfer your data using LSMW in SAP .