---
description: TestNG enables you to run test methods, test classes and test cases in parallel inside your project. By performing parallel execution, we can reduce the &#039;execution time&#039; as tests are started and executed simultaneously in different threads.
title: How to Run Multiple Test Cases in TestNG Suite
image: https://www.guru99.com/images/how-to-run-multiple-test-cases-with-testng-suite.png
---


[Skip to content](#main) 

**⚡ Smart Summary**

Run Multiple Test Cases with TestNG Suite in Selenium lets you trigger several classes, packages, or child suites from a single testng.xml. This walkthrough covers parallel threads, suite hierarchy, reporting, and AI assistance for modern TestNG 7.x projects.

* 🧵 **Parallel Threads:** Set thread-count and parallel=”tests” to slash overall runtime across browsers and packages.
* 🗂️ **Suite Hierarchy:** A parent testng.xml can list child suite-file entries to chain multiple suites in one trigger.
* ⚙️ **TestNG 7.x Ready:** Examples align with TestNG 7.10 and Selenium 4 W3C drivers, replacing legacy FirefoxDriver wiring.
* 📊 **Smart Reporting:** Verbose levels 1 through 10 and emailable HTML reports help diagnose failed parallel threads quickly.
* 🤖 **AI Orchestration:** AI-driven schedulers reorder, retry, and shard suites based on historical flake and duration data.

[ Read More ](javascript:void%280%29;) 

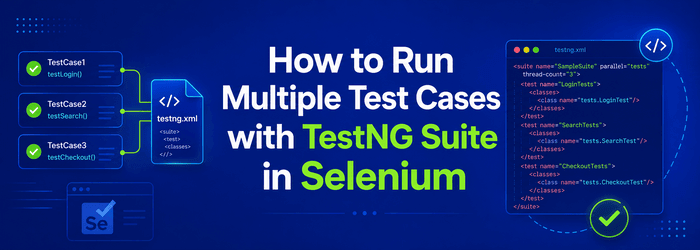
![Run Multiple Test Cases with TestNG Suite in Selenium](https://www.guru99.com/images/how-to-run-multiple-test-cases-with-testng-suite.png)

TestNG lets you run test methods, classes, and full suites in parallel inside one project. Parallel execution lowers total runtime because threads start the tests concurrently instead of one after another. This guide explains how to run multiple classes (different suites) using TestNG 7.x with Selenium WebDriver.

## Step 1) Creating a TestNG.xml file for executing tests

To create the configuration, follow the steps below.

1. Create a new project in Eclipse.
2. Create two packages in the project (name them **com.suite1** and **com.suite2**).
3. Create a class in each package (name them **Flipkart.java** and **Snapdeal.java**) and copy the code below into the respective classes.
4. Create a new file in your project and name it **testng.xml**. Make sure the TestNG plugin is installed (instructions available [here](https://testng.org/eclipse.html)). The testng.xml file holds all configuration such as class names, test names, and suite names.

**Flipkart.java**

package com.suite1;

import java.util.concurrent.TimeUnit;

import org.openqa.selenium.Alert;
import org.openqa.selenium.By;
import org.openqa.selenium.WebDriver;
import org.openqa.selenium.WebElement;
import org.openqa.selenium.firefox.FirefoxDriver;
import org.openqa.selenium.interactions.Actions;
import org.testng.annotations.AfterClass;
import org.testng.annotations.BeforeClass;
import org.testng.annotations.Test;

public class Flipkart {

    WebDriver driver = new FirefoxDriver();
    String username = ""; // Change to your username and password
    String password = "";

    // This method navigates to the Flipkart URL
    @BeforeClass
    public void init() {
        driver.manage().window().maximize();
        driver.manage().timeouts().implicitlyWait(60, TimeUnit.SECONDS);
        driver.navigate().to("https://www.flipkart.com");
    }

    // Log in to Flipkart
    @Test
    public void login() {
        driver.findElement(By.partialLinkText("Login")).click();
        driver.findElement(By.cssSelector(".fk-input.login-form-input.user-email")).sendKeys(username);
        driver.findElement(By.cssSelector(".fk-input.login-form-input.user-pwd")).sendKeys(password);
        driver.findElement(By.cssSelector(".submit-btn.login-btn.btn")).click();
    }

    // Search for a product
    @Test
    public void searchAndSelectProduct() {
        driver.findElement(By.id("fk-top-search-box")).sendKeys("moto g3");
        driver.findElement(By.cssSelector("search-bar-submit.fk-font-13.fk-font-bold")).click();
        String css = ".gd-row.browse-grid-row:nth-of-type(1) > div:nth-child(1)>div>div:nth-child(2)>div>a";
        driver.findElement(By.cssSelector(css)).click();
    }

    @Test
    public void buyAndRemoveFromCart() {
        driver.findElement(By.cssSelector(".btn-express-checkout.btn-big.current")).click();
        driver.findElement(By.cssSelector(".remove.fk-inline-block")).click();
        Alert a = driver.switchTo().alert();
        a.accept();
    }

    @Test
    public void logout() {
        Actions s = new Actions(driver);
        WebElement user = driver.findElement(By.partialLinkText(username));
        s.moveToElement(user).build().perform();
        driver.findElement(By.linkText("Logout")).click();
    }

    @AfterClass
    public void quit() {
        driver.close();
    }
}

**SnapDeal.java**

package com.suite2;

import java.util.concurrent.TimeUnit;

import org.openqa.selenium.Alert;
import org.openqa.selenium.By;
import org.openqa.selenium.WebDriver;
import org.openqa.selenium.WebElement;
import org.openqa.selenium.firefox.FirefoxDriver;
import org.openqa.selenium.interactions.Actions;
import org.testng.annotations.AfterClass;
import org.testng.annotations.BeforeClass;
import org.testng.annotations.Test;

public class SnapDeal {

    WebDriver driver = new FirefoxDriver();
    String username = ""; // Change to your username and password
    String password = "";
    String pinCode = "";

    // This method navigates to the Snapdeal URL
    @BeforeClass
    public void init() {
        driver.manage().window().maximize();
        driver.manage().timeouts().implicitlyWait(60, TimeUnit.SECONDS);
        driver.navigate().to("https://www.snapdeal.com");
    }

    @Test
    public void login() {
        driver.findElement(By.xpath("//button[text()='Login']")).click();
        driver.switchTo().frame("loginIframe");
        driver.findElement(By.cssSelector("div[onClick='getLoginForm()']")).click();
        driver.findElement(By.id("j_username")).sendKeys(username);
        driver.findElement(By.id("j_password_login")).sendKeys(password);
        driver.findElement(By.id("signin_submit")).click();
        driver.switchTo().defaultContent();
    }

    @Test
    public void searchAndSelectProduct() {
        driver.findElement(By.cssSelector(".col-xs-20.searchformInput.keyword")).sendKeys("iphone 6s");
        driver.findElement(By.cssSelector(".sd-icon.sd-icon-search")).click();
        String css = ".product_grid_row:nth-of-type(1)>div:nth-child(1)";
        driver.findElement(By.cssSelector(css)).click();
    }

    @Test
    public void buyAndRemoveFromCart() {
        driver.findElement(By.xpath("//li[contains(text(),'Silver')]")).click();
        driver.findElement(By.id("pincode-check")).sendKeys(pinCode);
        driver.findElement(By.id("buy-button-id")).click();
        driver.findElement(By.cssSelector("i[title='Delete Item']")).click();
        Alert a = driver.switchTo().alert();
        a.accept();
    }

    @Test
    public void logout() {
        driver.findElement(By.linkText("START SHOPPING NOW")).click();
        Actions s = new Actions(driver);
        WebElement user = driver.findElement(By.cssSelector(".sd-icon.sd-icon-user"));
        s.moveToElement(user).build().perform();
        driver.findElement(By.linkText("Logout")).click();
    }

    @AfterClass
    public void quit() {
        driver.close();
    }
}

**TestNG.xml**

<!DOCTYPE suite SYSTEM "http://testng.org/testng-1.0.dtd">

<suite thread-count="2" verbose="1" name="Gmail Suite" parallel="tests">

  <test name="flipkart">
    <classes>
      <class name="com.suite1.Flipkart"/>
    </classes>
  </test>

  <test name="Myntra">
    <classes>
      <class name="com.suite2.SnapDeal"/>
    </classes>
  </test>
</suite>

The final project structure looks like the example below.

[](https://www.guru99.com/images/jsp/030116%5F0948%5FTestNGExecu1.png)

### RELATED ARTICLES

* [CSS Selector in Selenium ](https://www.guru99.com/locators-in-selenium-ide.html "CSS Selector in Selenium")
* [Store Variables, Echo, Alert, PopUp handling in Selenium IDE ](https://www.guru99.com/store-variables-handling-selenium-ide.html "Store Variables, Echo, Alert, PopUp handling in Selenium IDE")
* [Selenium C# Tutorial: NUnit Framework with Example ](https://www.guru99.com/selenium-csharp-tutorial.html "Selenium C# Tutorial: NUnit Framework with Example")
* [Selenium VBA Excel Tutorial (Chrome Web Scraping) ](https://www.guru99.com/excel-vba-selenium.html "Selenium VBA Excel Tutorial (Chrome Web Scraping)")

## Step 2) Parallel execution in TestNG

After saving the XML file above, the next step is to run the parallel tests. The code is shown below.

[](https://www.guru99.com/images/jsp/030116%5F0948%5FTestNGExecu2.png)

**1) thread-count**: Defines how many threads TestNG can spin up for parallel execution. A higher value runs more tests at once, up to the CPU limit.

**2) verbose**: Logs execution details in the console. Allowed values run from 1 to 10\. Higher values produce more detailed and granular logs.

**3) name**: Name of the suite. Here it is “Gmail Suite”.

**4) parallel**: Tells TestNG what to run concurrently. Valid values are tests, classes, methods, or instances. The default value is **none**.

Right-click on the testng.xml file and select _Run As > TestNG Suite_. Once it finishes, you will see the consolidated results.

When you execute the above code, you will get the following output.

**Output:**

[](https://www.guru99.com/images/jsp/030116%5F0948%5FTestNGExecu3.png)

1) Name of the suite defined in testng.xml.

[](https://www.guru99.com/images/jsp/030116%5F0948%5FTestNGExecu4.png)

2) Name of the test defined in testng.xml.

[](https://www.guru99.com/images/jsp/030116%5F0948%5FTestNGExecu5.png)

3) Name of the class declared in testng.xml.

[](https://www.guru99.com/images/jsp/030116%5F0948%5FTestNGExecu6.png)

4) Method names annotated with @Test in the .java file.

[](https://www.guru99.com/images/jsp/030116%5F0948%5FTestNGExecu7.png)

The same flow runs for the SnapDeal test, so both classes execute side by side.

## Step 3) Running multiple suites from one parent testng.xml

A common requirement on bigger projects is chaining several testng.xml files into a single trigger. TestNG 7.x supports a parent suite that references child _suite-file_ entries, so each child can keep its own thread count, listeners, and parameters. Save each child suite separately, then point the parent to its path. Run only the parent file from Eclipse, Maven, or the command line.

<!DOCTYPE suite SYSTEM "http://testng.org/testng-1.0.dtd">
<suite name="Parent Suite" parallel="tests" thread-count="4">
  <suite-files>
    <suite-file path="./flipkart-suite.xml"/>
    <suite-file path="./snapdeal-suite.xml"/>
  </suite-files>
</suite>

This pattern keeps regression, smoke, and sanity suites separate yet reusable. You can also trigger the parent file from Maven Surefire by setting `<suiteXmlFile>parent-suite.xml</suiteXmlFile>` inside the plugin configuration, which makes the same parallel layout work in continuous integration pipelines.

## Step 4) Best practices for parallel TestNG runs

* **Pin TestNG 7.x:** Use TestNG 7.10 or later with Selenium 4 so W3C-compliant drivers behave consistently across threads.
* **Avoid shared state:** Move the _WebDriver_ field into a ThreadLocal so each thread holds its own session.
* **Tune thread-count:** Start with the CPU core count, then watch the emailable HTML report and Grid load before raising it.
* **Isolate test data:** Use unique users, carts, and pin codes per thread so logins never collide.
* **Capture screenshots on failure:** Attach them through an _ITestListener_ to debug flaky parallel runs faster.
* **Use AI assistance:** Tools like Testim, mabl, and CodiumAI can flag flaky tests and suggest stable selectors before the next run.

## Conclusion

The example above shows how to use [TestNG](https://www.guru99.com/all-about-testng-and-selenium.html) to execute parallel tests. TestNG 7.x gives you a single XML file to launch multiple test classes, link several child suites, and tune parallel threads, so large Selenium projects finish much faster.

## FAQs

🧵 How do I run two test classes in parallel using TestNG?

Place each class in its own <test> tag inside testng.xml, then set parallel=”tests” and a thread-count of at least 2\. TestNG starts both tests on separate threads, so the classes execute concurrently rather than sequentially.

🗂️ Can one testng.xml chain multiple suite files?

Yes. Build a parent suite that lists child files inside <suite-files>. Each child suite-file path runs its own configuration. The pattern works in Eclipse, Maven Surefire, and Gradle, and is supported from TestNG 6 onward, including the current 7.x release.

⚙️ What are the valid values for the parallel attribute?

The parallel attribute accepts tests, classes, methods, instances, or none. Choose tests when each <test> tag is self-contained, classes for whole-class isolation, and methods when individual @Test methods are thread-safe. The default value is none, which runs everything sequentially.

🚦 How do I avoid driver collisions across threads?

Use a ThreadLocal<WebDriver> or initialize the driver inside an @BeforeMethod block instead of as a static field. Each thread then owns its own browser session, which eliminates the race conditions that crash parallel TestNG runs on Selenium Grid.

🤖 How does AI improve test orchestration in TestNG?

AI orchestrators study previous run data to predict failures, quarantine flaky tests, and reorder slow ones. Platforms such as Launchable, Testim, and mabl plug into TestNG so the most likely failing suites run first, which shortens feedback loops on continuous integration servers.

🧠 Can AI-driven schedulers shard TestNG suites automatically?

Yes. AI-driven schedulers in Launchable and BuildPulse measure historical duration and flake rate per test, then split the testng.xml into balanced shards. Each shard runs on a separate agent, so total wall-clock time drops while parallel utilization stays high.

#### Summarize this post with:

ChatGPT Perplexity Grok Google AI 

**Stay Updated on AI** **Get Weekly AI Skills, Trends, Actionable Advice.** 

##### Sign up for the newsletter

Subscribe for Free 

You have successfully subscribed.  
Please check your inbox. 

![AI-Newsletter]() Chosen by over **350,000+** professionals 

[Scroll to top ](#wrapper)Scroll to top 

× 

Toggle Menu Close 

Search for: 

Search

```json
{"@context":"https://schema.org","@graph":[{"@type":"Organization","@id":"https://www.guru99.com/#organization","name":"Guru99","sameAs":["https://www.facebook.com/Guru99Official","https://twitter.com/guru99com"],"logo":{"@type":"ImageObject","@id":"https://www.guru99.com/#logo","url":"https://www.guru99.com/images/guru99-logo-v1-150x59.png","contentUrl":"https://www.guru99.com/images/guru99-logo-v1-150x59.png","caption":"Guru99","inLanguage":"en-US"}},{"@type":"WebSite","@id":"https://www.guru99.com/#website","url":"https://www.guru99.com","name":"Guru99","publisher":{"@id":"https://www.guru99.com/#organization"},"inLanguage":"en-US"},{"@type":"ImageObject","@id":"https://www.guru99.com/images/how-to-run-multiple-test-cases-with-testng-suite.png","url":"https://www.guru99.com/images/how-to-run-multiple-test-cases-with-testng-suite.png","width":"700","height":"250","caption":"How to Run Multiple Test Cases with TestNG Suite in Selenium","inLanguage":"en-US"},{"@type":"BreadcrumbList","@id":"https://www.guru99.com/testng-execute-multiple-test-suites.html#breadcrumb","itemListElement":[{"@type":"ListItem","position":"1","item":{"@id":"https://www.guru99.com","name":"Home"}},{"@type":"ListItem","position":"2","item":{"@id":"https://www.guru99.com/selenium","name":"Selenium"}},{"@type":"ListItem","position":"3","item":{"@id":"https://www.guru99.com/testng-execute-multiple-test-suites.html","name":"How to Run Multiple Test Cases in TestNG Suite"}}]},{"@type":"WebPage","@id":"https://www.guru99.com/testng-execute-multiple-test-suites.html#webpage","url":"https://www.guru99.com/testng-execute-multiple-test-suites.html","name":"How to Run Multiple Test Cases in TestNG Suite","dateModified":"2026-06-17T17:59:08+05:30","isPartOf":{"@id":"https://www.guru99.com/#website"},"primaryImageOfPage":{"@id":"https://www.guru99.com/images/how-to-run-multiple-test-cases-with-testng-suite.png"},"inLanguage":"en-US","breadcrumb":{"@id":"https://www.guru99.com/testng-execute-multiple-test-suites.html#breadcrumb"}},{"@type":"Person","@id":"https://www.guru99.com/author/admin","name":"Krishna Rungta","url":"https://www.guru99.com/author/admin","image":{"@type":"ImageObject","@id":"https://www.guru99.com/images/krishna-rungta-v2-120x120.png","url":"https://www.guru99.com/images/krishna-rungta-v2-120x120.png","caption":"Krishna Rungta","inLanguage":"en-US"},"worksFor":{"@id":"https://www.guru99.com/#organization"}},{"articleSection":"Selenium","headline":"How to Run Multiple Test Cases in TestNG Suite","description":"TestNG enables you to run test methods, test classes and test cases in parallel inside your project. By performing parallel execution, we can reduce the &#039;execution time&#039; as tests are started and executed simultaneously in different threads.","keywords":"selenium","speakable":{"@type":"SpeakableSpecification","cssSelector":[".entry-title",".summary"]},"@type":"Article","author":{"@id":"https://www.guru99.com/author/admin","name":"Krishna Rungta"},"dateModified":"2026-06-17T17:59:08+05:30","image":{"@id":"https://www.guru99.com/images/how-to-run-multiple-test-cases-with-testng-suite.png"},"copyrightYear":"2026","name":"How to Run Multiple Test Cases in TestNG Suite","subjectOf":[{"@type":"FAQPage","mainEntity":[{"@type":"Question","name":"How do I run two test classes in parallel using TestNG?","acceptedAnswer":{"@type":"Answer","text":"Place each class in its own  tag inside testng.xml, then set parallel=\"tests\" and a thread-count of at least 2. TestNG starts both tests on separate threads, so the classes execute concurrently rather than sequentially."}},{"@type":"Question","name":"Can one testng.xml chain multiple suite files?","acceptedAnswer":{"@type":"Answer","text":"Yes. Build a parent suite that lists child files inside . Each child suite-file path runs its own configuration. The pattern works in Eclipse, Maven Surefire, and Gradle, and is supported from TestNG 6 onward, including the current 7.x release."}},{"@type":"Question","name":"What are the valid values for the parallel attribute?","acceptedAnswer":{"@type":"Answer","text":"The parallel attribute accepts tests, classes, methods, instances, or none. Choose tests when each  tag is self-contained, classes for whole-class isolation, and methods when individual @Test methods are thread-safe. The default value is none, which runs everything sequentially."}},{"@type":"Question","name":"How do I avoid driver collisions across threads?","acceptedAnswer":{"@type":"Answer","text":"Use a ThreadLocal or initialize the driver inside an @BeforeMethod block instead of as a static field. Each thread then owns its own browser session, which eliminates the race conditions that crash parallel TestNG runs on Selenium Grid."}},{"@type":"Question","name":"How does AI improve test orchestration in TestNG?","acceptedAnswer":{"@type":"Answer","text":"AI orchestrators study previous run data to predict failures, quarantine flaky tests, and reorder slow ones. Platforms such as Launchable, Testim, and mabl plug into TestNG so the most likely failing suites run first, which shortens feedback loops on continuous integration servers."}},{"@type":"Question","name":"Can AI-driven schedulers shard TestNG suites automatically?","acceptedAnswer":{"@type":"Answer","text":"Yes. AI-driven schedulers in Launchable and BuildPulse measure historical duration and flake rate per test, then split the testng.xml into balanced shards. Each shard runs on a separate agent, so total wall-clock time drops while parallel utilization stays high."}}]}],"@id":"https://www.guru99.com/testng-execute-multiple-test-suites.html#schema-1115717","isPartOf":{"@id":"https://www.guru99.com/testng-execute-multiple-test-suites.html#webpage"},"publisher":{"@id":"https://www.guru99.com/#organization"},"inLanguage":"en-US","mainEntityOfPage":{"@id":"https://www.guru99.com/testng-execute-multiple-test-suites.html#webpage"}}]}
```