Cómo descargar e instalar MongoDB on Windows y nube
⚡ Resumen inteligente
Cómo descargar e instalar MongoDB on Windows y Cloud se explica como una guía de configuración completa. Este recurso cubre la instalación MongoDB Servidor comunitario en Windows, JavaTexto, Pythony controladores Ruby, MongoDB Compass, configuración con importación y exportación, un archivo de configuración y despliegue MongoDB Atlas en la nube.

Los instaladores de MongoDB Están disponibles en formato de 32 bits y 64 bits. Los instaladores de 32 bits son adecuados para entornos de desarrollo y prueba. Pero para entornos de producción, debe utilizar los instaladores de 64 bits. De lo contrario, puede verse limitado en la cantidad de datos que se pueden almacenar. MongoDBEs recomendable utilizar siempre la versión estable para entornos de producción.
Cómo descargar e instalar MongoDB on Windows
Los siguientes pasos se pueden utilizar para descargar e instalar MongoDB on Windows 10:
Paso 1) Descargar MongoDB Community Server
Vaya a la este enlace y descarga MongoDB Servidor comunitario. Instalaremos la versión de 64 bits para Windows.

Paso 2) Haga clic en Configuración
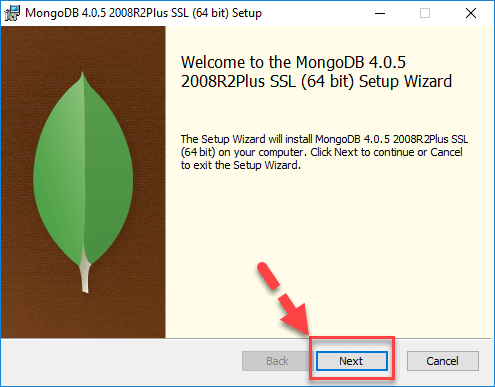
Una vez completada la descarga, abra el archivo msi. Haga clic en Siguiente en la pantalla de inicio.
Paso 3) Acepte el Acuerdo de licencia de usuario final
- Acepte el Acuerdo de licencia de usuario final.
- Haga clic en Siguiente.

Paso 4) Haga clic en el botón “Completar”
Haz clic en el botón "Completar" para instalar todos los componentes. La opción personalizada permite instalar componentes específicos o cambiar la ubicación de la instalación.

Paso 5) Configuración del servicio
- Seleccione “Ejecutar el servicio como usuario de servicio de red”. Anote la ruta del directorio de datos; la necesitaremos más adelante.
- Haga clic en Siguiente.

Paso 6) Iniciar el proceso de instalación
Haga clic en el botón Instalar para iniciar la instalación.

Paso 7) Haga clic en Siguiente una vez completado.
La instalación comenzará. Haga clic en Siguiente cuando haya finalizado.

Paso 8) Haga clic en el botón Finalizar
Paso final: una vez completada la instalación, haga clic en el botón Finalizar.

Hola Mundo MongoDB: JavaControlador de script
Conductores en MongoDB se utilizan para la conectividad entre las aplicaciones cliente y la base de datos. Por ejemplo, si tuviera una Java programa y requirió que se conectara a MongoDB, entonces necesitarías descargar e integrar el Java controlador para que el programa pueda funcionar con el MongoDB base de datos.
el conductor para JavaScript sale de la caja. MongoDB shell que se utiliza para trabajar con el MongoDB una base de datos es en realidad una JavaScript shell. Para acceder a él:
Paso 1) Vaya a “C:\Archivos de programa\MongoDB\Server\4.0\bin” y haga doble clic en mongo.exe. Alternativamente, también puede hacer clic en el MongoDB artículo de escritorio.

Paso 2) Introduzca el siguiente programa en la consola:
var myMessage='Hello World';
printjson(myMessage);
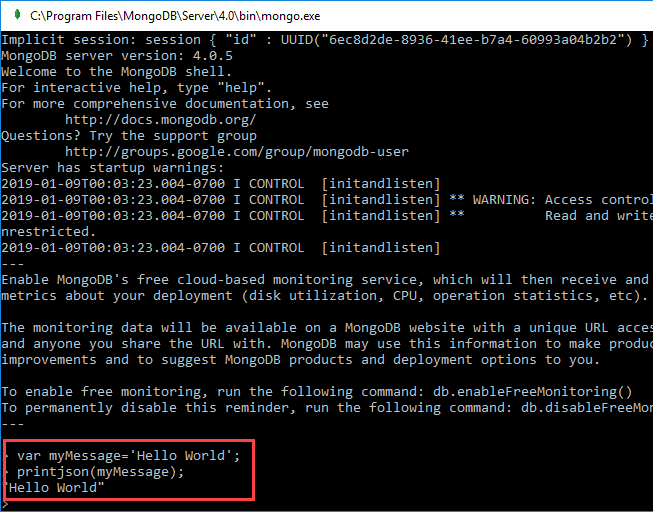
Code Explicación:
- Sólo estamos declarando una simple JavaVariable de script para almacenar una cadena llamada 'Hola Mundo'.
- Estamos utilizando el método printjson para imprimir la variable en la pantalla.
Instale Python Destornillador
Paso 1) Asegúrese de que Python está instalado en el sistema.
Paso 2) Instale los controladores relacionados con mongo ejecutando el siguiente comando:
pip install pymongo
Instalar el controlador Ruby
Paso 1) Asegúrese de que Ruby esté instalado en el sistema.
Paso 2) Asegúrese de que gems esté actualizado ejecutando el comando:
gem update --system
Paso 3) Instale los controladores relacionados con mongo ejecutando el siguiente comando:
gem install mongo
Instale MongoDB Compass – MongoDB Herramienta de administracion
Existen en el mercado herramientas disponibles para gestionar MongoDB. Una de esas herramientas no comerciales es MongoDB CompassAlgunas de las características de Compass se detallan a continuación:
- Todo el poder de la concha de Mongo
- Múltiples conchas
- Múltiples resultados
Paso 1) Vaya a la este enlace y haz clic en descargar.

Paso 2) Introduzca los datos en la ventana emergente y haga clic en enviar.

Paso 3) Double Haz clic en el archivo descargado.

Paso 4) La instalación se iniciará automáticamente.

Paso 5) Compass se iniciará con una pantalla de bienvenida.

Paso 6) Mantén la configuración de privacidad predeterminada y haz clic en "Comenzar a usar Compass".

Paso 7) Verás la pantalla de inicio con una lista de las bases de datos actuales.

MongoDB Configuración, importación y exportación
Antes de iniciar el MongoDB servidor, el primer aspecto clave es configurar el directorio de datos donde se encuentran todos los MongoDB Los datos se almacenarán. Esto se puede hacer de la siguiente manera:

El comando anterior 'md \data\db' crea un directorio llamado \data\db en su ubicación actual. MongoDB creará automáticamente las bases de datos en esta ubicación, porque esta es la ubicación predeterminada para MongoDB para almacenar su información. Simplemente nos estamos asegurando de que el directorio esté presente, para que MongoDB Puede encontrarlo cuando comienza.
La importación de datos a MongoDB Esto se hace con el comando “mongoimport”. El siguiente ejemplo muestra cómo se puede hacer.
Paso 1) Crea un archivo CSV llamado data.csv e introduce los siguientes datos:
Employeeid,EmployeeName
1,Guru99
2,Mohan
3,Smith
En el ejemplo anterior, suponemos que queremos importar 3 documentos a una colección llamada "datos". La primera fila se denomina línea de encabezado y contendrá los nombres de los campos de la colección.
Paso 2) Ejecuta el comando mongoimport.

Code Explicación:
- Estamos especificando la opción db para indicar a qué base de datos se deben importar los datos.
- La opción "type" sirve para especificar que estamos importando un archivo CSV.
- Recuerda que la primera fila se llama línea de encabezado, que se convertirá en los nombres de los campos de la colección; por eso especificamos la opción –headerline. A continuación, especificamos nuestro archivo data.csv.
Resultado

El resultado muestra claramente que se importaron 3 documentos a MongoDB.
Exportación MongoDB Esto se hace utilizando el comando mongoexport.

Code Explicación:
- Estamos especificando la opción db para indicar desde qué base de datos se deben exportar los datos.
- Estamos especificando la opción de colección para indicar qué colección utilizar.
- La tercera opción es especificar que queremos exportar a un archivo CSV.
- El cuarto es especificar qué campos de la colección deben exportarse.
- La opción –out especifica el nombre del archivo csv al que exportar los datos.
Resultado

El resultado muestra claramente que se exportaron 3 registros desde MongoDB.
Configurando MongoDB servidor con archivo de configuración
Se puede configurar la instancia del servidor mongod para que se inicie con un archivo de configuración. El archivo de configuración contiene ajustes que son equivalentes a las opciones de la línea de comandos de mongod. Por ejemplo, supongamos que quisiera MongoDB Para almacenar toda la información de registro en una ubicación personalizada, siga los pasos que se indican a continuación:
Paso 1) Crea un archivo llamado “mongod.conf” y guarda la siguiente información en él.

- La primera línea del archivo especifica que queremos agregar configuración para el archivo de registro del sistema, que es donde se almacena la información sobre lo que está haciendo el servidor, en un archivo de registro personalizado.
- La segunda opción es mencionar que la ubicación será un archivo.
- Aquí se menciona la ubicación del archivo de registro.
- LogAppend: "true" significa garantizar que la información de registro se siga agregando al archivo de registro. Si pone el valor como "falso", el archivo se eliminará y se creará de nuevo cada vez que el servidor se inicie nuevamente.
Paso 2) Inicie el proceso del servidor mongod y especifique el archivo de configuración creado anteriormente como parámetro. A continuación se muestra una captura de pantalla que ilustra cómo hacerlo.

Una vez ejecutado el comando anterior, el proceso del servidor comenzará a usar este archivo de configuración. Si accede al directorio /etc de su sistema, verá que se ha creado el archivo mongod.log. La siguiente captura de pantalla muestra un ejemplo del aspecto de un archivo de registro.

Cómo instalar MongoDB en la nube (AWS, Google, Azure)
No es necesario instalar el MongoDB servidor y configurarlo. Puedes implementar un MongoDB Servidor Atlas en la nube en plataformas como AWS, Google Cloud, y Azurey conectarse a la instancia mediante un cliente. A continuación se detallan los pasos:
Paso 1) Vaya a la este enlace.
- Ingrese sus datos personales
- Está de acuerdo con los términos
- Haz clic en el botón “Comienza gratis”

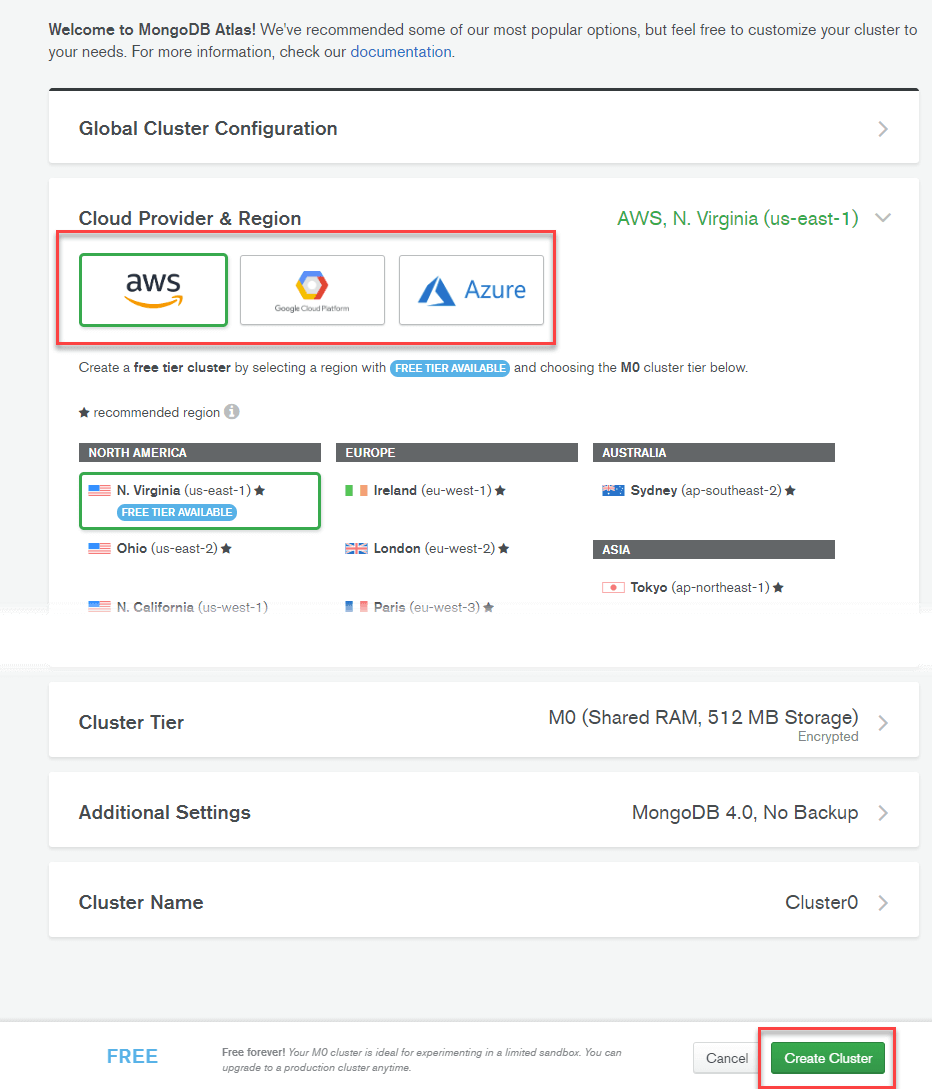
Paso 2) Haz clic en “Crear mi primer clúster”.

Paso 3) Puede seleccionar entre AWS, Google Cloud, y Azure como su proveedor de nube. En este tutorial, utilizaremos AWS, que está configurado por defecto. No realice ningún otro cambio en la página y haga clic en “Crear”. Cluster.
Paso 4) Cluster La creación lleva algún tiempo.

Paso 5) Después de un tiempo, verás que el clúster está listo.

Paso 6) Haz clic en Seguridad > Agregar nuevo usuario.

Paso 7) En la siguiente pantalla:
- Introduzca las credenciales de usuario
- Asignar privilegios
- Haga clic en el botón Agregar usuario

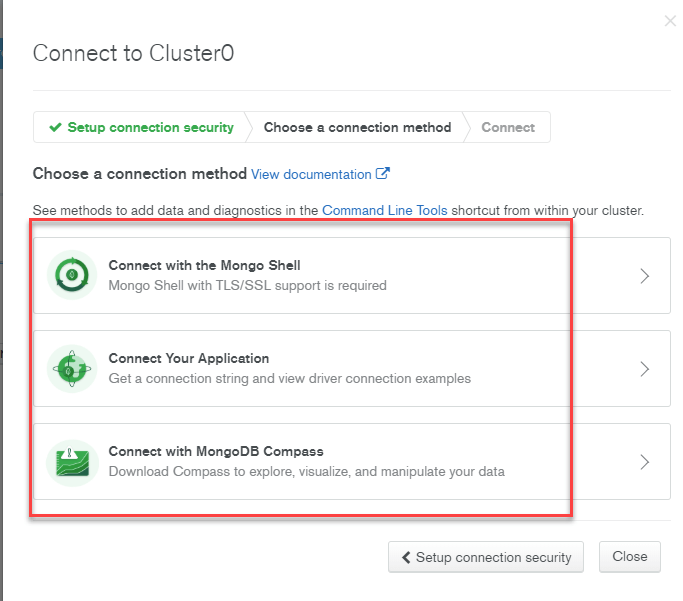
Paso 8) En el panel de control, haga clic en el botón Conectar.
- Incluya en la lista blanca su conexión IP
- Elige el método de conexión

Paso 9) Seleccione el método de conexión que prefiera para conectarse a la MongoDB servidor.