How to use Photoshop Text Tool to add Text
Basics of Photoshop Text Tool
In number of ways you can use “text” while designing in Photoshop.
So let’s grab the “Text tool” photoshop from the tool bar.
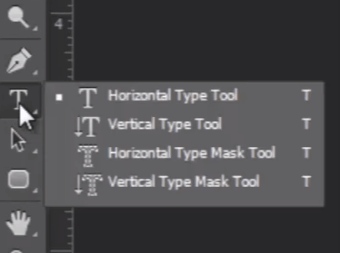
If you click and hold on text tool you can see various types of text tools , like “Horizontal type tool” , “Vertical type tool” , “Horizontal type mask tool” and “Vertical type mask tool”. But most commonly we will use the “Horizontal type tool”.
Now just click on the canvas and see in the layers panel a blank text layer is created.
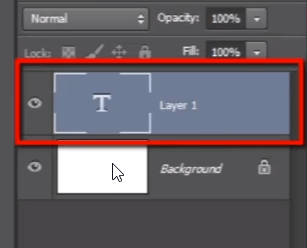
Let me type “Guru99.com (free online education)”.

To make selection of text just double click on the text layer.
Look here in options bar for some options to modify the text.

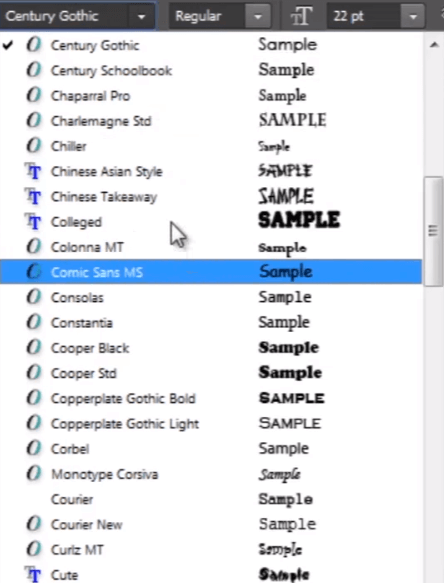
1) Here you can change the font styles of the selected text. There is a huge list of font styles.
2) Here you can give some normal font effects such like “Bold”, “Italic” and “Regular”.
3) By this option we can set font size. You can click and drag on this icon to increase or decrease font size.
4) Here are some font adjustment options.
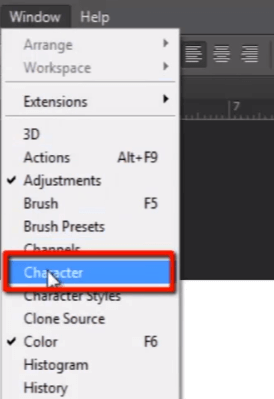
5) Click this icon to open “character” panel.
Character Panel
Character Panel contains all the settings for text. We can also get this panel in “window” menu.
In this panel we have same options as we saw in “options bar” and much more options like “kerning” , “tracking” , “vertically scale” , “horizontally scale” , “font color” and much more options you have in this panel to modify your texts.
Now make selection of text by double clicking on text layer and press CTRL + T , to on “show transform”.
You can drag and scale text non destructively.
Notice here the font size of the text, and then scale down the text. when you press enter you can see font size of text is also changed.

You can scale up and down the text as you do with an image, but still not losing the quality after scaling as in image. Because when we scale the text it is not resampling the text, In fact it resizing the text so it can be scaled non destructively.
Now if you want to change font style then select the text and open this list of font styles. You can choose any of the font style from this list. And if you want to check all the font styles one by one then just click on the font style name and keep it selected then start pressing up and down arrow keys to change all fontstyles one by one.
Tracking and Kerning
Let’s talk about tracking and kerning. tracking means spacing between two characters and kerning means spacing between two lines.
Let me change the color of this word so that you can see the difference clearly while changing tracking value.

But first we will change tracking for entire line by click and drag this icon.
You also can set tracking space between two individual characters. for that just click between those two words and put your cursor there and the shortcut to change the tracking value is just hold ALT key and press arrow keys left and right to increase or decrease the space.
You can use same shortcut when you want to change spacing in entire line.
We can also scale our text horizontally and vertically by changing values in “vertically scale” and “horizontally scale” option.
Text on a Path
So now let’s talk about the text on a path.
Let me draw a shape as path so we can put some text on it.
Now just see the cursor. when it’s on canvas area outside the path it looks like normal text tool cursor but when I keep it over the path then it will change. And that changed cursor indicates that your text will be stick to this path.
Now click on that path and you will be able to type your text following on that path.
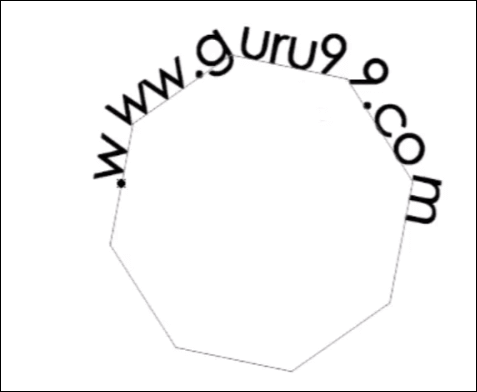
And you can also determine starting point and ending point of text on the path.
So select the text then press and hold CTRL key then put the cursor at the starting of the text. You can see the changed cursor, now click there and drag the cursor so you will be able to see two different points.
This little cross indicates that this is the starting point of text and the little dot symbol indicates that this is the ending point of the text. So you can’t go out of that limited area.
You can change those points by holding CTRL key then click and drag them.
You can flip up and down the text around the path by moving the cursor in and out of the path area but keep holding CTRL key.
We can also do this thing on simple path drawn by pen tool. so let’s check it out.
Grab the pen tool and draw a simple path.
Now take the text tool, click on the path and start typing.
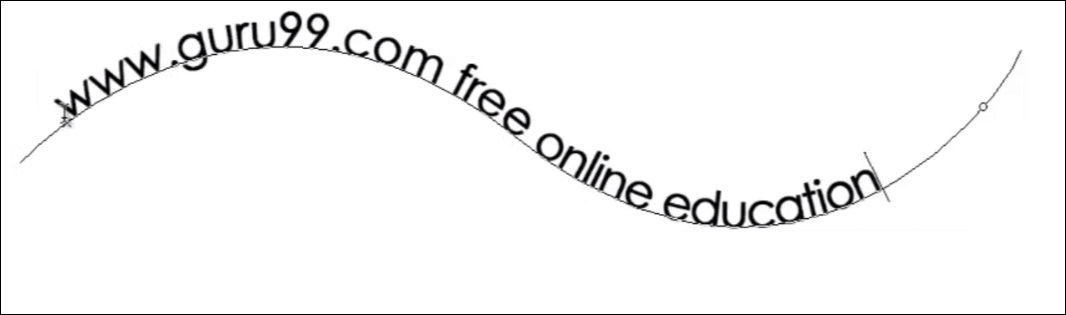
And you see here, you have same features here what we have seen previously in text over the shape path.
Customizing Font Style
Now let’s talk about customizing font style.
I mean to say that every time font style can’t give you exactly what you want. So in some cases you need to take some texts and modify them as per your requirement.
You can do this by converting the text to path.
Let me type a word “Guru99”. Then right click on the text layer in text panel and choose “create work path”.
It will convert your text to a path that you can easily modify.
Switch Off the text layer and see it have generated a path around the text.
And look here in “paths panel” a work path is created. Save it first.
Now if you want to modify the path then just grab the pen tool and select some control points which you want to move and set them properly as such you have the design in your mind.

You have to hold the CTRL key then click and drag any control point the way you want.
You can see how I have modified the font and created a new design. If I think that I work only with only font style to get my output then it will not gona be success everytime. some time we have to modify the text as per our requirement.
So these are some features about texts in next video tutorial we will gona talk about “filters”.